

Saturday, May 29, 2021
Wednesday, May 5, 2021
Common Reasons that Hypertufa Cracks

Why Hypertufa Projects Crack
This article presumes that you are familiar with the basics of making projects with hypertufa. If you aren’t familiar with the process, or just need a refresher, you may want to first go to our Hypertufa 101 article by clicking here.
Sunday, May 2, 2021
Best Homesteading Books for Beginners

Best Homesteading Books for Beginners
The word "homesteading" today has come to mean the pursuit of a rewarding and self-sufficient lifestyle. It can include everything from keeping bees, growing vegetables, composting, installing solar panels, creating a rain barrel, raising animals, canning your own food, and the list goes on!
Saturday, April 24, 2021
Growing Sage - Homesteading 101

Perennial Zones 4 – 8 (Hardiness Varies)
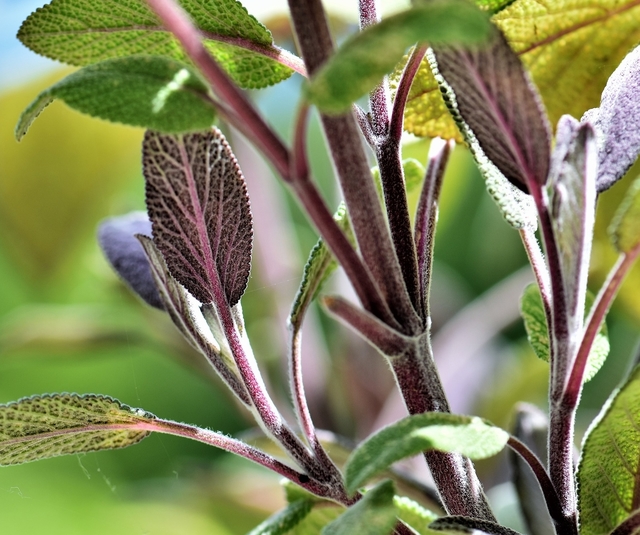
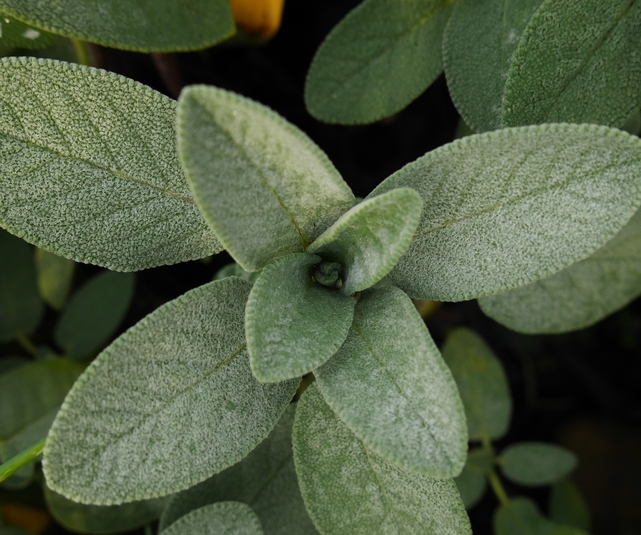
Sage is a shrubby perennial that’s an obvious choice for the kitchen. From spring through mid-summer, Sage displays blue to lavender flowers which are very attractive to birds. It has an earthy, rich, spicy flavor and it is part of the mint family.
The most popular types of culinary Sage are Garden Sage, Golden Garden Sage, Berggarten Garden Sage, Dwarf Garden Sage, Tricolor Garden Sage, and Window Box Sage.


Starting Sage from Seed
Seed Longevity: 2 years.
Seed Sowing Depth: Surface, cover lightly.
Best Soil Temp for Germination: 65 – 70 degrees.
Days to Germination: 15-21 days.
Spring Sowing:
Sow Indoors 6 – 8 weeks before the last frost. Transplant out after the last frost date.
Fall: Not recommended.


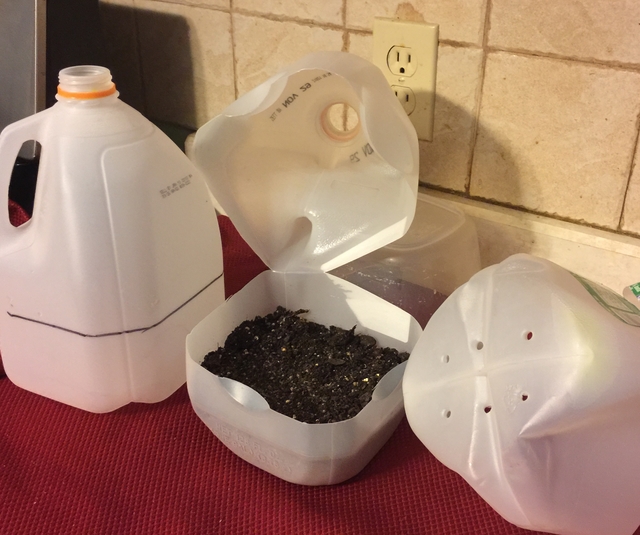
Winter Sowing
For our article containing detailed information about Winter Sowing, see our separate article.
Herb Scissors

Herb Mincer

Growing Sage
Plant Size: 1-3’ Height.
Growing Soil Temperature: 55 – 80 degrees.
Spacing: 12 - 18”.
Container Size: 12” x 12” good size for Sage.
Soil: Well-drained.
Watering: Light, only during dry spells. Avoid overwatering.
Light/Sun: Full sun to light shade.
Fertilizer: Add some compost throughout the year.
Other Care Tips:
- Prefers cool to warm temperatures and will need some shade during the hot weather.
- The plant should be replaced every 4-5 years.
- Remove flower spikes before they have a chance to flower.
- After three years, trim off woody parts to encourage new growth.

Dividing Sage
Best to divide Sage every 4-5 years when the plant becomes woody. Dig up the entire plant, and using a sharp shovel, divide it into sections. Remove all woody parts and replant the tender sections planting at the same depth.
Softwood Cuttings of Sage
Take cuttings in spring when new growth is several inches in length. Side shoots of 4" in length are perfect. Cut the stem at an angle and remove lower leaves leaving an inch or two of the stem bare. Plant cutting bare side down into a well-drained soil mix. No fertilizer is needed at this stage.
Wrap the container in plastic to keep in humidity. Avoid having the leaves touch the plastic. Place the pot in light but out of direct light. Keep soil moist but never soggy. Remove the plastic when cutting grows roots. A light tug that gives you some resistance means it has rooted.
Harvesting Sage
Start to harvest Sage once you see good growth on the plant. Best harvested when tops of blossoms are barely open. You can gather leaves at any time. Sage is most flavorful as flowers begin to open. Purple-leaved Sage tends to be more aromatic than green-leaved Sage.
Storing Sage
Fresh
Damp Paper Towel
This method works well for hardy herbs that have woody stems as well as a few soft-stemmed herbs.
Clean and thoroughly dry the Sage. Arrange lengthwise in a single layer on a slightly damp paper towel. Loosely roll up the herb and transfer to a plastic bag or plastic wrap. Label and store in the fridge. Sage will stay fresh in the fridge using this method for up to 2 weeks.
Freezing
For best results, use frozen Sage within 1-2 years. By freezing herbs, you will lose some of the herb's texture but preserve the flavor. Here are a few freezing options to consider:
Tray Freeze
Strip leaves off the stems of the Sage and spread onto a cookie sheet on a single layer. Freeze in the freezer, then place it in a labeled freezer bag to store. Since the leaves are frozen separately, you can easily remove the amount you need.
Ice Cube Trays with Oil
This method works well for hard-stemmed herbs that would probably be cooked when adding to a dish. The oil reduces some of the browning and freezer burns.
Clean and thoroughly dry herbs. Mince and firmly pack herbs into an ice cube tray 3/4 full. Add Olive Oil to fill and freeze. Transfer frozen cubes into labeled freezer bags to store.


Flat Freezer Bag
Trim off the stems and place them in a labeled freezer bag. Squeeze out the air, flatten the freezer bag, label and store.
Drying
Sage contains more oil than most other herbs so it dries more slowly. It is one of the best herbs to dry. For best results, use dried Sage within 1-2 years.
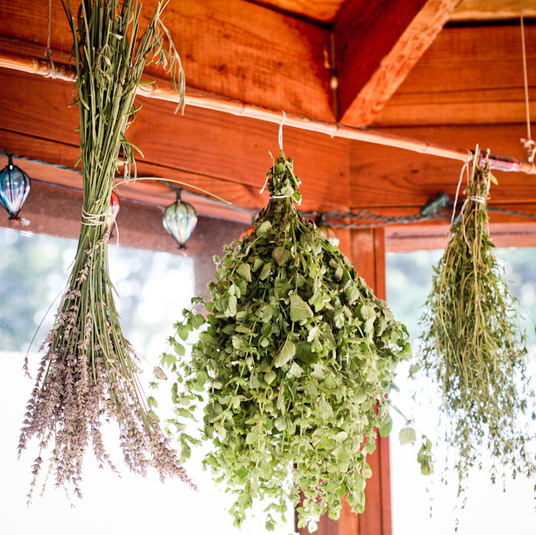
Hang to Dry
Pick your Sage in bunches right before you intend to store them. Tie the bottom of the bunch together with twine and hang upside down to dry in a dry, low humidity area. For added protection against dust, you can put the bundles inside paper bags with plenty of holes for ventilation. When the herbs are dry, the leaves will crumble easily between your fingers. Store in an airtight container.

Using Sage
- Sage can be overwhelming so start with small amounts.
- Use leaves fresh in recipes or add them sparingly to salads.
- Dried sage is commonly used with Thanksgiving stuffing.
- It can be paired with pork, beans, potatoes, and cheese.
- You can mix it into a soft cheese for a tasty bread spread.
Where to go next!
Great Garden Articles -- Full List!
Follow us on Pinterest!
Back to Our Blog Homepage!
This post may contain some Amazon Associate links meaning that I will get a small compensation at no expense to you if you purchase something from this blog.
Wednesday, April 14, 2021
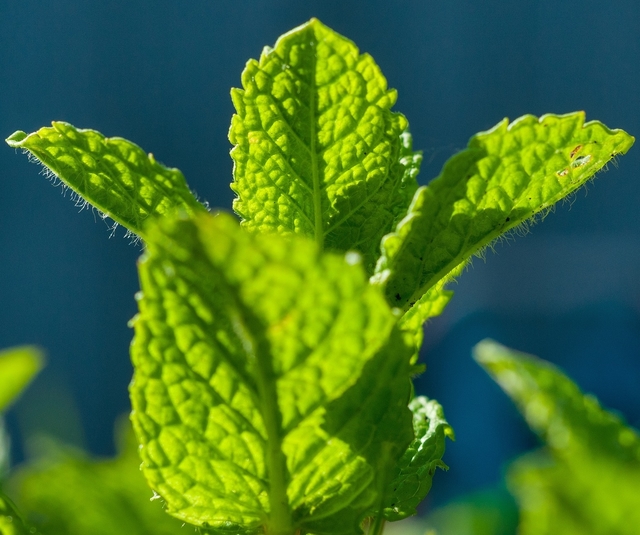
Growing Mint - Homesteading 101

Mint is a hardy perennial commonly associated with sweets. Mint lends a cool, peppery bite to plenty of dishes. It’s very fragrant, fast-growing but it can be invasive.
Starting from Mint Seed
Mint is very difficult to grow from seed and most plants grown from seed will be different than the parent plant. This is because they are hybrid varieties that don't come true to form when grown from seed. Growing Mint from seed is not recommended, but here are the details.
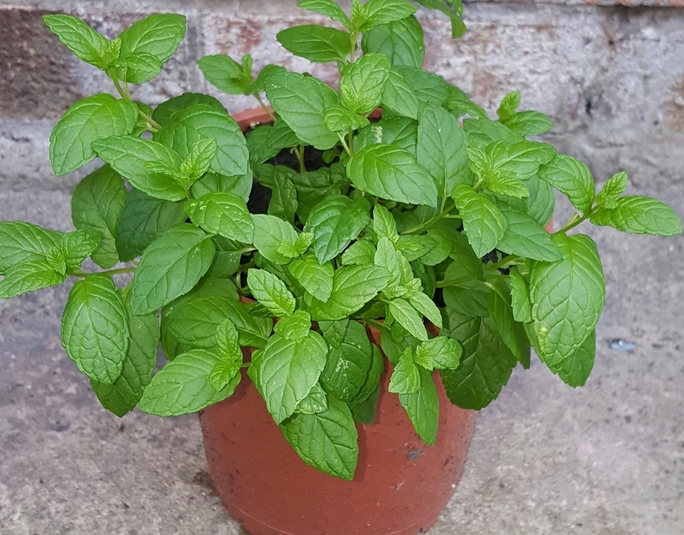
Growing Mint
Plant size: Height 12”–18” height Spreading.
Spacing: 8-24”.
Container Size: 2 seedlings in a 12” container.
Soil: Avoid very heavy soil.
Watering: Loves moist soil.
Light/Sun: morning sun and part afternoon shade.
Fertilizer: Fertile soil. Diluted fertilizer every 2-3 weeks.
Good Companions: Peas, tomatoes.
Bad Companions: Keep away from other spices. Taste can transfer.
Other Care Tips
- The plant can be rather invasive as it spreads through runners underground.
- In fall, cut back the plant to the ground
- Trim off the top of the plant for compact growth
- Mulch plant before the first frost.
- Bring a plant indoors in later summer for winter.
herb mincer
Dividing Mint
Mint propagates well through rootball division. Use a sharp shovel to cut into desired pieces and replant at the same depth. Dividing a Mint plant every two or three years will help keep the fresh scent and the flavor of the mint nice and strong.
Softwood Cuttings
Cut off a 4” sprig and place in 1” of water. Remove leaves that fall below the waterline. Small roots should appear under the water. Change water every three to four days to prevent rot. Wait another week then plant in soil.

Harvesting Mint
Right before flowering, cut the stems 1 inch from the ground. You can harvest one mint plant two or three times in one growing season. You can also just pick the leaves as you need them. You can grow the plants indoors for fresh leaves throughout the winter.Storing Mint
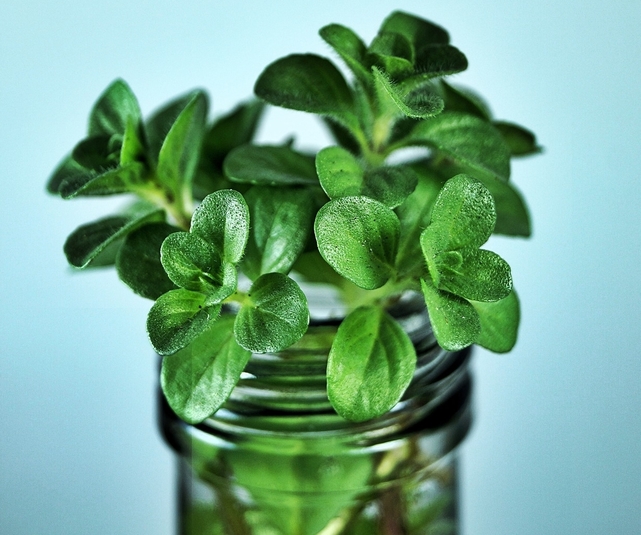
Fresh
Bouquet Storage
This method works well for tender herbs with soft stems and leaves.
Clean and thoroughly dry the herb. Trim the end of the stems and remove any wilted or browned leaves. Place the Mint in a Mason jar or clear glass with 1" of water like a bouquet of flowers. Loosely cover with a plastic bag or cling wrap. Label and store in the fridge.
Mint will stay fresh in the fridge with this method for up to 2 weeks.
Try Audible and Get Two Free Audiobooks
Try Audible and Get Two Free Audiobooks
Freezing
For best results, use frozen Mint within 1-2 years. By freezing herbs, you will lose some of the herb's texture but preserve the flavor. Here are a few freezing options to consider:
Tray Freeze
Spread herb onto a cookie sheet on a single layer. Freeze in the freezer, then transfer the mint into a labeled freezer bag to store. Since the leaves are frozen separately, you can easily remove the amount you need.
Ice Cube Trays
Clean and thoroughly dry the mint. Mince and pack firmly into ice cube trays 3/4 full. Add water to fill and freeze. Transfer frozen cubes into a labeled freezer bag to store.
Flat Freezer Bag
Clean and thoroughly dry the mint. Chop herb into 1/2" pieces, place in a labeled freezer bag. Squeeze out the air, lay flat and freeze.
Drying Mint
For best results, use dried Mint within 1-2 years.
Hang to Dry
Pick your herbs in bunches right before you intend to store them. Tie the bottom of the bunch together with twine and hang upside down to dry in a dry, low humidity area. For added protection against dust, you can put the bundles inside paper bags with plenty of holes for ventilation. When the herbs are dry, the leaves will crumble easily between your fingers. Store in an airtight container.

Using Mint
- Perfect for summer salads and to liven up a sauce and to brew fragrant teas.
- The flavor is also used to temper spicy curries.
- Mint complements fish, chicken, lamb, and spices up vegetables like carrots and peas.
- Spices up salads, too.
Growing your own herbs is fun, easy, more healthy than the herbs shipped to grocery stores, and what's best, saves you tons of money! Try it today.
Where to go next!
Great Garden Articles -- Full List!
Follow us on Pinterest!
Back to Our Blog Homepage!
This post may contain some Amazon Associate links meaning that I will get a small compensation at no expense to you if you purchase something from this blog.
Wednesday, February 10, 2021
Growing Hostas from Seed

Growing Hostas From Seed
So you're wondering, can I grow a hosta from seed? Growing hostas from seed is a tricky endeavor, but if you have patience and keep a few things in mind, it can be worth your time.
Friday, January 29, 2021
Unique and Fun Hosta-Related Gift Ideas

Unique and Fun Hosta-Related Gift Ideas
Welcome to part two of our hosta gift ideas blog!
If you missed Part 1 which includes important and very practical tools and supplies for your hosta garden, you can read it here: Great Hosta Gifts
Now onto our top picks for unique hosta-related gifts.
Subscribe to:
Posts (Atom)
Popular Posts
-
 Use of Epsom Salt on Hostas! Hostas continue to be one of the most popular perennials in shady and party shady gardens. It's n...
 -
 Fertilizing Your Hosta Plants It's no surprise that hostas continue to be one of the most popular perennial plants in a variety ...
 -
 What are Sun Tolerant Hostas? One of the most common questions I hear about hostas is, can hostas handle sun?
 -
 When and How to Divide your Hosta Whether you want to divide your hostas for the healthy of the plants or to increase the hosta love...
 -
 Winter Sown Seeds Have Germinated! Now what? So you’ve tried the winter sowing method and found out that it’s easy and it works....
 -
 Best Care for Your Potted Hostas To keep your hostas healthy and beautiful as they grow in pots, there are a few Hosta plants are beau...
 -
 Seasonal Calendar of Care for Hostas One of the reasons that hostas continue to be so popular is the fact that they're a very low m...