Growing Sage - Homesteading 101


GROWING SAGE


Perennial Zones 4 – 8 (Hardiness Varies)

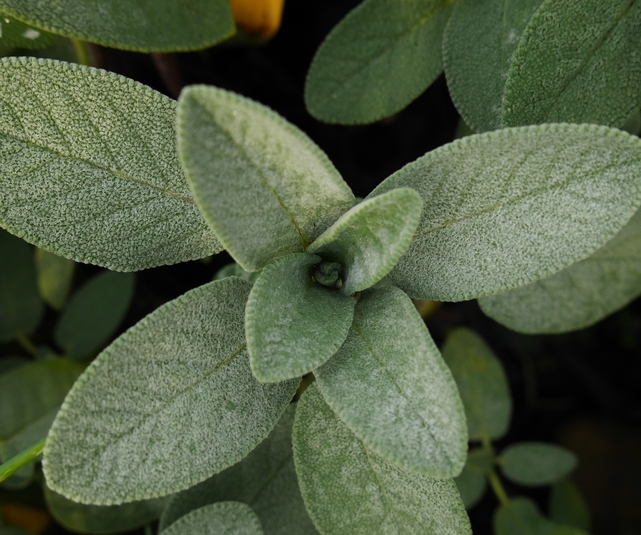
Sage is a shrubby perennial that’s an obvious choice for the kitchen.  From spring through mid-summer, Sage displays blue to lavender flowers which are very attractive to birds.  It has an earthy, rich, spicy flavor and it is part of the mint family.

The most popular types of culinary Sage are Garden Sage, Golden Garden Sage, Berggarten Garden Sage, Dwarf Garden Sage, Tricolor Garden Sage, and Window Box Sage.


Starting Sage from Seed

Seed Longevity:                                            2 years.
Seed Sowing Depth:                                     Surface, cover lightly.
Best Soil Temp for Germination:                   65 – 70 degrees.
Days to Germination:                                    15-21 days.

Spring Sowing                                           

Sow Indoors 6 – 8 weeks before the last frost.  Transplant out after the last frost date.

Fall:    Not recommended.


Winter Sowing


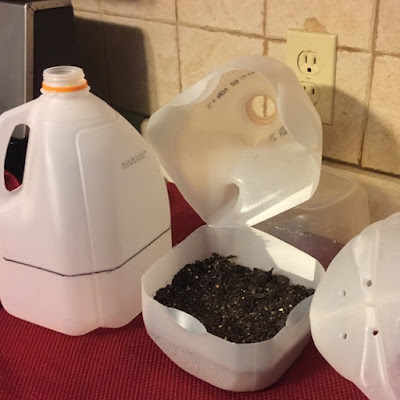
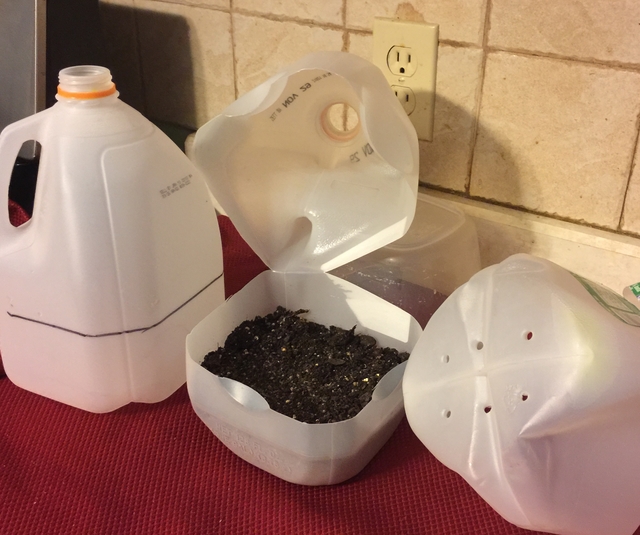
If you haven't tried winter sowing, you're in for a treat.  This method is especially good for sowing herbs.  Winter sowing is basically sowing seeds in the bottom of milk jugs in the winter, setting the milk jugs outside for the winter and leaving them there until the seeds germinate in the Spring.

For our article containing detailed information about Winter Sowing, see our separate article.
To watch our 30 minute video on how to winter sow, click here.


Growing Sage

Plant Size:                                                     1-3’ Height.
Growing Soil Temperature:                            55 – 80 degrees.
Spacing:                                                         12 - 18”.
Container Size:                                              12” x 12” good size for Sage.
Soil:                                                                Well-drained.                                                             
Watering:                                    Light, only during dry spells.  Avoid overwatering.
Light/Sun:                                    Full sun to light shade.
Fertilizer:                                      Add some compost throughout the year.

Other Care Tips:   

  • Prefers cool to warm temperatures and will need some shade during the hot weather.
  • The plant should be replaced every 4-5 years.
  • Remove flower spikes before they have a chance to flower.
  • After three years, trim off woody parts to encourage new growth.


Dividing Sage

Best to divide Sage every 4-5 years when the plant becomes woody.  Dig up the entire plant, and using a sharp shovel, divide it into sections.  Remove all woody parts and replant the tender sections planting at the same depth.


Softwood Cuttings of Sage

Take cuttings in spring when new growth is several inches in length.  Side shoots of 4" in length are perfect. Cut the stem at an angle and remove lower leaves leaving an inch or two of the stem bare.  Plant cutting bare side down into a well-drained soil mix.  No fertilizer is needed at this stage.

Wrap the container in plastic to keep in humidity.  Avoid having the leaves touch the plastic.  Place the pot in light but out of direct light.  Keep soil moist but never soggy.  Remove the plastic when cutting grows roots.  A light tug that gives you some resistance means it has rooted.


Harvesting Sage

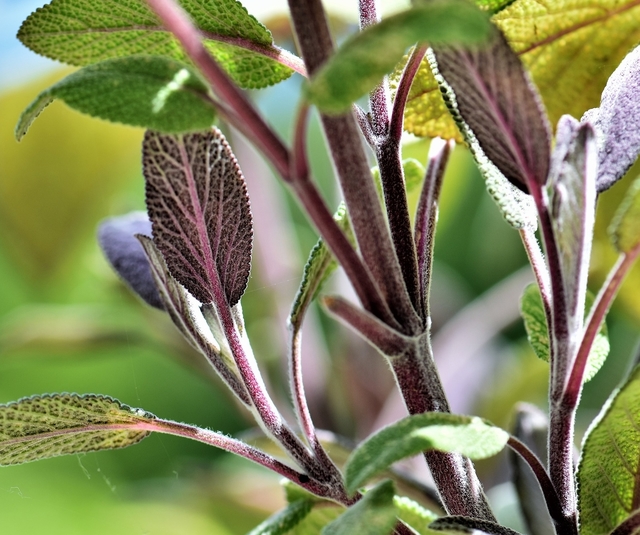
Start to harvest Sage once you see good growth on the plant.  Best harvested when tops of blossoms are barely open.  You can gather leaves at any time.  Sage is most flavorful as flowers begin to open. Purple-leaved Sage tends to be more aromatic than green-leaved Sage.


Storing Sage


Fresh
Damp Paper Towel

This method works well for hardy herbs that have woody stems as well as a few soft-stemmed herbs.

Clean and thoroughly dry the Sage.  Arrange lengthwise in a single layer on a slightly damp paper towel.  Loosely roll up the herb and transfer to a plastic bag or plastic wrap.  Label and store in the fridge.  Sage will stay fresh in the fridge using this method for up to 2 weeks.


Freezing

For best results, use frozen Sage within 1-2 years.  By freezing herbs, you will lose some of the herb's texture but preserve the flavor.  Here are a few freezing options to consider:

Tray Freeze

Strip leaves off the stems of the Sage and spread onto a cookie sheet on a single layer. Freeze in the freezer, then place it in a labeled freezer bag to store.  Since the leaves are frozen separately, you can easily remove the amount you need.


Ice Cube Trays with Oil

This method works well for hard-stemmed herbs that would probably be cooked when adding to a dish.  The oil reduces some of the browning and freezer burns.
Clean and thoroughly dry herbs.  Mince and firmly pack herbs into an ice cube tray 3/4 full.  Add Olive Oil to fill and freeze.  Transfer frozen cubes into labeled freezer bags to store.


Flat Freezer Bag

Trim off the stems and place them in a labeled freezer bag.  Squeeze out the air, flatten the freezer bag, label and store.


Drying

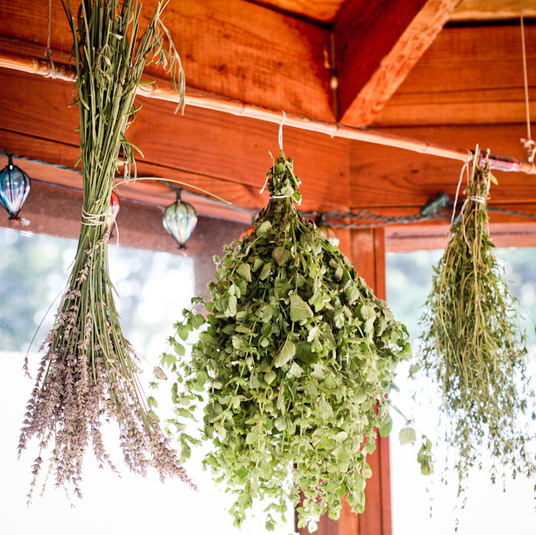
Sage contains more oil than most other herbs so it dries more slowly.  It is one of the best herbs to dry.   For best results, use dried Sage within 1-2 years.


Hang to Dry

Pick your Sage in bunches right before you intend to store them.  Tie the bottom of the bunch together with twine and hang upside down to dry in a dry, low humidity area. For added protection against dust, you can put the bundles inside paper bags with plenty of holes for ventilation.  When the herbs are dry, the leaves will crumble easily between your fingers.  Store in an airtight container.



Using Sage

  • Sage can be overwhelming so start with small amounts.
  • Use leaves fresh in recipes or add them sparingly to salads.
  • Dried sage is commonly used with Thanksgiving stuffing. 
  • It can be paired with pork, beans, potatoes, and cheese. 
  • You can mix it into a soft cheese for a tasty bread spread.


Back to Our Blog Homepage!

This post may contain some Amazon Associate links meaning that I will get a small compensation at no expense to you if you purchase something from this blog.

Tulle - Great for the Garden!


Tulle Fabric 

Ten Uses in the Garden!


If you've never used Tulle fabric in your garden, you're missing out on a great opportunity!


First, what is Tulle fabric? Tulle is a soft, fine silk, rayon or nylon material commonly used to make wedding veils and dresses.

Growing Cilantro - Homesteading 101


One of the world's most popular spices with a zesty, citrus flavor. It’s a fast-growing and easy-to-grow tender herb from the carrot family. Cilantro is the actual leaves of the plant, while Coriander refers to the two Cilantro seeds that are actually encased in the husk. Cilantro has a short life cycle and bolts quickly to produce its seeds in hot weather, so succession sowing of 2-3 weeks is recommended for a continued supply.


Starting Cilantro from Seed


Seed Longevity:                               Five years.

Seed Sowing Depth:                        1/4” to 1/2” deep.

Best Soil Temp for Germination:      55 – 65 degrees.

Days to Germination                        7-10.

Seed Spacing:                                 At 2-3” tall thin to 5” apart.


Spring Sowing

Start seeds indoors 2 weeks before the last frost date to plant out after the danger of frost has passed.


Direct Sowing

After the threat of frost has passed and every three weeks until Fall.


Fall Sowing

In warmer areas, direct sow in summer for a fall harvest.


milk jug as winter sown container with seeds

Winter Sowing

If you haven't tried winter sowing, you're in for a treat. This method is especially good for sowing herbs. Winter sowing is basically sowing seeds in the bottom of a milk jug in the winter, setting the milk jugs outside for the winter and leaving them there until the seeds germinate in the Spring.

For a detailed blog about Winter Sowing, click here.

To watch our 30 minute video on how to winter sow, click here.


Other Sowing Tips

  • Cilantro reseeds easily, so give it a place in your garden to do so. 
  • Cilantro will bolt quickly in hot weather.


Try Audible and Get Two Free Audiobooks


Growing Cilantro


Plant Size:                            Height 18-24"     Width to 18"

Soil Temperature:                 50 - 75 degrees.

Spacing in Beds:                  6-8"

Container Size:                    8-10" deep and 18" wide

Soil:                                     Well draining.

Watering:                            Dry soil causes the plant to bolt.

Light/Sun:                           For seeds, full sun. For leaves, light shade.

Fertilizer:                             Avoid fertilizer if growing for seed since that may actually delay 
                                           flowering.


Other Care Tips

  • For a continuous supply, make succession sowings every three weeks.
  • Snip off the top part of the main stem as soon as it develops flower buds or seed pods.


Harvesting Cilantro Leaves


Leaves can be cut at any time. Use the upper newly-cut leaves for cooking.


Harvesting Coriander Seeds


Harvest large seeds on a dry day. Cut off the top of stems when the seed pods begin to turn brown and crack if pressed. Place seed pods in a paper bag and let dry. Pods can be rolled around in between your fingers to release the seeds.


Storing Cilantro

Fresh
Bouquet Storage


This method works well for tender herbs with soft stems and leaves.

Clean and thoroughly dry the Cilantro. Trim the ends of the stems and remove any wilted or browned leaves. Place Cilantro in a Mason jar or clear glass with 1" of water like a bouquet of flowers. Loosely cover with a plastic bag or cling wrap. Label and store in the fridge.

Cilantro will stay fresh in the fridge with this method for up to 3 weeks.


Freezing


For best results, use frozen Cilantro within 1 to 2 years.  By freezing herbs, you will lose some of the herb's texture but preserve the flavor.

Here are some methods for freezing:


Tray Freeze

Spread the Cilantro onto a cookie sheet on a single layer. Freeze in the freezer, then transfer the herbs into a labeled freezer bag to store. Since the leaves are frozen separately, you can easily remove the amount you need.


Ice Cube Trays

Clean and thoroughly dry the Cilantro. Mince and firmly pack herbs into ice cube trays 3/4 full. Add water to fill and freeze. Transfer frozen cubes into a labeled freezer bag to store.


Flat Freezer Bag


Clean and thoroughly dry the Cilantro. Chop herbs into 1/2" pieces, place in a labeled freezer bag. Squeeze out the air, lay flat and freeze.


Drying

Cilantro does not dry well.


Using Cilantro

  • In omelets.
  • A staple in Latin and Asian cooking. The sweet stems are usually eaten raw.
  • Use fresh whenever possible.
  • Sprinkle raw Cilantro on salads or salsas.
  • The seeds are mildly spicy. Good for casseroles and baked goods.
  • Also adds a nice aroma to the kitchen!
~~~~~~~~~~~~~~~~~~~~~~~~~~~~~~~~~~~~~~~~~~~~~~~~~~~~~~~~~~~~~~~~

Growing your own herbs is fun, easy, more healthy than the herbs shipped to grocery stores, and what's best, saves you tons of money!  Try it today.

~~~~~~~~~~~~~~~~~~~~~~~~~~~~~~~~~~~~~~~~~~~~~~~~~~~~~~~~~~~~~~~~~~


Back to Our Blog Homepage!

This post may contain some Amazon Associate links meaning that I will get a small compensation at no expense to you if you purchase something from this blog.


Hosta - Seasonal Calendar of Care

 
First Frost hosta leaves


Seasonal Calendar of Care for Hostas


One of the reasons that hostas continue to be so popular is the fact that they're a very low maintenance perennial. 


That being said, if you follow a few basic steps to care for them, you can keep your hostas looking healthy and beautiful throughout the season, whether they're snug in the ground or in pots.

Multi-Sow Seeds! Save Room!


Tray full of multi-sown seedlings
Tray of Multi-Sown Seedlings


Save Room Under Grow Lights!

Multi-Sow Seeds!


What's multi-sowing and why should you be doing it?


Multi-sowing refers to sowing several seeds, usually four to ten seeds depending on what you're growing, in the same seed-starting cell and allowing them to mature into small clumps. Then, rather than thinning them or planting them out one plant per space, the entire clump is planted together.


Growing Ornamental Sweet Potato Vines - Propagation


Growing Ornamental Sweet Potato Vines


The deeply lobed leaves of the sprawling vine of the Ornamental Sweet Potato (Ipomoea batatas) continue to be quite a show stopper in the garden. It's a great way to add a tropical feel to even the northern gardens.

Hypertufa 101 for Beginner Success


Blue Mouse Ears Hosta Nestled in Hypertufa Pot


Hypertufa 101 - Detailed How-To


Once you know the basics of making hypertufa projects, you will only be limited by your own creativity!  
It's easy, it's fun, and you can look like an expert even on your first project!


It is recommended that you read through the entire article before beginning your first Hypertufa project. A good basic understanding of the entire process will help ensure first-time success.

Featured Post

Welcome!

Thanks to you, we've hit over 1.7 MILLION pageviews!   Homesteading is a journey, an adventure, and an ever-evolving quest to make our h...