Causes of Canning Jar or Contents Darkening


Four Reasons Canning Jar Contents Darken


First, how pressure canners work to keep food safe.


Pressure Canners basically heat the jars to a temperature high enough to destroy the microorganisms that could cause food spoliage and or foodborne illness.    The heating process also removes air from the product and creates a vacuum which helps to prevent recontamination by harmful microorganisms.

Growing Parsley - Homesteading 101


Parsley is a tender herb with soft stems and leaves.  It is popular for many reasons including its variety of uses, vitamin content and its ability to grow and give you a flavorful harvest even after a light snowfall.  Parsley has a light, peppery flavor that complements other seasonings.


Types of Parsley

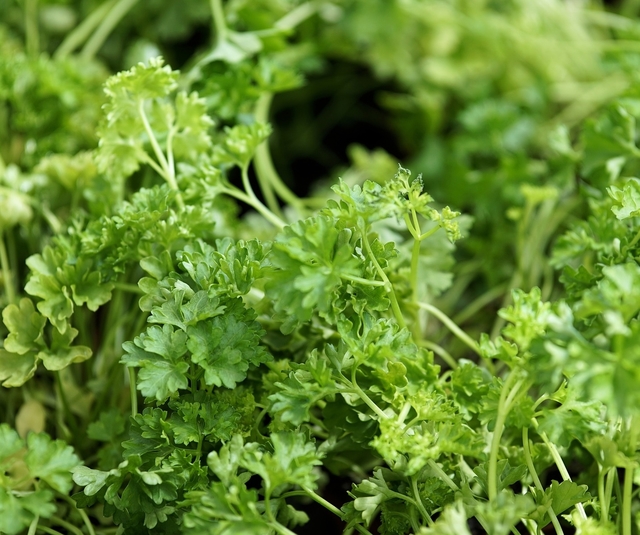
Curly Leaf Parsley.   Deep curled leaves and attractive appearance.  Only used as a garnish.


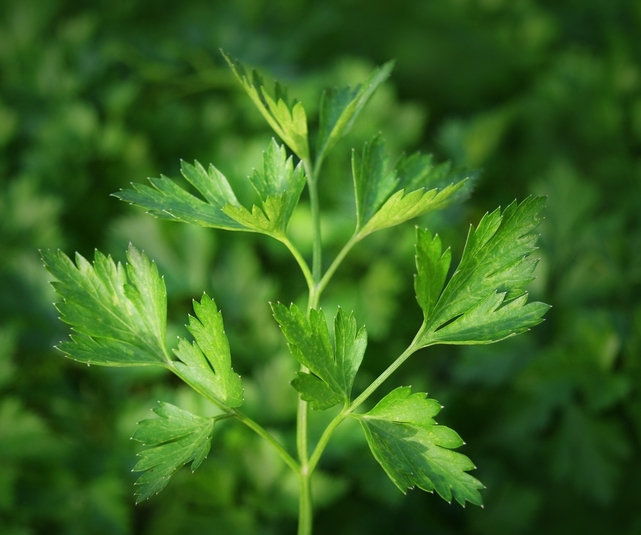
Flat Leaf Parsley (AKA Italian Parsley) Preferred by cooks for its flat, celery-like leaves.  Pleasant tasting foliage can be eaten fresh or added to recipes.  Single Leaf Italian Parsley has a rich flavor that is best for seasoning cooked dishes.  


Giant of Italy Parsley.  Huge, dark green leaves with great flavor.  Strong, upright stems make this one of the best parsley varieties for fresh-market sales.


Starting Parsley from Seed

Parsley is slow to germinate, but after you do get it to the plant stage, it's not fussy at all.  To speed up this process, soak or refrigerate the seeds for a day before sowing them.

Seed Longevity:                                       2-3 years.
Seed Sowing Depth:                                1/4”.
Best Soil Temp for Germination:             65 – 85 degrees.
Days to Germination:                               21+ days.


            Spring Sowing                                             

Direct sow 4-6 weeks before the last frost date or as soon as the soil can be worked, or sow indoors 6-8 weeks before the last frost date. 


Winter Sowing

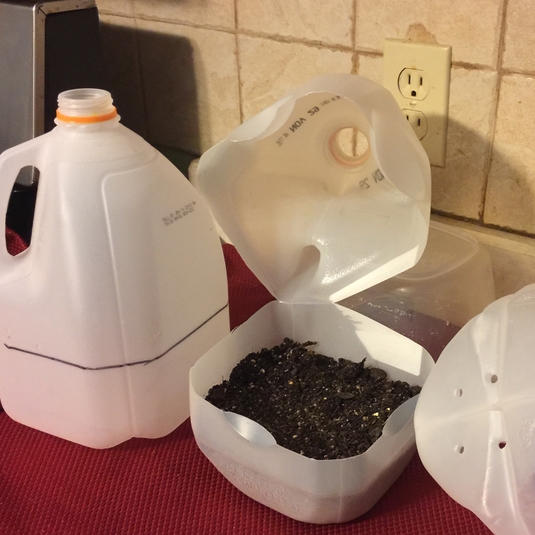
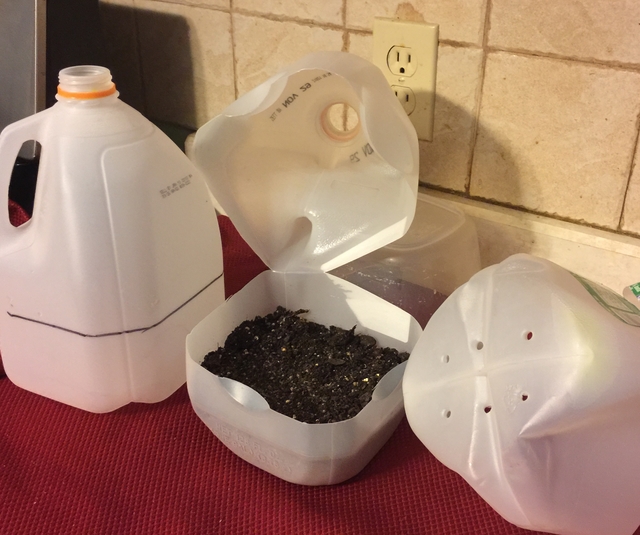
If you haven't tried winter sowing, you're in for a treat.  This method is especially good for sowing herbs.  Winter sowing is basically sowing seeds in the bottom of clear milk jugs in the winter, setting the milk jugs outside for the winter and leaving them there until the seeds germinate in the Spring.

For our article containing detailed information about Winter Sowing, click here


To watch our 30 minute video on how to winter sow, click here.


             Other Sowing Tips                                   

You can also start seeds in a pot in late summer and grow the plant outside until the first frost, then bring the plant indoors.


Growing Parsley

Plant Size:    12-18” Height.
Growing Soil Temperature:     60 – 65 degrees.
Spacing:     9-12”.
Container Size:  6-18” in diameter   12” deep.                          
For fresh parsley all winter long, transplant one or two plants in a 10” container in late Fall and grow in a sunny window.

Soil:     Fertile, slightly acidic to slightly alkaline.
Watering:    Light.  Parsley has shallow roots.
Light/Sun:   Full sun to light shade.
Fertilizer:     None.
Good Companions:   Asparagus, corn, pepper, tomato.

Other Care Tips:
Keep roots cool and moist by mulching.
In September, cut back plants set out in spring to promote new foliage.


Dividing Parsley


Dig up the Parsley plant.  Locate the older growth which will have a slightly darker hue.  This growth is vital to the plant.  Divide into thirds and replant at the same depth.  Do not harvest sections again for at least 3 weeks.


Cuttings of Parsley


Take cuttings in spring when new growth is several inches in length.  Side shoots of 4" in length are perfect. Cut the stem at an angle and remove lower leaves leaving an inch or two of the stem bare.  Plant cutting bare side down into a  well-drained soil mix.  No fertilizer is needed at this stage.

Wrap the container in plastic to keep in humidity.  Avoid having the leaves touch the plastic.  Place the pot in light but out of direct light.  Keep soil moist but never soggy.  Remove the plastic when cutting grows roots.  A light tug that yields some resistance will let you know that roots have formed.


Harvesting Parsley

Harvest Parsley as needed, starting with the larger outer leaves.  You can also harvest the long stems with the leaf blades.  You can cut above the soil level for a bunch and it will grow new foliage.


Harvesting Parsley Seed

Parsley does not go to seed the first year.  Harvest the Parsley seeds of second-year plants when they have turned dark brown.  If the seeds are harvested earlier, they may not be viable.  Shake seeds off the seed heads and into a paper bag to dry.  You can also pluck out seeds as they turn brown as they tend to ripen at separate times.


Storing Parsley

Fresh
Bouquet Storage

This method works well for tender herbs with soft stems and leaves.
  • Clean and thoroughly dry the herb.  
  • Trim the end of the stems and remove any wilted or browned leaves.  
  • Fill a Mason jar or clear glass with 1" of water.  
  • Place the herbs in the jar like a bouquet of flowers
  • Loosely cover with a plastic bag or cling wrap.  Label and store in the fridge.

Parsley will stay fresh in the fridge with this method for 3 weeks.


Freezing Parsley

For best results, use frozen Parsley within 1-2 years. 
By freezing herbs, you will lose some of the herb's texture but preserve the flavor. 

Here are a few freezing options to consider:

Tray Freeze

Spread herb onto a cookie sheet on a single layer. Freeze in the freezer, then transfer the herbs into a labeled freezer bag to store.  Since the leaves are frozen separately, you can easily remove the amount you need.


Ice Cube Trays

Clean and thoroughly dry herbs.  Mince and pack herbs into ice cube trays 3/4 full.  Add water to fill and freeze.  Transfer frozen cubes into a labeled freezer bag to store.


Flat Freezer Bag

Clean and thoroughly dry herbs.  Chop herb into 1/2" pieces, place in a labeled freezer bag. Squeeze out the air, lay flat and freeze.


Drying Parsley

Hang to Dry

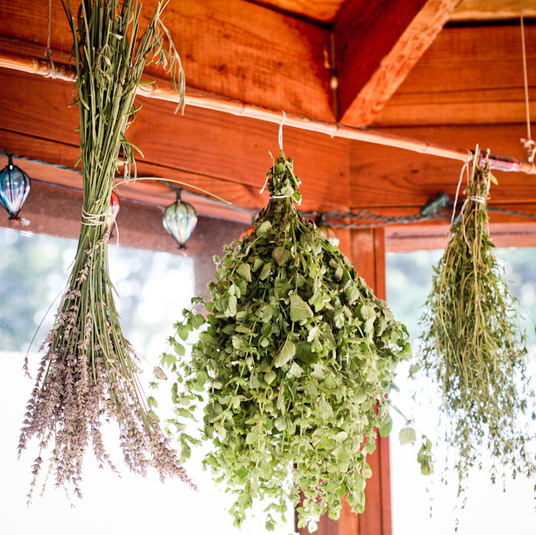
Pick your herbs in bunches right before you intend to store them.  Tie the bottom of the bunch together with twine and hang upside down to dry in a dry, low humidity area. For added protection against dust, you can put the bundles inside paper bags with plenty of holes for ventilation.  When the herbs are dry, the leaves will crumble easily between your fingers.  Store in an air tight container.  For best results, use dried Parsley within 1-2 years.


Dehydrate Parsley in Dehydrator


Using Parsley

Parsley perks up salads, soups, meatballs, and poultry stuffing.
It is most often used in sauces, salads, and sprinkled over dishes at the end of cooking for a flash of green and fresh taste.

~~~~~~~~~~~~~~~~~~~~~~~~~~~~~~~~~~~~~~~~~~~~~~~~~~~~~~~~~~~~~

Growing your own herbs is fun, easy, more healthy than the herbs shipped to grocery stores, and what's best, saves you tons of money! Try it today.

~~~~~~~~~~~~~~~~~~~~~~~~~~~~~~~~~~~~~~~~~~~~~~~~~~~~~

This post may contain some Amazon Associate links meaning that I will get a small compensation at no expense to you if you purchase something from this blog.

Growing Thyme - Homesteading 101


The perennial shrub, Thyme, certainly deserves a place in every herb garden.  Not only is it one of the most useful plants in the kitchen, but it also has attractive foliage, long-lasting flowers and it's an easy-to-care-for compact plant.  English Thyme is used most often in cooking.

Types of culinary Thyme include Thymus Vulgaris, also referred to as Common Thyme, and include summer, winter, and French Thyme. 


Starting Thyme From Seed

Thyme seeds are difficult and slow to germinate, but it can be done.  It will take a year to get a good-sized plant.

Seed Longevity:                                           2 years.
Seed Sowing Depth:                                    Cover thinly.
Best Soil Temp for Germination:                  70 degrees.
Days to Germination:                                    7-10+ days.


Spring Sowing


Sow indoors 6-10 weeks before the last spring frost.   Plant outside 2-3 weeks before the first last spring frost.


Winter Sowing


If you haven't tried winter sowing, you're in for a treat.  This method is especially good for sowing herbs.  Winter sowing is basically sowing seeds in the bottom of milk jugs in the winter, setting the milk jugs outside for the winter and leaving them there until the seeds germinate in the Spring.

For our article containing detailed information about Winter Sowing, click here

To watch our 30 minute video on how to winter sow, click here.


Growing Thyme

Plant Size:                                                     Height 6-12”   Width 12”.
Growing Soil Temperature:                           70 degrees.
Spacing:                                                         12”.
Container Size:                                              Height:  6-8”   Width:  4 – 12”.
Soil:                                                                Well-drained.  Rich soil produces large plants that are less fragrant.
Watering:                                                      Light.
Light/Sun:                                                     Full Sun.
Fertilizer:                                                      Very little, not necessary.
Good Companions:                                      Cabbage, Tomato, Eggplant.
Bad Companions:                                        Onion family.


                       Other Care Tips                                            

  • Trim leggy plants.
  • Lightly mulch after ground freezes.

Dividing Thyme

Divide Thyme after three or four years when the plant becomes woody.


Softwood Cuttings of Thyme

Take cuttings in spring when new growth is several inches in length.  Side shoots of 4" in length are perfect. Cut the stem at an angle and remove lower leaves leaving an inch or two of the stem bare.  Plant cutting bare side down into a well-drained soil mix.  No fertilizer is needed at this stage.

Wrap the container in plastic to keep in humidity.  Avoid having the leaves touch the plastic.  Place the pot in light but out of direct light.  Keep soil moist but never soggy.  Remove the plastic when cutting grows roots.  A light tug that gives you some resistance means it has rooted.


Harvesting Thyme

Harvest only lightly the first year.  The best flavor is mid-June and July or when the flowers are barely open.

Peel off leaves from the woody stem.  The stems from younger Thyme can be used as well as the leaves.  An established plant will keep coming back.


Harvesting Thyme Seeds

Shake the dry seed head to shake the seed free.  If they are ripe they will fall out.  If you break up the dried seed head, separating the seeds from the chaff will be time-consuming.

Storing Thyme


Fresh
Damp Paper Towel

This method works well for hardy herbs that have woody stems as well as a few soft-stemmed herbs.

  • Clean and thoroughly dry the Thyme.  
  • Arrange lengthwise in a single layer on a slightly damp paper towel.  
  • Loosely roll up the herb and transfer to a plastic bag or plastic wrap.  
  • Label and store in the fridge. 
Thyme will stay fresh in the fridge using this method for 2 weeks.


Freezing Thyme

For best results, use frozen Thyme within 1-2 years.
By freezing herbs, you will lose some of the herb's texture but preserve the flavor.  

Here are a few freezing options to consider:


Tray Freeze

Strip leaves off the stems and spread onto a cookie sheet on a single layer. Freeze in the freezer, then place in a labeled freezer bag to store.  Since the leaves are frozen separately, you can easily remove the amount you need.

Ice Cube Trays with Oil

This method works well for hard stemmed herbs that would probably be cooked when adding to a dish.  The oil reduces some of the browning and freezer burn.
Clean and thoroughly dry herbs.  Mince and pack herbs into an ice cube tray 3/4 full.  Add Olive Oil to fill and freeze. Transfer frozen cubes into labeled freezer bags to store.


Flat Freezer Bag

Trim off the stems and place them in a labeled freezer bag.  Squeeze out the air, flatten the freezer bag, label and store.

Drying Thyme

For best results, use dried Thyme within 1-2 years.
Thyme is one of the best herbs to dry.  For drying, harvest Thyme when plants begin to flower.


Hang to Dry

Pick the Thyme in bunches right before you intend to store them.  Tie the bottom of the bunch together with twine and hang upside down to dry in a dry, low humidity area. For added protection against dust, you can put the bundles inside paper bags with plenty of holes for ventilation.  When the herbs are dry, the leaves will crumble easily between your fingers.  Store in an airtight container.

Using Thyme

  • Thyme is an essential element in Creole, Cajun, Greek, and French Cuisine.
  •  Thyme can be paired with just about any kind of meat, poultry, fish or vegetable.
  • Thyme is usually incorporated during the cooking process as opposed to the last minute.

~~~~~~~~~~~~~~~~~~~~~~~~~~~~~~~~~~~~~~~~~~~~~~~~~~~~~~~~~~~~~~~~~~~~~

There's nothing like the aroma of fresh-picked herbs!  Try growing some today and save money!

~~~~~~~~~~~~~~~~~~~~~~~~~~~~~~~~~~~~~~~~~~~~~~~~


Back to Our Blog Homepage!


This post may contain some Amazon Associate links meaning that I will get a small compensation at no expense to you if you purchase something from this blog.


Pressure Canning Item List


Pressure Canning Item List


With this fast-paced and ever-changing world we live in now, there is no better time to learn to pressure can food.


Many people are taking a renewed interest in learning to can food in light of the recent world events taking place.


Pressure Canning Check List


In addition to saving money by buying food in bulk at grocery sales and farmers’ markets, a pantry full of jars of food can give you confidence that your family will stay safely fed.


Whether you are harvesting the food from your own large garden or farm or beginning to grow some veggies on your deck or porch, the art of canning food is a great way to stock up on items you regularly use. To learn the basics of pressure canning, a good book like this one is very important.


There are some essential kitchen appliances that you will need to get started. The cost of some of these items may seem a bit daunting at first, but the investment will be well worth it.


Pressure Canner


First, you will need a pressure canner. NOT a pressure cooker, but a pressure canner. A pressure canner is used to cook, sterilize, and preserve low-acid foods that are to be canned for future use.


Water Bath Canner


Another way to can food is by using a water bath canner. This is a large pot with a jar rack. It is used with all high-acid foods. High-acid foods include all fruits, jams, jellies, pie fillings, pickles or condiments, and tomatoes with added lemon juice.


You will need a good supply of canning jars, lids, and rings. These three items come together in a case of canning jars.


You cannot use just any jar in canning food. Canning jars are specially designed to withstand the high temperature of steam pressure processing and the low temperature of freezing. These jars will be labeled as canning and/or freezing jars.


Canning Jars


These jars come in a variety of sizes, most commonly found are:

Pints.
Pint jars are great for just about anything you want to add to them for smaller portions.

Quarts.
Quarts are a great family-size jar. They are ideal for canning whole fruits and vegetables like peaches and green beans, or for just for canning larger portions.


Half Pint or Jelly Jars


Half Pints. This small size is great for creating gifts or small batches of jams, jellies, or preserves. Some smaller or cut vegetables may fit in these jars if using a wide-mouth canning jar.


Canning jars also come in what’s known as “regular mouth” and “wide mouth” jar openings. The only difference is the size of the jar opening.


Lids and Rings


You can sometimes find some canning jars at thrift stores, or maybe you have a relative that no longer does canning and has a stash of jars. If you find some of these older canning jars, you may need to buy lids and rings to go with those jars.

There are reusable lids available now that are called “Tattler” lids that are made in the USA. They also come in sizes suitable for both wide mouth and regular mouth jar sizes. You can use these with pressure canners, water bath canners, and vacuum sealers.


There are also plastic lids for canning jars for use in storing the jars in the fridge after they've been unsealed.
Plastic lids that fit canning jars


You will need various kitchen/canning utensils to make your canning projects easier. You can buy a kit of items like the one below that has most if not all of the items you will need.


Utensil Kit

Or you can purchase items separately. You will need:
Funnel that fits jar openings

Ladels

Jar Lifter


Other supplies you may need, depending on the types of food that you intend to can, are:


Pickle Crisp (for pickling veggies and pickles)
Citric Acid, commonly used for home canning tomatoes
Canning Salt (Not regular salt)


Real Fruit Pectin for homemade Jam and Jelly recipes
5% Vinegar You will probably use large amounts of this.


Vinegar is used in the pressure canner to prevent minerals from hard water from building up on the jars or on the inside of your canner. Vinegar is also used along with water to fill jars of some foods to be processed.


There are also seasoning packets available for use in canning like salsa tomato mixes, pickle mixes, potato seasonings, etc. Mrs. Wagers' brand is very popular with canners. My favorite is the salsa packet below.


________________________________________

So what are you waiting for? Learn to pressure can and water bath can and start saving money on food and getting some much-needed food security!

_____________________________________________________


Canning Jar Sizes


Canning Jars Sizes and Their Common Usages


Mason jars have many uses, but the glass in them is particularly molded for use in home canning to preserve food. The mouths of Mason jars have threads on their outer perimeter so they can accept a metal ring when it is screwed down onto them.

Featured Post

Welcome!

Thanks to you, we've hit over 1.7 MILLION pageviews!   Homesteading is a journey, an adventure, and an ever-evolving quest to make our h...