Showing posts with label chickens. Show all posts

Growing Herbs for Chickens -- Dill


Do you know that by simply adding one herb to your backyard garden, you can vastly improve the health and productivity of your chickens? Yes, that's right - the small but mighty herb known as dill has been proven to have numerous benefits for our feathered friends.


In this article, we will dive into the world of dill and its powerful effects on chickens. From its nutritional value to its role in preventing common illnesses, we will explore all the reasons why growing dill for your chickens is a must. So grab your gardening gloves and get ready to learn how this simple herb can make a big impact on your flock's well-being.


Why Feed Dill to your Chickens?


Dill is a popular herb that is easy to grow and offers numerous health benefits to your chickens. It is rich in nutrients and has antimicrobial properties that can help prevent infections and promote digestive health. Plus, its unique flavor and aroma can add some variety to your chickens' diet and make their food more appealing.


Vitamins: Dill is rich in vitamins A, C, and K, all of which are important for maintaining healthy immune systems and promoting overall health in chickens.


Minerals: Dill is also a good source of several minerals, including calcium, iron, and manganese. These minerals are important for bone health, blood circulation, and the production of eggs.


Antioxidants: Dill contains several antioxidants, including polyphenols and flavonoids. These antioxidants can help protect chickens' cells from damage and promote overall health.


Essential Oils: Dill also contains essential oils, such as carvone and limonene, which can have antimicrobial properties that can help prevent infections in chickens.

Fiber: Dill is also a good source of dietary fiber, which can help promote digestive health in chickens and prevent digestive issues like constipation.

Overall, dill is a highly nutritious herb that can provide several health benefits to chickens. Incorporating dill into their diet can help promote overall health and well-being, and can be a great way to supplement their regular feed.


Growing Dill


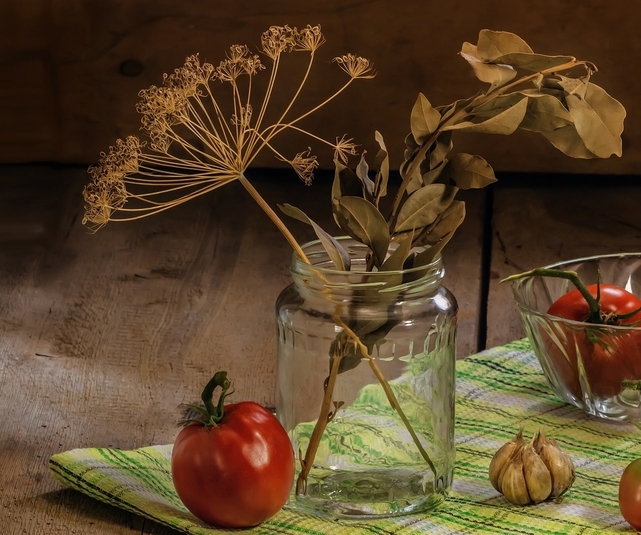
Dill is a warm-season annual herb that has feathery leaves on fronds that add a pleasant anise-like flavor to kinds of seafood, soups, salads, and sauces. Its subtle taste complements fish and shellfish. In addition to providing aromatic seeds and foliage, Dill will brighten your garden with its yellow-green flowers in the spring and fall.


Types of Dill

Bouquet is the most popular Dill grown for its fragrance of leaves and seeds. Used for both pickling and cooking.


Taller Varieties include Mammoth and Long Island and may need to be staked.
Fernleaf Dill Weed (aka the Fish Dill) is popular for its use in fish.


Starting Dill from Seed

Seed Longevity:                                     3 years.
Seed Dowing Depth:                              ¼”.
Best Soil Temp for Germination:            60-70 degrees.
Days to Germination:                             7-10 days.
Spring Sowing:                                       Direct sow after last frost.

Sow Indoors - Not recommended; does not transplant easily.


Winter Sowing

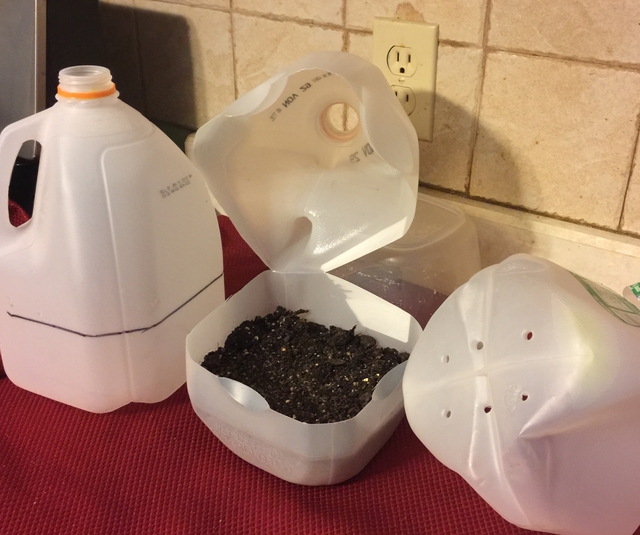
If you haven't tried winter sowing, you're in for a treat.  This method is especially good for sowing herbs.  Winter sowing is basically sowing seeds in the bottom of clear milk jugs in the winter, setting the milk jugs outside for the winter and leaving them there until they germinate in the Spring.

For our article containing detailed information about Winter Sowing, click here.

To watch our 30 minute video on how to winter sow, click here.


Growing Dill

Plant size:                                          Generally grows 2-3’.
Growing Soil Temperature:                60– 70 degrees.
Spacing:                                             12-15”.
Container Size:                                  20 seeds per 18” pot.
Soil:                                                    Well-drained, moderately rich and loose.
Watering:                                            Loves moist soil.
Light/Sun:                                           Full sun  6-8 hours.
Fertilizer:                                            Light to none.
Good Companions:                            Cabbage, onions.
Bad Companions:                              Carrots.


Other Care Tips
                   

  • Shelter from strong winds.
  • It doesn’t transplant well.
  • Successive planting every 2-3 weeks for a continuous supply.
  • Attracts beneficial insects such as wasps and other predatory insects.
  • Attracts bees and butterflies.
  • Tall Dill plants may need staking.
  • Create a permanent Dill weed patch by allowing seeds to fall and self sow the next season.

Dill Cuttings

By placing Dill cuttings of 4-5” in length into water, the cuttings will grow roots in 3-4 weeks.

Harvesting Dill Leaves


As soon as the plant has 4-5 leaves, you can start to harvest.  Pick off remaining leaves just before the flowers open or let seeds develop for harvesting.   You can always pinch off leaves as needed.


Harvesting Dill Seeds

After the Dill plant flowers, allow the seed heads to dry on the plant.  Cut the entire seed head when seeds are a pale brown.  Thoroughly dry seeds and store in an airtight container.


Storing Dill

Fresh
Bouquet Storage

This method works well for tender herbs with soft stems and leaves.
Clean and thoroughly dry the Dill.  Trim the end of the stems and remove any wilted or browned leaves.  Place the Dill into a Mason jar or clear glass with 1" of water like a bouquet of flowers.  Loosely cover with a plastic bag or cling wrap.  Label and store in the fridge.

Dill will stay fresh in the fridge with this method for up to 3 weeks.

Freezing

For best results, use frozen Dill within 1-2 years.
By freezing herbs, you will lose some of the herb's texture but preserve the flavor.
Here are some suggestions for freezing Dill.

Tray Freeze

Spread the Dill onto a cookie sheet on a single layer. Freeze in the freezer, then transfer the herbs into a labeled freezer bag to store.  Since the leaves are frozen separately, you can easily remove the amount you need.


Ice Cube Trays

Clean and thoroughly dry the Dill.  Mince and firmly pack herbs into ice cube trays 3/4 full.  Add water to fill and freeze.  Transfer frozen cubes into a labeled freezer bag to store.


Flat Freezer Bag

Clean and thoroughly dry the Dill.  Chop herb into 1/2" pieces, place in a labeled freezer bag. Squeeze out the air, lay flat and freeze.


Drying

Dill does not dry well.


Using Dill

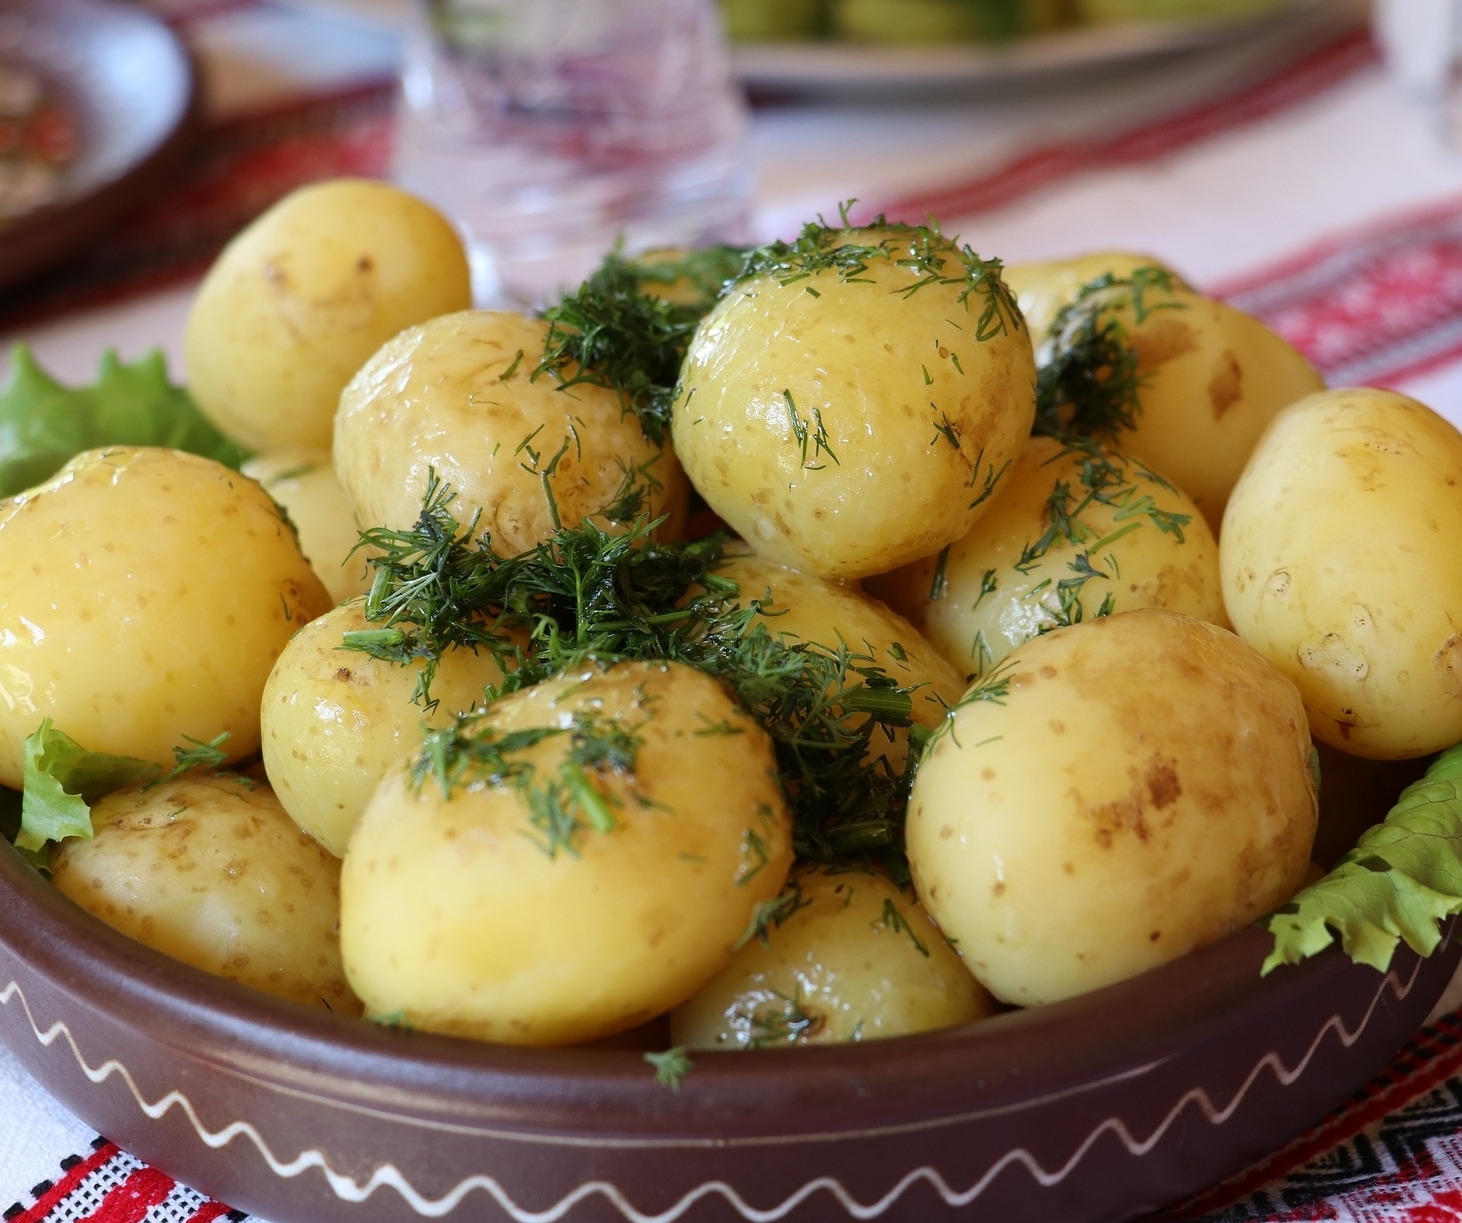
  • Brings a great tang to potato recipes.
  • A small amount can go a long way, so use sparingly at first.
  • Use in salads and salad dressings and of course to pickle cucumbers.
  • Delicious accent to eggs, cheese, vegetables, and fish.

~~~~~~~~~~~~~~~~~~~~~~~~~~~~~~~~~~~~~~~~~~~

In conclusion, growing dill for chickens is not just a simple task, but a beneficial one for both the chickens and the farmer. 

As we've learned, dill provides numerous health benefits for our feathered friends, and its pungent aroma can also repel pests and attract pollinators. But beyond that, it's a reminder that what we choose to grow and feed our animals can have a significant impact on their overall wellbeing. 

So, let's strive to be mindful and intentional in our farming practices, and remember that even a small herb like dill has the power to make a big difference. 


Growing your own herbs is fun, easy, more healthy than the herbs shipped to grocery stores, and what's best, saves you tons of money! Try it today.

~~~~~~~~~~~~~~~~~~~~~~~~~~~~~~~~~~~~~~~~~~~~


Back to Our
 Blog Homepage!

This post may contain some Amazon Associate links meaning that I will get a small compensation at no expense to you if you purchase something from this blog.

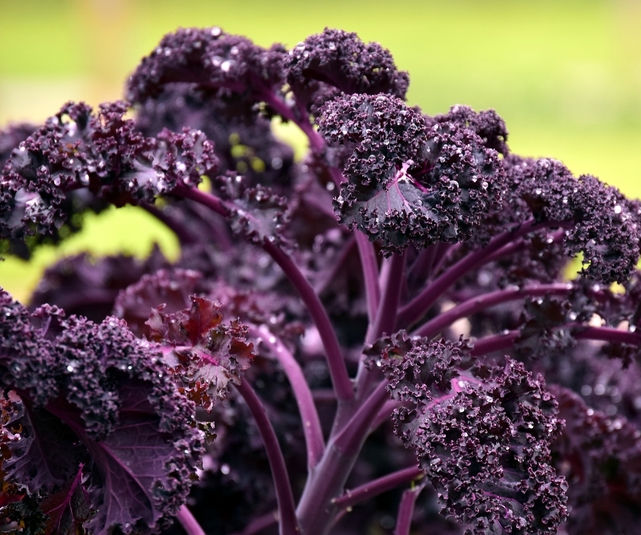
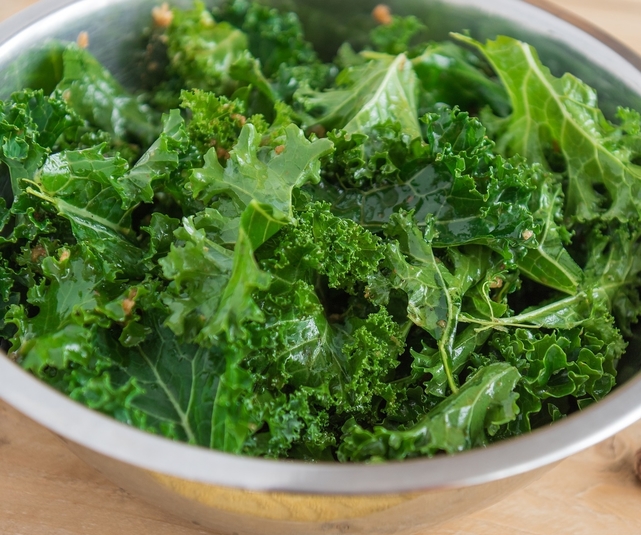
Growing Kale for Chickens!


GROWING KALE FOR YOUR CHICKENS!


Did you know that chickens who dine on kale regularly lay eggs with more vibrant yolks and stronger shells?" This statement may come as a surprise to many of us, as kale is often viewed as a trendy superfood for humans. 


But what if I told you that growing kale for your chickens can not only improve their health, but also benefit your own diet?

From its easy cultivation to its nutritional benefits, kale is the perfect addition to your backyard chicken feed.


In this article, we will explore the reasons why growing kale for your chickens is a win-win situation and how to do it successfully. So grab your gardening gloves and let's get started on this leafy adventure!


Why Grow Kale for your Chickens?


Kale is high in vitamins and minerals, including vitamin A and calcium, which are good for bone health and egg production.

Kale can help with a chicken's digestion.

Kale can support a chicken's immune system.

Darker yolks: Dark leafy greens like kale can result in darker, richer yolks.


How to Feed Kale to Chickens


Here are some tips for feeding kale to chickens:


Chop or shred 
kale into small pieces to make it easier for chickens to digest.


Introduce gradually
As with any new food, introduce kale gradually and monitor your chickens' health and behavior.


Avoid overconsumption
Too much kale can cause digestive issues like diarrhea or crop impaction.


Consider egg taste
Kale can taint the taste of eggs, so make sure chickens don't eat too much
. 

                Growing Kale

A hardy biennial usually grown as an annual.
Height 12-18"    Width  8-12"


When it comes to Kale in salads, Kale adds substance, color, and most importantly nutrition.  Its colorful leaves are packed with vitamins and minerals.  Kale's leaf texture can range from deeply puckered to deeply frilled.

Types:
Curley Leaf (Scotts Kale).  Noticeable pungent flavor with a peppery quality....


Dinosaur Kale.  Hearty leaves that are tall and narrow.  It retains its firm texture even after cooking.  It is slightly sweeter with a more delicate taste.

Red Russian Kale.  Flat, fringed leaves that resemble large Arugula leaves.  Great sweet flavor with a bit of pepper.

Rape kale (aka Leaf and Spear).  A cross between a curly leaf and plain leaf.

Try Audible and Get Two Free Audiobooks


Starting Seeds of Kale


Seed Depth:                     1/2"
Seed Spacing:                  3"
Days to Germinate:           5-7 days.
Days to Harvest:
70-95 from seed.  55-75 days from transplants.

Seed Longevity:               2 years.


Sowing Indoors:

Spring:  Sow 5-7 weeks before your last average frost date.  Plant out as transplants 1-2 weeks before your average expected frost date.


Sowing Outdoors:

Spring:  Direct sow 2-4 weeks before your average last frost date or as soon as the soil can be worked.


Winter Sowing


If you haven't tried winter sowing, you're in for a treat. This method is especially good for sowing herbs and greens. Winter sowing is basically sowing seeds in the bottom of a milk jug during the winter, setting the milk jugs outside for the winter and leaving them there until the seeds germinate in Spring.


To see our full Winter Sowing article, click here.

To watch our 30 minute video on how to winter sow, click here.


Growing Kale Plants


Growing Temperature:          60-65 degrees down to 20 degrees.
Plant Spacing:                      Thin plants to 12-15" apart.
Container Size:                     6-8" depth.
Sun/Shade:                           Part sun/part shade.
Soil:                                       Rich in nitrogen.
Watering:                               Consistent moisture for best flavor.
                                              Water heavily during
 the growing season.


Fertilizing:
If grown in nutrient-rich soil, your Kale plants won't need any fertilizer until after the first flush of leaves.  Then one side dressing of balanced fertilizer is all that the plant should need for the growing season. 


Harvesting Kale

Harvest Kale when the plant is 8-10" high, starting with the outside leaves.  To harvest the entire plant, cut 2" above ground level.  The plant will sprout new leaves in 1-2 weeks.


   Using Kale


  • Remove stems before cooking.
  • Use young leaves raw in salads
  • Substitute Kale for spinach in any recipe.
  • Kale chips, kale pesto, sauteed Kale, Kale Quich, Kale Soup, Kale slaw.
    Kale can also be used as a garnish
    !


Storing Kale For Later Use


Although tender green leaves, like Lettuce, can't be preserved well, the thicker leaved greens can be.
Fresh
  • Clean and pat dry.  Bundle stems lightly, place on a paper towel (to absorb moisture) and wrap in a plastic bag.  Keeps in refrigerator for 10 days.

Freezing for Later Use in Chili, Soups, Sauces, and Casseroles.
  • Steam or saute' leaves, chop them and store in freezer bags.
  • Puree with water and freeze into ice cube trays.
  • Clean and dry the leaves and store in quart size freezer bags.
  • Frozen leaves will keep for 6 months.
  • Blanching the leaves for two minutes first will extend freezer storage to 14 months.

~~~~~~~~~~~~~~~~~~~~~~~~~~~~~~~~~~~~~~~~~~~~~~~~~~~~~~~~~~~~~~~~~~~

Kale is one of the most nutrition crops you can grow. I love kale in soups, stir fries, steamed or even eating baby kale leaves in salads. It's often found in mesclun and lettuce mixes to add a deep green color and crunchy texture.

~~~~~~~~~~~~~~~~~~~~~~~~~~~~~~~~~~~~~~~~~~~~~~~~~~~~~~~~~~~~~~


This post may contain Amazon affiliate links and as an Amazon Associate I earn from qualifying purchases without costing you anything extra.


Growing Greens for Chickens -- Arugula!


GROWING ARUGULA FOR CHICKENS!


Chicken feed isn't cheep!  Luckily, there are some ways that you can reduce your bagged chicken feed bill.

Feeding your hens food scraps from your leftover meals is certainly one. But for putting a bigger dent in that feed bill, grow some healthy feed alternatives right there in your backyard or homestead.


Most greens are a wonderful choice to grow for your chickens. 


Why Feed Arugula to Chickens?


Arugula is quite good for chickens.  In fact, it is superior to many other leafy vegetables thanks to its abundance of vitamins and minerals all of which can help chickens thrive.


Arugula is commonly classified as a superfood among other leafy vegetables and is packed with a ton of nutrition, both in  vitamin and mineral form.


Arugula contains a phenomenal amount of vitamin K, folate, vitamin C, vitamin A equivalent, and beta-carotene, and it still contains a respectable amount of vitamins B2, B6, and vitamin E.


The leaves of Arugula will grow a rosette about a food wide and equally as tall.  Another benefit:  It's a cut-and-come again plant!

Arugula Basics


aka  Rocket Roquette 
Cool-season annual plant which is fast growing.
Height:  6-12"       Width 8-10"


Types:

Wild Arugula.  Grows up to 2' tall with jagged leaves and a yellow flower.


Rocket Salad.  A weaker peppery flavor.  The plant grows up to 3' tall.  It has lobed leaves and a white flower.


Starting Seeds of Arugula


Seed Depth:                    1/8" on the soil surface and tamp down.
Seed Spacing:                 3-4"  Thin to 4-6".
Days to Germinate:          7-14 days.
Days to Harvest:              3 weeks/baby leaves,  45 days mature.
Seed Longevity:               4 years.


Sowing Outdoors


Direct sow in the ground or in containers as early as when the soil temperature is 40+ degrees.


Winter Sowing


If you haven't tried winter sowing, you're in for a treat.  This method is especially good for sowing herbs and greens.  Winter sowing is basically sowing seeds in the bottom of a milk jug during the winter, setting the milk jugs outside for the winter and leaving them there until the seeds germinate in Spring.

To see our detailed article about Winter Sowing, click here.

To watch our 30 minute video on how to winter sow, click here.


Growing Arugula


Growing Temperature: 
    
Arugula is frost hardy enough that it can grow through the winter in a cold frame or unheated greenhouse.

Plant Spacing:                  12-18" apart.
Container Size:                 8" depth is enough.
Sun/Shade:                       Full sun, some mid-day shade.
Soil:                                   Rich, compost.
Watering:                           Consistent moisture for best flavor.


Fertilizing:

Since greens are such a  fast-growing crop, as long as they are grown in rich soil there may be little need for further fertilization.    That said, a liquid balanced fertilizer when the seedlings are 4" tall will give your greens a boost and carry them through their short season.  After the temperatures warm, though, the leaves of Arugula will turn bitter and no amount of fertilizer will help at that point.


Harvesting Arugula

Harvest when leaves are 4-6" tall.  Harvest outer leaves.  Harvest until leaves taste too strong.  Harvesting often will encourage new growth.


Using Arugula

  • A great addition to any salad, but use sparingly for a mustard-like flavor.
  • Pizza toppings.
  • Add Arugula flowers to salads in late spring and summer for their peppery flavor.
  • Cook larger leaves with other greens.
  • Small leaves tend to be milder while the larger has a more peppery taste.
  • Arugula goes well with most meats, especially grilled meats.

Storing Arugula For Later Use

Remove Arugula's tough stems, clean and dry.
Although tender green-leafed plants, like lettuce, cannot be preserved well, the thicker leafed greens can be preserved.

Fresh
  • Clean and pat dry.  Bundle stems lightly, place on a paper towel (to absorb moisture) and wrap in a plastic bag.  Keeps in refrigerator for 10 days.
  

Freezing for Later Use in Chilis, Soups, Sauces, and Casseroles.
  • Steam or saute' leaves, chop them and store in freezer bags.
  • Puree with water and freeze into ice cube trays.
  • Clean and dry the leaves and store in quart size freezer bags.
  • Frozen leaves will keep for 6 months.
  • Blanching the leaves for two minutes first will extend freezer storage to 14 months.

~~~~~~~~~~~~~~~~~~~~~~~~~~~~~~~~~~~~~~~~~~~~~~~~~~~~~~~~~

Start growing Arugula for your flock! They will love you for it!


~~~~~~~~~~~~~~~~~~~~~~~~~~~~~~~~~~~~~~~~~~~~~~~~~~~~~~~~~~~~~~~~~

Back to Our Blog Homepage!

This post may contain some Amazon Associate links meaning that I will get a small compensation at no expense to you if you purchase something from this blog.

Growing Herbs for Chickens -- Basil.


Chicken feed isn't cheep! Luckily, there are some ways you can reduce your bagged chicken feed bill.
Feeding your hens food scraps from your leftover meals is certainly one. But for putting a bigger dent in that feed bill, grow some healthy feed alternatives right there in your backyard or homestead.


Herbs are a wonderful choice to grow for your chickens. Not only do chickens like to eat many different herbs, but most herbs have some other uses you may want to try in the chicken coop and run.


            Why Feed Chickens Basil?


Basil is a nutritionally-dense herb that is high in plant protein.


Basil has antibacterial properties and a wide range of vitamins, minerals, and immune system boosting antioxidants.


Basil supports a strong immune system and aids in improving digestion, which is very important for chicken health.


Basil promotes mucus membrane and respiratory system health. This is important for chickens because they are particularly susceptible to respiratory issues, especially if the chicken run and coop aren’t large enough and/or aren’t cleaned often.


Add some crushed Basil to your chicken feed and watch their egg yolks turn a radiant orange.


Basil contains vitamins A, B, C, and K which help maintain good eyesight and strong bones.


How to Prepare Basil for Chickens

Fresh

A gathering of fresh basil in reach of chickens to peck at.


Drying Basil for Later Use

Air Drying

This method is the easiest, but is the longest way to dry basil.  You can tie the basil into small bundles and hang them upside down in a well-ventilated area, away from direct sunlight, until the leaves and stems are completely dry.

Oven Drying

Spread into a single layer on the dehydrator trays and dry for 2 to 4 hours until they are completely dry and brittle.  You can leave the oven door slightly open so all the moisture escapes.  

Dry for about two hours.  Don't forget to check on the leaves every 30-45 minutes.

You can leave the door slightly ajar so all the moisture escapes. Dry for about 2 hours, checking on the leaves every 30-45 minutes.  


Dehydrator Drying


Preheat the food dehydrator to 95 - 115F.  The temperature, humidity, and dehydrator model will determine how long you need to dehydrate the basil.  You'll need to keep an eye on the leaves.

To watch our 30 minute video on how to winter sow, click here.


How Much Basil is Safe for Chickens?


As with all chicken feed alternatives, begin by feeding in moderation. Your chickens will let you know which alternatives are their favorites!


Basil to Deter Pests in the Coop 


Pests don’t like aromatic herbs, so adding Basil throughout your chicken coops keeps many pests away.

In the nesting box, dried Basil acts as a pleasant odor control.  An electric herb grinder works wonders!


Where to Grow Basil


You can grow some herbs like Basil inside your chicken run by sowing seeds inside a wire fence circle like the above picture. It will keep your chickens from digging the plants right out of the ground until it's time to remove the fencing and let them feast!


Herbs are great plants to grow in pots and containers which can easily be moved right into the chicken run when ready to feed.


You can also designate a few raised garden beds for growing great food for your chickens so there's always some healthy foods available to toss in and watch the show!

~~~~~~~~~~~~~~~~~~~~~~~~~~~~~~~~~~~~~~


When you add herbs to other chicken food and their coop, you're assuring your chickens will maintain better overall health.


So save money on that ever-rising cost of chicken feed and grow some healthy alternatives for your hens and roosters. They will love you for it!


~~~~~~~~~~~~~~~~~~~~~~~~~~~~~~~~~~~~~~~~

This post may contain some Amazon Associate links meaning that I will get a small compensation at no expense to you if you purchase something from this blog.


Growing Parsley for Chickens!


Parsley is a tender herb with soft stems and leaves.  It is popular for many reasons including its variety of uses, vitamin content and its ability to grow and give you a flavorful harvest even after a light snowfall.  Parsley has a light, peppery flavor that complements other seasonings.


Great Herb to grow for your Hens!


Parsley is the perfect addition to your chickens diet as it is rich in vitamins, promotes circulatory system development, and is a strong stimulate for laying.


 While they may not take to it at first, there are a few different ways you can incorporate parsley into your girls diet. Adding it fresh and chopped up to their layer feed is the best and easiest option (they will hardly even tell!) or you can try leaving a pot in the run for them to peck at the leaves, or scattered around the coop-it’s all down to your chickens preference!


Parsley is high in nutrients and vitamins and can help with blood vessel development. You can feed chickens parsley fresh or add it to their feed dry.


Types of Parsley

Curly Leaf Parsley.   Deep curled leaves and attractive appearance.  Only used as a garnish.


Flat Leaf Parsley (AKA Italian Parsley) Preferred by cooks for its flat, celery-like leaves.  Pleasant tasting foliage can be eaten fresh or added to recipes.  Single Leaf Italian Parsley has a rich flavor that is best for seasoning cooked dishes.  


Giant of Italy Parsley.  Huge, dark green leaves with great flavor.  Strong, upright stems make this one of the best parsley varieties for fresh-market sales.


Starting Parsley from Seed

Parsley is slow to germinate, but after you do get it to the plant stage, it's not fussy at all.  To speed up this process, soak or refrigerate the seeds for a day before sowing them.

Seed Longevity:                                       2-3 years.
Seed Sowing Depth:                                1/4”.
Best Soil Temp for Germination:            65 – 85 degrees.
Days to Germination:                               21+ days.


            Spring Sowing                                             

Direct sow 4-6 weeks before the last frost date or as soon as the soil can be worked, or sow indoors 6-8 weeks before the last frost date. 


Winter Sowing

If you haven't tried winter sowing, you're in for a treat.  This method is especially good for sowing herbs.  Winter sowing is basically sowing seeds in the bottom of clear milk jugs in the winter, setting the milk jugs outside for the winter and leaving them there until the seeds germinate in the Spring.

For our article containing detailed information about Winter Sowing, click here


To watch our 30 minute video on how to winter sow, click here.


             Other Sowing Tips                                   

You can also start seeds in a pot in late summer and grow the plant outside until the first frost, then bring the plant indoors.


Growing Parsley

Plant Size:    12-18” Height.
Growing Soil Temperature:     60 – 65 degrees.
Spacing:     9-12”.
Container Size:  6-18” in diameter   12” deep.                          
For fresh parsley all winter long, transplant one or two plants in a 10” container in late Fall and grow in a sunny window.

Soil:     Fertile, slightly acidic to slightly alkaline.
Watering:    Light.  Parsley has shallow roots.
Light/Sun:   Full sun to light shade.
Fertilizer:     None.
Good Companions:   Asparagus, corn, pepper, tomato.

Other Care Tips:
Keep roots cool and moist by mulching.
In September, cut back plants set out in spring to promote new foliage.


Dividing Parsley


Dig up the Parsley plant.  Locate the older growth which will have a slightly darker hue.  This growth is vital to the plant.  Divide into thirds and replant at the same depth.  Do not harvest sections again for at least 3 weeks.


Cuttings of Parsley


Take cuttings in spring when new growth is several inches in length.  Side shoots of 4" in length are perfect. Cut the stem at an angle and remove lower leaves leaving an inch or two of the stem bare.  Plant cutting bare side down into a  well-drained soil mix.  No fertilizer is needed at this stage.

Wrap the container in plastic to keep in humidity.  Avoid having the leaves touch the plastic.  Place the pot in light but out of direct light.  Keep soil moist but never soggy.  Remove the plastic when cutting grows roots.  A light tug that yields some resistance will let you know that roots have formed.


Harvesting Parsley

Harvest Parsley as needed, starting with the larger outer leaves.  You can also harvest the long stems with the leaf blades.  You can cut above the soil level for a bunch and it will grow new foliage.


Harvesting Parsley Seed

Parsley does not go to seed the first year.  Harvest the Parsley seeds of second-year plants when they have turned dark brown.  If the seeds are harvested earlier, they may not be viable.  Shake seeds off the seed heads and into a paper bag to dry.  You can also pluck out seeds as they turn brown as they tend to ripen at separate times.


Storing Parsley

Fresh
Bouquet Storage

This method works well for tender herbs with soft stems and leaves.
  • Clean and thoroughly dry the herb.  
  • Trim the end of the stems and remove any wilted or browned leaves.  
  • Fill a Mason jar or clear glass with 1" of water.  
  • Place the herbs in the jar like a bouquet of flowers
  • Loosely cover with a plastic bag or cling wrap.  Label and store in the fridge.

Parsley will stay fresh in the fridge with this method for 3 weeks.


Freezing Parsley

For best results, use frozen Parsley within 1-2 years. 
By freezing herbs, you will lose some of the herb's texture but preserve the flavor. 

Here are a few freezing options to consider:

Tray Freeze

Spread herb onto a cookie sheet on a single layer. Freeze in the freezer, then transfer the herbs into a labeled freezer bag to store.  Since the leaves are frozen separately, you can easily remove the amount you need.


Ice Cube Trays

Clean and thoroughly dry herbs.  Mince and pack herbs into ice cube trays 3/4 full.  Add water to fill and freeze.  Transfer frozen cubes into a labeled freezer bag to store.


Flat Freezer Bag

Clean and thoroughly dry herbs.  Chop herb into 1/2" pieces, place in a labeled freezer bag. Squeeze out the air, lay flat and freeze.


Drying Parsley

Hang to Dry

Pick your herbs in bunches right before you intend to store them.  Tie the bottom of the bunch together with twine and hang upside down to dry in a dry, low humidity area. For added protection against dust, you can put the bundles inside paper bags with plenty of holes for ventilation.  When the herbs are dry, the leaves will crumble easily between your fingers.  Store in an air tight container.  For best results, use dried Parsley within 1-2 years.


Dehydrate Parsley in Dehydrator


~~~~~~~~~~~~~~~~~~~~~~~~~~~~~~~~~~~~~~~~~~~~~~~~~~~~~~~~~~~~~

Growing herbs for your egg-laying flock is fun, easy, more healthy than the herbs shipped to grocery stores, and what's best, saves you tons of money! Try it today!

~~~~~~~~~~~~~~~~~~~~~~~~~~~~~~~~~~~~~~~~~~~~~~~~~~~~~

This post may contain some Amazon Associate links meaning that I will get a small compensation at no expense to you if you purchase something from this blog

Featured Post

Welcome!

Thanks to you, we've hit over 1.7 MILLION pageviews!   Homesteading is a journey, an adventure, and an ever-evolving quest to make our h...