Fall Care for Hosta Plants
With fresh air and fewer insects and plant diseases to worry about, Fall is a pretty great time in the garden.
But for hostas, those beautiful leaves are beginning to die back making the plant look a bit ragged, but the plant is just conserving energy and getting ready for their winter sleep where they will await warm Spring temperatures.
Here are some ways that you can care for your hostas during the Fall season.
Water
As long as the hosta leaves are green, when there's a lack of rainfall, the hosta plant will need to be watered at the base, even in the Fall.
This is because when a hosta emerges in the Spring, it is emerging on the energy and food reserves that the plant stored in its rhizome late the previous Summer and Fall. If the hosta received sufficient water in late Summer and Fall, it should emerge the next spring as a larger plant because it was able to store away more energy than it used.
Try Audible and Get Two Free Audiobooks
However, a hosta that does not receive adequate moisture in late Summer and Fall cannot build up the energy reserves it needs to increase in size. The result is a hosta that emerges the following Spring smaller than it was the year before.
Multiple unusually dry Summers or Falls in a row can be especially devastating for hostas, as they are unable to replenish their depleted energy reserves.
An investment in a good soaker hose is a great idea. This is the type I use around the hosta farm. I just move it around to any area that needs some extra water.
Fertilizer
Your hostas need no further fertilizer than what they were given in the Spring and early Summer. As a rule, stop fertilizing hostas two months before your expected first frost date. This will aid the hostas in preparing for their winter dormancy.
Dividing
You can divide your hostas in early Fall, up to six weeks before your average first frost date.
For our full article on when to divide hostas, click here.
Other Care Tips for Fall
Some gardeners prefer to mark the spot where the hosta will come up next spring. A small heavy rock next to each crown works well.
Since slugs produce eggs in the Fall, this is a good time to apply a slug killer. For more detailed information about slugs in the garden, click here.
Cutting Back
As the greenery dies back in the Fall, you have one of two choices:
1. Leave it be. The dead foliage does provide an extra layer of mulch, so many gardeners feel that removing the dead foliage is unnecessary.
2. Remove your dead foliage before the first frost and discard. (Do not compost.) This will help remove nematodes, slugs, and any diseased leaves. First, disinfect the scissors or knife you're using between cuttings with a solution of 10% bleach 90% water.
Water
Hostas in pots that are stored in an unheated space for the winter could dry out completely. Check pots once a month during late Fall and add a little water if the soil is very dry.
The most important time to check on the soil is right after you've stored them until the hard frosts hit, and then in early Spring as it warms up. Once it's the dead of winter, no care is needed. Do not water over frozen soil.
Protection
There are several ways to protect your hostas in pots over the late Fall and Winter months. The key is to keep the hostas away from overhead moisture and to protect them from sudden swings in temperature.
There are several ways to do this:
- Move them to an unheated garage or shed.
- Bury the entire pot or group of pots in the ground or cover the group with leaves.
- Large potted hostas will normally overwinter well in place with an additional layer of mulch on top of the soil. They can be huddled together out of direct sun.
- After the soil is nearly frozen, you can tip the pots over on their sides to give them extra protection from overhead moisture.
- More labor-intensive, but if you have a prized hosta in a pot, you can plant it in the ground and repot it again the next Spring.
Giving your hostas some Fall love can ensure your hostas come back in the spring beautiful and healthy!
~~~~~~~~~

Have You Tried Winter Sowing??
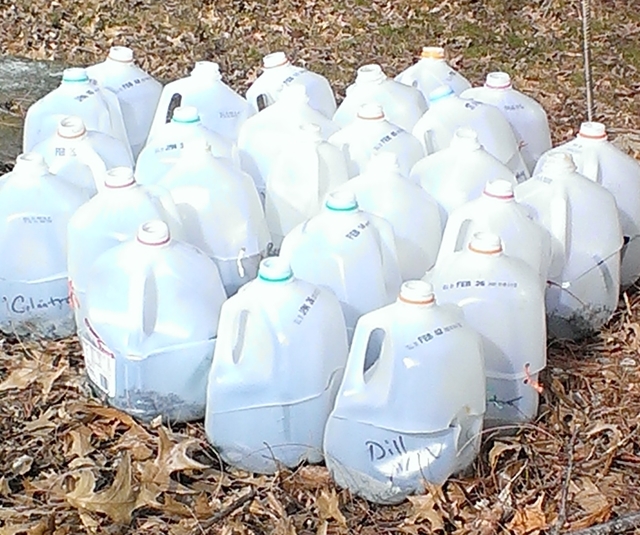
If you haven't tried winter sowing, you're in for a treat. This method is especially good for sowing herbs. Winter sowing is basically sowing seeds in the bottom of milk jugs in the winter, setting the milk jugs outside for the winter and leaving them there until the seeds germinate in the Spring.
For our article containing detailed information about Winter Sowing, click here.
To watch our 30 minute video on how to winter sow, click here.
Hit the "Follow" Button on our Home Page
This post may contain Amazon affiliate links and as an Amazon Associate I earn from qualifying purchases without costing you anything extra.
This post may contain Amazon affiliate links and as an Amazon Associate I earn from qualifying purchases without costing you anything extra.


.png)


No comments:
Post a Comment
Note: Only a member of this blog may post a comment.