Thursday, September 9, 2021

Growing Oregano - Homesteading 101


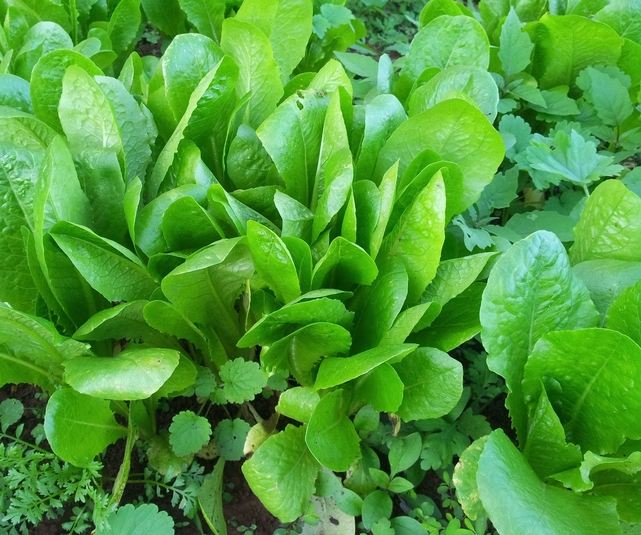
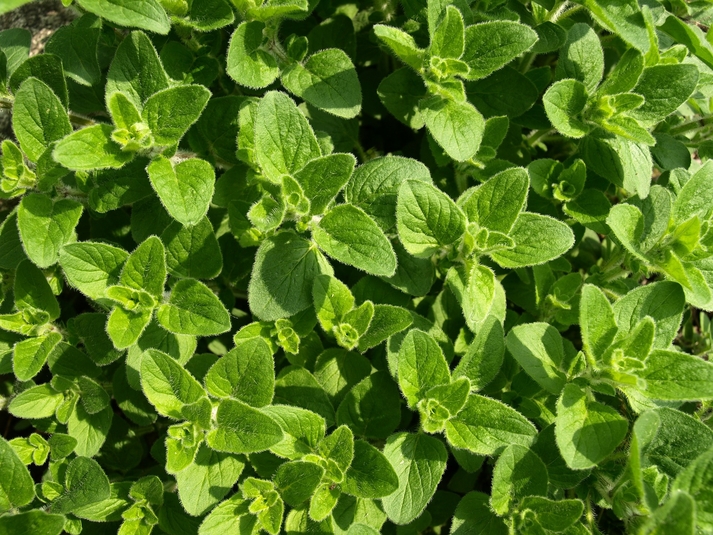
A hardy perennial in Zones 5 – 10 gardens, Oregano is a pungently aromatic plant that is one of the most important herbs in Italian, Greek and Mexican cooking.  It has a bold flavor and a hardy constitution.  It is also called Wild Marjoram.

The flavor of Oregano can vary greatly from variety to variety.  Greek Oregano is the spiciest. 


Starting Oregano From Seed

Seed Longevity:                                   One Year.
Seed Sowing Depth:                            Just cover.  Needs light to germinate.
Best Soil Temp for Germination:          60 degrees.
Days to Germination:                           7 - 14.
Spring Sowing:                                    Sow indoors 8-10 weeks before last frost.                                                                Direct sow 2 weeks before last frost.
Fall:                                                      Not recommended.
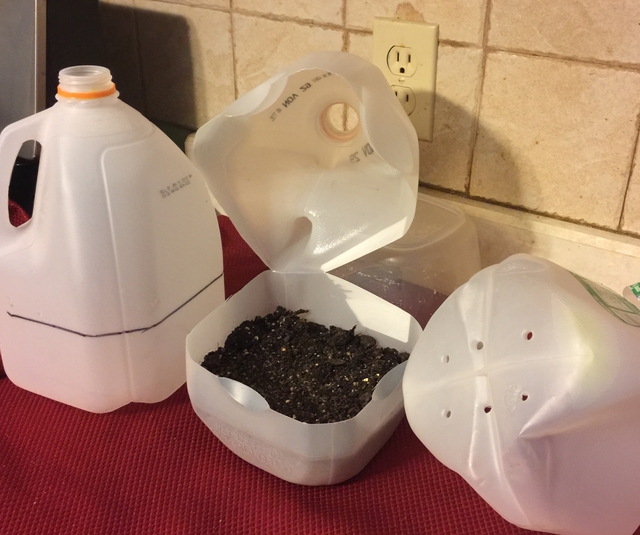


Winter Sowing

If you haven't tried winter sowing, you're in for a treat.  This method is especially good for sowing herbs.  Winter sowing is basically sowing seeds in the bottom of milk jugs in the winter, setting the milk jugs outside for the winter and leaving them there until the seeds germinate in the Spring.

For our article containing detailed information about Winter Sowing, click here.


            Other Sowing Tips                               

At 6” tall, thin seedlings to 12” apart.
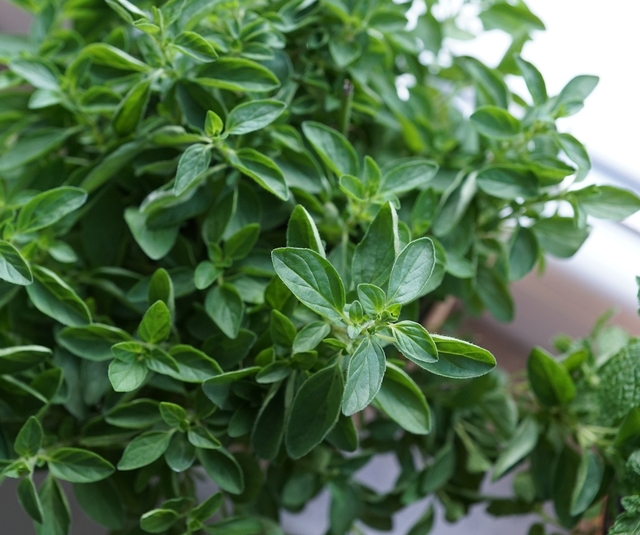

Growing Oregano

Plant Size:                                                   Height 8-12” Spread 24”.
Spacing:                                                      18”.
Container Size:                                            12" diameter and  8+” deep.
Soil:                                                              Well-drained.
Watering:                                                      Thoroughly, less often. 
Light/Sun:                                                     Thrives in warm, sunny spots.
Fertilizer:                                                       None for the best-flavored foliage.
Good Companions:                                       Everything.  
Bad Companions:                                          Nothing.


                                Other Care Tips                                       

  • Flowers should be pinched off to keep the plants bushier and prevent them from early bolting.
  • Allow plants to grow to 4” tall then trim lightly to encourage branching.
  • Regular trimming will avoid plant legginess.                               


Dividing Oregano

Divide Oregano plants when the stems begin to die out or the stems become woody, or to simply make more plants. 


Soft Cuttings

Take cuttings in spring when new growth is several inches in length.  Side shoots of 4" in length are perfect. Cut the stem at an angle and remove lower leaves leaving an inch or two of the stem bare.  Plant cutting bare side down into a well-drained soil mix.  No fertilizer is needed at this stage.

Wrap the container in plastic to keep in humidity.  Avoid having the leaves touch the plastic.  Place the pot in light but out of direct light.  Keep soil moist but never soggy.  Remove the plastic when cutting grows roots.  A light tug that gives you some resistance means it has rooted.


Overwinter Plant Care

Oregano plants should be cut back to ground level and covered with a layer of mulch.  Containers can be brought inside for the winter.


Harvesting Oregano

As soon as the leaves are large enough to use and before the plant flowers.
Snip the leaves individually or shear plants to 2” above ground level just before flowering and again a month before the first frost.  You'll get two harvests that way.


Harvesting Oregano Seed

Oregano seeds are tiny and develop after the flowers fade in late summer or fall.  Collect and thoroughly dry seeds before storing them in an airtight container.


Storing Oregano


Fresh
Damp Paper Towel

This method works well for hardy herbs that have woody stems as well as a few soft-stemmed herbs.

Clean and thoroughly dry the Oregano.  Arrange lengthwise in a single layer on a slightly damp paper towel.  Loosely roll up the herb and transfer to a plastic bag or plastic wrap.  Label and store in the fridge. 

Oregano will stay fresh in the fridge using this method for up to 2 weeks.
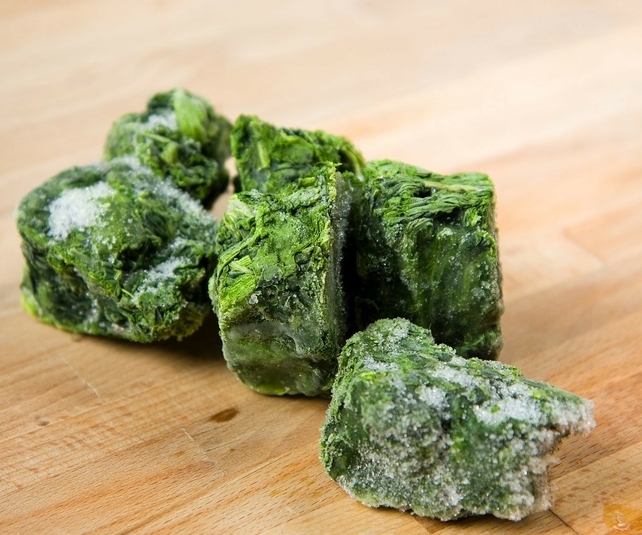

Freezing

For best results, use frozen Oregano within 1-2 years.
By freezing herbs, you will lose some of the herb's texture but preserve the flavor.
Here are some freezing methods:

Tray Freeze

Spread herb onto a cookie sheet on a single layer. Freeze in the freezer, then transfer the Oregano into a labeled freezer bag to store.  Since the leaves are frozen separately, later you can easily remove the amount you need.

Ice Cube Trays with Oil

This method works well for hard-stemmed herbs that would probably be cooked when adding to a dish.  The oil reduces some of the browning and freezer burn.
Clean and thoroughly dry the Oregano.  Mince and firmly pack herbs into an ice cube tray 3/4 full.  Add Olive Oil to fill and freeze.  Transfer frozen cubes into labeled freezer bags to store.


Flat Freezer Bag

Trim off the stems and place in a labeled freezer bag.  Squeeze out the air, flatten the freezer bag, label and store.
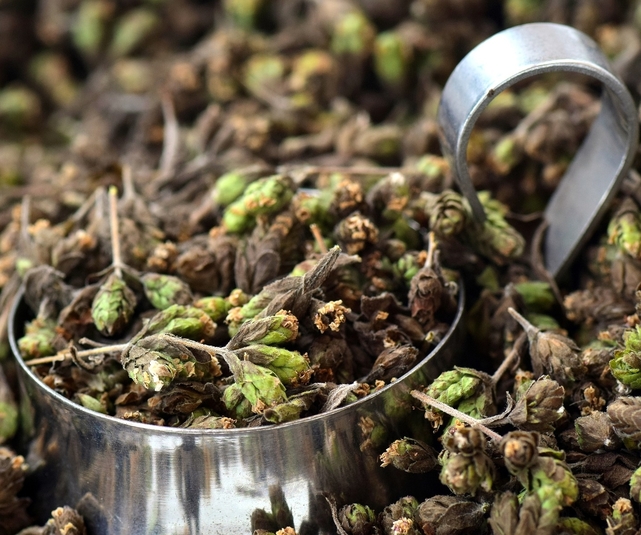
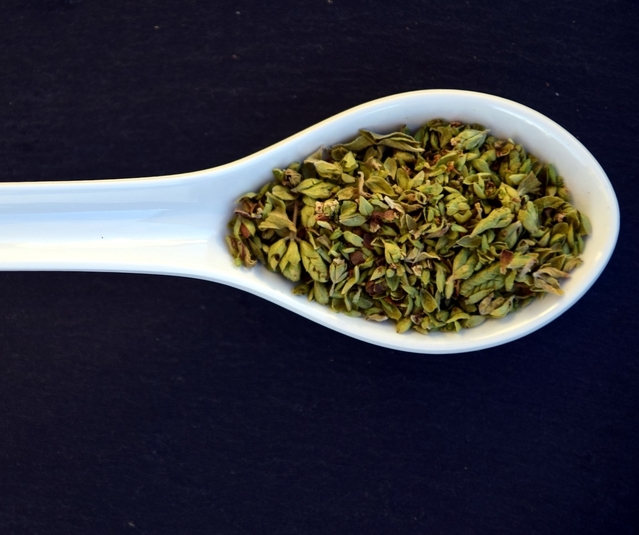


Drying Oregano

Oregano is one of the best herbs to use in a dried form.  For best results, use dried Oregano within 1-2 years.
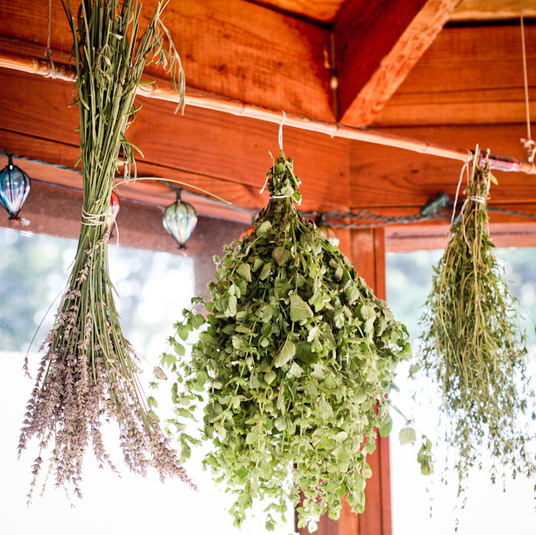

Hang to Dry

Pick your Oregano in bunches right before you intend to store them.  Tie the bottom of the bunch together with twine and hang upside down to dry in a dry, low humidity area. For added protection against dust, you can put the bundles inside paper bags with plenty of holes for ventilation.  When the herbs are dry, the leaves will crumble easily between your fingers.  Store in an air tight container.


Using Oregano


  • Oregano adds zest to pasta and pizza sauces.
  • It complements meats and vegetables.
  • Garlic, onion, thyme, basil, parsley and olive oil are complementary partners.
  • Makes a great ground cover.

Growing your own herbs is fun, easy, more healthy than the herbs shipped to grocery stores, and what's best, saves you tons of money! Try it today.


Where to go next!

Great Garden Articles -- Full List!
Follow us on Pinterest!
Back to Our Blog Homepage!


This post may contain some Amazon Associate links meaning that I will get a small compensation at no expense to you if you purchase something from this blog.


Sunday, August 8, 2021

Winter Sow Your Vegetable Seeds!


Winter Sow your Vegetable Seeds!


First off, if you are unfamiliar with the basics of winter sowing, you may want to start with the Winter Sowing 101 article, then come back for the vegetable sowing specifics.

Wednesday, August 4, 2021

Growing Endive - Homesteading 101


aka Frisee
Annual Plant related to Chickory
Height:  6-12"       Width:  6-12"
Endive and Escarole are different forms of the same plant.  Endive has curly or crinkly-edged leaves and a sharp, somewhat bitter taste.  Escarole is a type of Endive which is hardier with flat, somewhat thicker leaves and a less bitter flavor.

Types:
- Curled Endive with pointy leaves.
- Smoother-leafed Escarole


Starting Seeds of Endive/Escarole

Seed Depth:                   1/4" deep.
Seed Spacing:                3 seeds per inch.
Days to Germinate:         5-7 days.
Days to Harvest:             45 days as baby greens.  60-100 days as mature heads.
Seed Longevity:              4-6 years.

Sowing Indoors:
Spring:  Sow 8 weeks before your average last frost date.

Sowing Outdoors:

Spring:  Direct sow as soon as the ground can be worked.

Fall:  Direct sow 15 weeks before the first expected frost date.


Salad Spinner


Winter Sowing:

If you haven't tried winter sowing, you're in for a treat.  This method is especially good for sowing herbs and greens.  Winter sowing is basically sowing seeds in the bottom of a milk jug during the winter, setting the milk jugs outside for the winter and leaving them there until the seeds germinate in Spring.
For our detailed article about winter sowing, click here.


Salad Tongs


Growing Endive/Escarole Plants

Growing Temperature:       Can take temperatures as low as 20 degrees.
Plant Spacing:                   8-12".
Container Size:                  12" deep.
Sun/Shade:                        Full sun to part shade.
Soil:                                   In poorer soils, add fish emulsion or seaweed.
Watering:                          Consistent moisture for best flavor.
                                          Light moisture when grown in a cold frame.


Try Audible and Get Two Free Audiobooks


Fertilizing:


Since greens are such a fast-growing crop, as long as they are grown in rich soil there may be little need for further fertilization. That said, a liquid balanced fertilizer when the seedlings are 4" tall will give your greens a boost and carry them through their short season. After the temperatures warm, though, the leaves of Endive will turn bitter and no amount of fertilizer will help at that point.


Salad Lunch Container


Growing Tips

Looseleaf varieties can survive winter if given some sort of protection like an unheated greenhouse.  If you leave undamaged roots and 1 inch of stem, new growth may appear in warmer weather.
Fall plants that are subjected to a few light touches of frost have a richer, less bitter flavor than spring-grown plants.


Harvesting Endive/Escarole

Harvest as soon as the outer leaves are of usable size.  Gather leaves as needed or cut the whole plant at the soil level.   Harvest all before the first frost.


Using Endive/Escarole

  • Leaves are best used fresh.
  • Endive begins to turn pale green and taste bitter when exposed to light.

Storing Endive/Escarole For Later Use

Although tender green leaves, like Lettuce, can't be preserved well, the thicker leaved greens can be.


Fresh

  • Clean and pat dry.  Bundle stems lightly, place on a paper towel (to absorb moisture) and wrap in a plastic bag.  Keeps in refrigerator for 10 days.


Freezing for Later Use in Chilis, Soups, Sauces, and Casseroles.
  • Steam or saute' leaves, chop them and store in freezer bags.
  • Puree with water and freeze into ice cube trays.
  • Clean and dry the leaves and store in quart size freezer bags.
  • Frozen leaves will keep for 6 months.
  • Blanching the leaves first will extend freezer storage to 14 months.


To read the other articles in our Growing Your Greens series, click on the name below:


Swiss Chard


Where to go next!

Great Garden Articles -- Full List!
Follow us on Pinterest!
Hit the "Follow Button" Our Blog Homepage!


This post may contain some Amazon Associate links meaning that I will get a small compensation at no expense to you if you purchase something from this blog.


Tuesday, August 3, 2021

Growing Thyme - Homesteading 101


The perennial shrub thyme certainly deserves a place in every herb garden.  Not only is it one of the most useful plants in the kitchen, but it also has attractive foliage, long-lasting flowers and it's an easy-to-care-for compact plant.  English Thyme is used most often in cooking.

Types of culinary Thyme include Thymus Vulgaris, also referred to as Common Thyme, and include summer, winter, and French Thyme. 


Starting Thyme From Seed

Thyme seeds are difficult and slow to germinate, but it can be done.  It will take a year to get a good-sized plant.

Seed Longevity:                                           2 years.
Seed Sowing Depth:                                    Cover thinly.
Best Soil Temp for Germination:                  70 degrees.
Days to Germination:                                    7-10+ days.


Herb Scissors


Herb Mincer


Spring Sowing


Sow indoors 6-10 weeks before the last spring frost.   Plant outside 2-3 weeks before the first last spring frost.


Winter Sowing


If you haven't tried winter sowing, you're in for a treat.  This method is especially good for sowing herbs.  Winter sowing is basically sowing seeds in the bottom of milk jugs in the winter, setting the milk jugs outside for the winter and leaving them there until the seeds germinate in the Spring.

For our article containing detailed information about Winter Sowing, click here


Growing Thyme

Plant Size:                                                     Height 6-12”   Width 12”.
Growing Soil Temperature:                           70 degrees.
Spacing:                                                         12”.
Container Size:                                              Height:  6-8”   Width:  4 – 12”.
Soil:                                                                Well-drained.  Rich soil produces large plants that are less fragrant.
Watering:                                                      Light.
Light/Sun:                                                     Full Sun.
Fertilizer:                                                      Very little, not necessary.
Good Companions:                                      Cabbage, Tomato, Eggplant.
Bad Companions:                                        Onion family.


                       Other Care Tips                                            

  • Trim leggy plants.
  • Lightly mulch after ground freezes.

Dividing Thyme

Divide Thyme after three or four years when the plant becomes woody.


Softwood Cuttings of Thyme

Take cuttings in spring when new growth is several inches in length.  Side shoots of 4" in length are perfect. Cut the stem at an angle and remove lower leaves leaving an inch or two of the stem bare.  Plant cutting bare side down into a well-drained soil mix.  No fertilizer is needed at this stage.

Wrap the container in plastic to keep in humidity.  Avoid having the leaves touch the plastic.  Place the pot in light but out of direct light.  Keep soil moist but never soggy.  Remove the plastic when cutting grows roots.  A light tug that gives you some resistance means it has rooted.


Harvesting Thyme

Harvest only lightly the first year.  The best flavor is mid-June and July or when the flowers are barely open.

Peel off leaves from the woody stem.  The stems from younger Thyme can be used as well as the leaves.  An established plant will keep coming back.


Harvesting Thyme Seeds

Shake the dry seed head to shake the seed free.  If they are ripe they will fall out.  If you break up the dried seed head, separating the seeds from the chaff will be time-consuming.

Storing Thyme


Fresh
Damp Paper Towel

This method works well for hardy herbs that have woody stems as well as a few soft-stemmed herbs.

  • Clean and thoroughly dry the Thyme.  
  • Arrange lengthwise in a single layer on a slightly damp paper towel.  
  • Loosely roll up the herb and transfer to a plastic bag or plastic wrap.  
  • Label and store in the fridge. 
Thyme will stay fresh in the fridge using this method for 2 weeks.


Freezing Thyme

For best results, use frozen Thyme within 1-2 years.
By freezing herbs, you will lose some of the herb's texture but preserve the flavor.  

Here are a few freezing options to consider:

Tray Freeze

Strip leaves off the stems and spread onto a cookie sheet on a single layer. Freeze in the freezer, then place in a labeled freezer bag to store.  Since the leaves are frozen separately, you can easily remove the amount you need.

Ice Cube Trays with Oil

This method works well for hard stemmed herbs that would probably be cooked when adding to a dish.  The oil reduces some of the browning and freezer burn.
Clean and thoroughly dry herbs.  Mince and pack herbs into an ice cube tray 3/4 full.  Add Olive Oil to fill and freeze. Transfer frozen cubes into labeled freezer bags to store.

Flat Freezer Bag

Trim off the stems and place them in a labeled freezer bag.  Squeeze out the air, flatten the freezer bag, label and store.


Drying Thyme

For best results, use dried Thyme within 1-2 years.
Thyme is one of the best herbs to dry.  For drying, harvest Thyme when plants begin to flower.


Hang to Dry

Pick the Thyme in bunches right before you intend to store them.  Tie the bottom of the bunch together with twine and hang upside down to dry in a dry, low humidity area. For added protection against dust, you can put the bundles inside paper bags with plenty of holes for ventilation.  When the herbs are dry, the leaves will crumble easily between your fingers.  Store in an airtight container.

Using Thyme

  • Thyme is an essential element in Creole, Cajun, Greek, and French Cuisine.
  •  Thyme can be paired with just about any kind of meat, poultry, fish or vegetable.
  • Thyme is usually incorporated during the cooking process as opposed to the last minute.


There's nothing like the aroma of fresh-picked herbs!  Try growing some today and save money!


Where to go next!

Great Garden Articles -- Full List!
Follow us on Pinterest!
Back to Our Blog Homepage!


This post may contain some Amazon Associate links meaning that I will get a small compensation at no expense to you if you purchase something from this blog.


Popular Posts