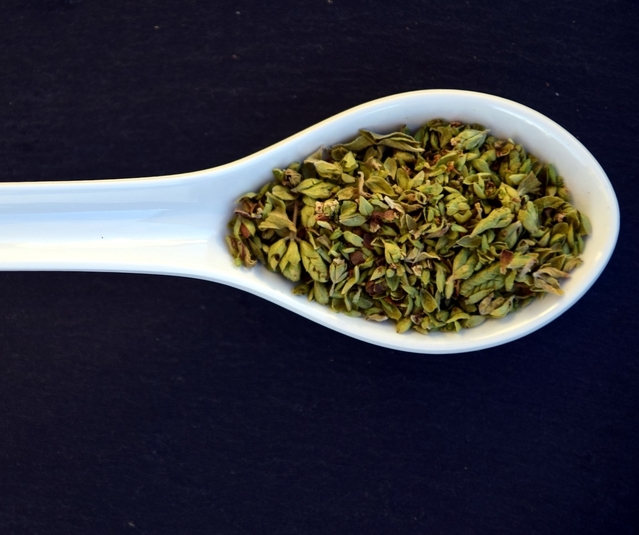
Growing Herbs for Chickens -- Sage


GROWING SAGE


Perennial Zones 4 – 8 (Hardiness Varies)

Sage is a shrubby perennial that’s an obvious choice for the kitchen.  From spring through mid-summer, Sage displays blue to lavender flowers which are very attractive to birds.  It has an earthy, rich, spicy flavor and it is part of the mint family.

The most popular types of culinary Sage are Garden Sage, Golden Garden Sage, Berggarten Garden Sage, Dwarf Garden Sage, Tricolor Garden Sage, and Window Box Sage.


GROWING SAGE FOR CHICKENS


Sage is a great herb for the overall health of your chickens. It acts as an antioxidant and can help combat salmonella. You can add this dried herb to your chicken's daily feed or give it to your flock fresh. 

Sage is a highly nutritious herb that provides several health benefits for chickens. Here are some of the nutritional benefits of sage for chickens:

Vitamins: Sage is a good source of vitamins that are essential for chickens, including vitamins A, K, and B-complex vitamins. These vitamins help promote healthy growth, strong bones, and a robust immune system.

Minerals: Sage is also a great source of several minerals that are vital for chickens, including calcium, iron, and magnesium. These minerals play a crucial role in the development of strong bones, healthy blood circulation, blood vessel development and proper muscle function.

Antioxidants: Sage is a rich source of antioxidants. These antioxidants help protect the cells from oxidative stress, which can cause cellular damage and increase the risk of chronic diseases.

Anti-inflammatory properties: Sage contains compounds that have anti-inflammatory properties. These compounds can help reduce inflammation in the body which can help alleviate pain and promote overall health.


Starting Sage from Seed

Seed Longevity:                                            2 years.
Seed Sowing Depth:                                     Surface, cover lightly.
Best Soil Temp for Germination:                   65 – 70 degrees.
Days to Germination:                                    15-21 days.

Spring Sowing:                                             

Sow Indoors 6 – 8 weeks before the last frost.  Transplant out after the last frost date.

Fall:    Not recommended.


Winter Sowing


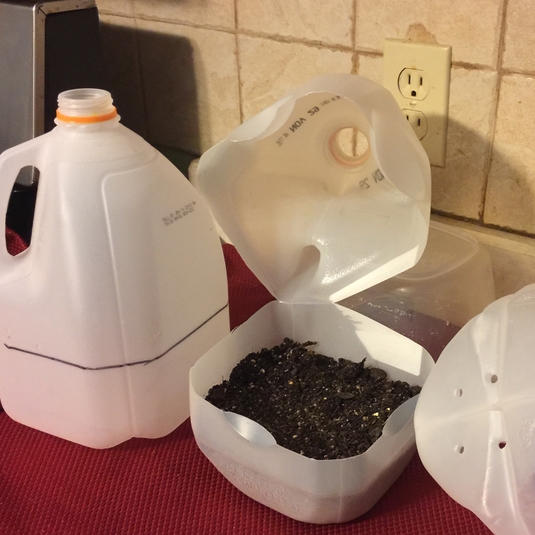
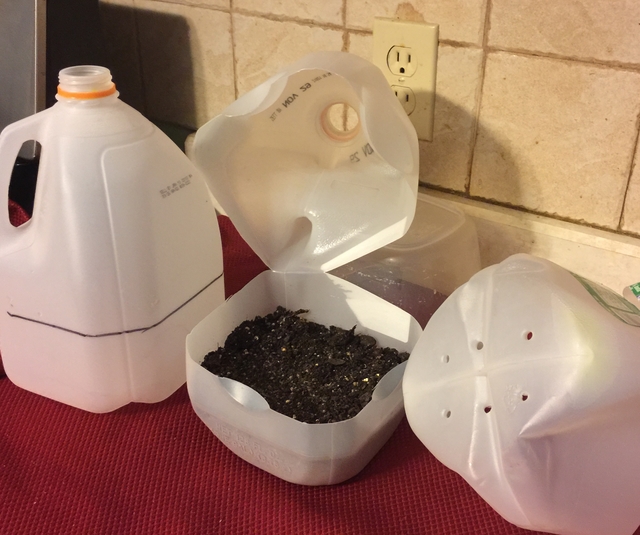
If you haven't tried winter sowing, you're in for a treat.  This method is especially good for sowing herbs.  Winter sowing is basically sowing seeds in the bottom of milk jugs in the winter, setting the milk jugs outside for the winter and leaving them there until the seeds germinate in the Spring.

For our article containing detailed information about Winter Sowing, see our separate article.

To watch our 30 minute video on how to winter sow, click here.


Growing Sage

Plant Size:                                                     1-3’ Height.
Growing Soil Temperature:                            55 – 80 degrees.
Spacing:                                                         12 - 18”.
Container Size:                                              12” x 12” good size for Sage.
Soil:                                                                Well-drained.                                                             
Watering:                                    Light, only during dry spells.  Avoid overwatering.
Light/Sun:                                    Full sun to light shade.
Fertilizer:                                      Add some compost throughout the year.

Other Care Tips:   

  • Prefers cool to warm temperatures and will need some shade during the hot weather.
  • The plant should be replaced every 4-5 years.
  • Remove flower spikes before they have a chance to flower.
  • After three years, trim off woody parts to encourage new growth.


Dividing Sage

Best to divide Sage every 4-5 years when the plant becomes woody.  Dig up the entire plant, and using a sharp shovel, divide it into sections.  Remove all woody parts and replant the tender sections planting at the same depth.


Softwood Cuttings of Sage

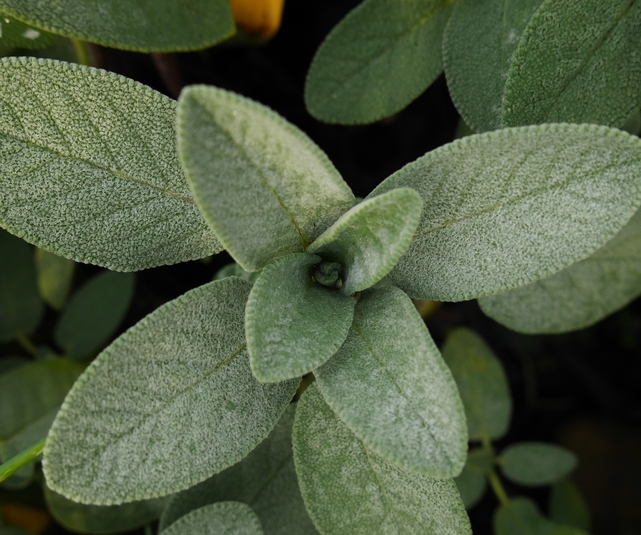
Take cuttings in spring when new growth is several inches in length.  Side shoots of 4" in length are perfect. Cut the stem at an angle and remove lower leaves leaving an inch or two of the stem bare.  Plant cutting bare side down into a well-drained soil mix.  No fertilizer is needed at this stage.

Wrap the container in plastic to keep in humidity.  Avoid having the leaves touch the plastic.  Place the pot in light but out of direct light.  Keep soil moist but never soggy.  Remove the plastic when cutting grows roots.  A light tug that gives you some resistance means it has rooted.


Harvesting Sage

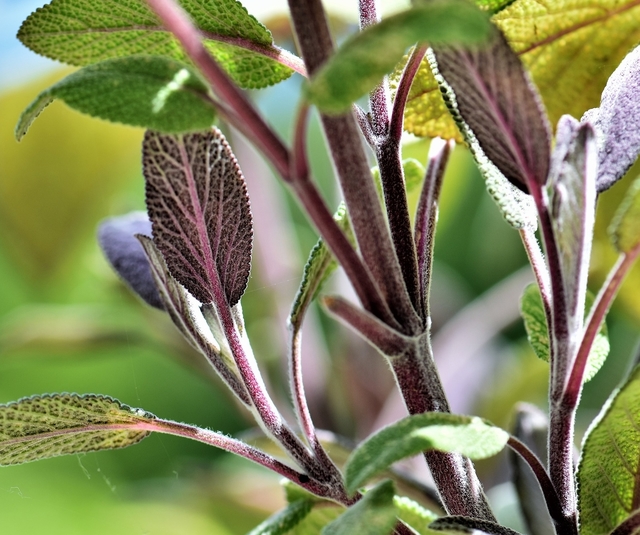
Start to harvest Sage once you see good growth on the plant.  Best harvested when tops of blossoms are barely open.  You can gather leaves at any time.  Sage is most flavorful as flowers begin to open. Purple-leaved Sage tends to be more aromatic than green-leaved Sage.


Storing Sage


Fresh
Damp Paper Towel

This method works well for hardy herbs that have woody stems as well as a few soft-stemmed herbs.

Clean and thoroughly dry the Sage.  Arrange lengthwise in a single layer on a slightly damp paper towel.  Loosely roll up the herb and transfer to a plastic bag or plastic wrap.  Label and store in the fridge.  Sage will stay fresh in the fridge using this method for up to 2 weeks.


Freezing

For best results, use frozen Sage within 1-2 years.  By freezing herbs, you will lose some of the herb's texture but preserve the flavor.  Here are a few freezing options to consider:

Tray Freeze

Strip leaves off the stems of the Sage and spread onto a cookie sheet on a single layer. Freeze in the freezer, then place it in a labeled freezer bag to store.  Since the leaves are frozen separately, you can easily remove the amount you need.


Ice Cube Trays with Oil

This method works well for hard-stemmed herbs that would probably be cooked when adding to a dish.  The oil reduces some of the browning and freezer burns.
Clean and thoroughly dry herbs.  Mince and firmly pack herbs into an ice cube tray 3/4 full.  Add Olive Oil to fill and freeze.  Transfer frozen cubes into labeled freezer bags to store.


Flat Freezer Bag

Trim off the stems and place them in a labeled freezer bag.  Squeeze out the air, flatten the freezer bag, label and store.
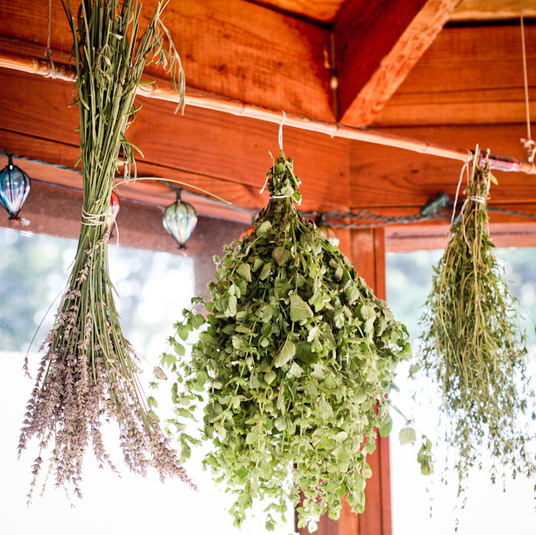


Drying

Sage contains more oil than most other herbs so it dries more slowly.  It is one of the best herbs to dry.   For best results, use dried Sage within 1-2 years.


Hang to Dry

Pick your Sage in bunches right before you intend to store them.  Tie the bottom of the bunch together with twine and hang upside down to dry in a dry, low humidity area. For added protection against dust, you can put the bundles inside paper bags with plenty of holes for ventilation.  When the herbs are dry, the leaves will crumble easily between your fingers.  Store in an airtight container.


Using Sage

  • Sage can be overwhelming so start with small amounts.
  • Use leaves fresh in recipes or add them sparingly to salads.
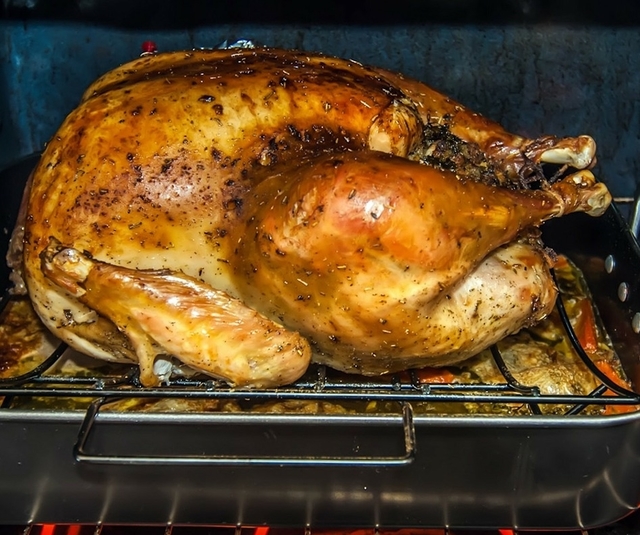
  • Dried sage is commonly used with Thanksgiving stuffing. 
  • It can be paired with pork, beans, potatoes, and cheese. 
  • You can mix it into a soft cheese for a tasty bread spread.

~~~~~~~~~~~~~~~~~~~~~~~~~~~~~~~~~~~~~~~~~~

Including sage in your chicken's diet can provide a range of nutritional benefits that can help promote their health and well-being. Whether you add it to their regular feed or use it as a natural insect repellent or as a natural antibiotic, sage is an excellent herb to incorporate into your chicken's diet.

~~~~~~~~~~~~~~~~~~~~~~~~~~~~~~~~~~~~~~~~~~~~

Back to Our Blog Homepage!

This post may contain some Amazon Associate links meaning that I will get a small compensation at no expense to you if you purchase something from this blog.

Growing Kale for Chickens!


GROWING KALE FOR YOUR CHICKENS!


Did you know that chickens who dine on kale regularly lay eggs with more vibrant yolks and stronger shells?" This statement may come as a surprise to many of us, as kale is often viewed as a trendy superfood for humans. 


But what if I told you that growing kale for your chickens can not only improve their health, but also benefit your own diet?

From its easy cultivation to its nutritional benefits, kale is the perfect addition to your backyard chicken feed.


In this article, we will explore the reasons why growing kale for your chickens is a win-win situation and how to do it successfully. So grab your gardening gloves and let's get started on this leafy adventure!


Why Grow Kale for your Chickens?


Kale is high in vitamins and minerals, including vitamin A and calcium, which are good for bone health and egg production.

Kale can help with a chicken's digestion.

Kale can support a chicken's immune system.

Darker yolks: Dark leafy greens like kale can result in darker, richer yolks.


How to Feed Kale to Chickens


Here are some tips for feeding kale to chickens:


Chop or shred 
kale into small pieces to make it easier for chickens to digest.


Introduce gradually
As with any new food, introduce kale gradually and monitor your chickens' health and behavior.


Avoid overconsumption
Too much kale can cause digestive issues like diarrhea or crop impaction.


Consider egg taste
Kale can taint the taste of eggs, so make sure chickens don't eat too much
. 

                Growing Kale

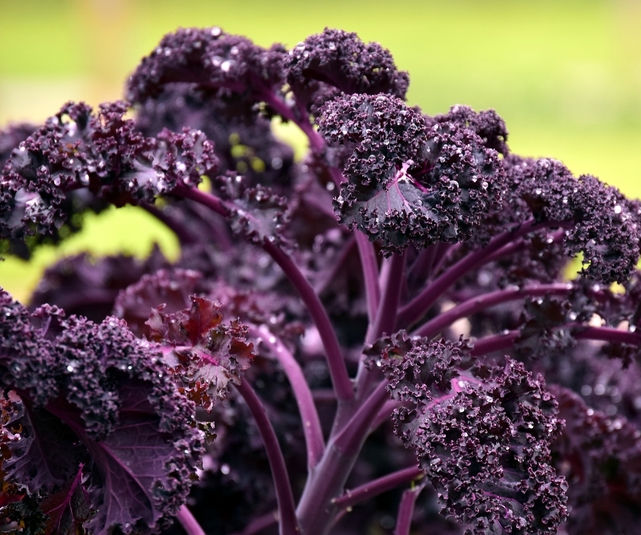
A hardy biennial usually grown as an annual.
Height 12-18"    Width  8-12"


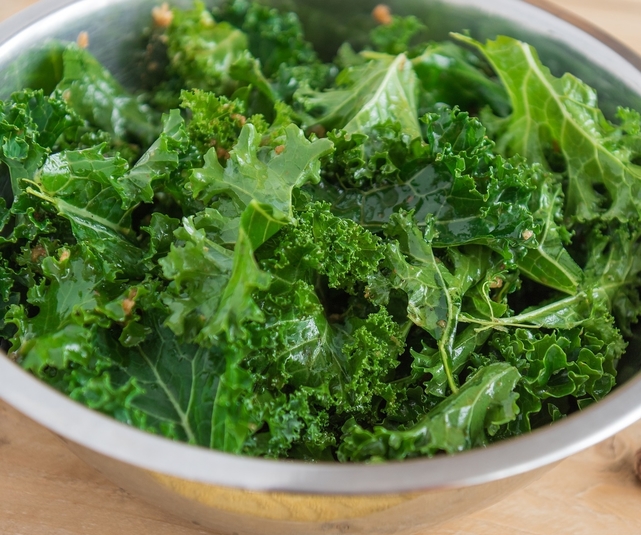
When it comes to Kale in salads, Kale adds substance, color, and most importantly nutrition.  Its colorful leaves are packed with vitamins and minerals.  Kale's leaf texture can range from deeply puckered to deeply frilled.

Types:
Curley Leaf (Scotts Kale).  Noticeable pungent flavor with a peppery quality....


Dinosaur Kale.  Hearty leaves that are tall and narrow.  It retains its firm texture even after cooking.  It is slightly sweeter with a more delicate taste.

Red Russian Kale.  Flat, fringed leaves that resemble large Arugula leaves.  Great sweet flavor with a bit of pepper.

Rape kale (aka Leaf and Spear).  A cross between a curly leaf and plain leaf.

Try Audible and Get Two Free Audiobooks


Starting Seeds of Kale


Seed Depth:                     1/2"
Seed Spacing:                  3"
Days to Germinate:           5-7 days.
Days to Harvest:
70-95 from seed.  55-75 days from transplants.

Seed Longevity:               2 years.


Sowing Indoors:

Spring:  Sow 5-7 weeks before your last average frost date.  Plant out as transplants 1-2 weeks before your average expected frost date.


Sowing Outdoors:

Spring:  Direct sow 2-4 weeks before your average last frost date or as soon as the soil can be worked.


Winter Sowing


If you haven't tried winter sowing, you're in for a treat. This method is especially good for sowing herbs and greens. Winter sowing is basically sowing seeds in the bottom of a milk jug during the winter, setting the milk jugs outside for the winter and leaving them there until the seeds germinate in Spring.


To see our full Winter Sowing article, click here.

To watch our 30 minute video on how to winter sow, click here.


Growing Kale Plants


Growing Temperature:          60-65 degrees down to 20 degrees.
Plant Spacing:                      Thin plants to 12-15" apart.
Container Size:                     6-8" depth.
Sun/Shade:                           Part sun/part shade.
Soil:                                       Rich in nitrogen.
Watering:                               Consistent moisture for best flavor.
                                              Water heavily during
 the growing season.


Fertilizing:
If grown in nutrient-rich soil, your Kale plants won't need any fertilizer until after the first flush of leaves.  Then one side dressing of balanced fertilizer is all that the plant should need for the growing season. 


Harvesting Kale

Harvest Kale when the plant is 8-10" high, starting with the outside leaves.  To harvest the entire plant, cut 2" above ground level.  The plant will sprout new leaves in 1-2 weeks.


   Using Kale


  • Remove stems before cooking.
  • Use young leaves raw in salads
  • Substitute Kale for spinach in any recipe.
  • Kale chips, kale pesto, sauteed Kale, Kale Quich, Kale Soup, Kale slaw.
    Kale can also be used as a garnish
    !


Storing Kale For Later Use


Although tender green leaves, like Lettuce, can't be preserved well, the thicker leaved greens can be.
Fresh
  • Clean and pat dry.  Bundle stems lightly, place on a paper towel (to absorb moisture) and wrap in a plastic bag.  Keeps in refrigerator for 10 days.

Freezing for Later Use in Chili, Soups, Sauces, and Casseroles.
  • Steam or saute' leaves, chop them and store in freezer bags.
  • Puree with water and freeze into ice cube trays.
  • Clean and dry the leaves and store in quart size freezer bags.
  • Frozen leaves will keep for 6 months.
  • Blanching the leaves for two minutes first will extend freezer storage to 14 months.

~~~~~~~~~~~~~~~~~~~~~~~~~~~~~~~~~~~~~~~~~~~~~~~~~~~~~~~~~~~~~~~~~~~

Kale is one of the most nutrition crops you can grow. I love kale in soups, stir fries, steamed or even eating baby kale leaves in salads. It's often found in mesclun and lettuce mixes to add a deep green color and crunchy texture.

~~~~~~~~~~~~~~~~~~~~~~~~~~~~~~~~~~~~~~~~~~~~~~~~~~~~~~~~~~~~~~


This post may contain Amazon affiliate links and as an Amazon Associate I earn from qualifying purchases without costing you anything extra.


Growing Herbs for Chickens -- Oregano


Chicken feed certainly isn't cheep! Luckily, there are some ways you can reduce your bagged chicken feed bill.


Feeding your hens food scraps from your leftover meals is certainly one. But for putting a bigger dent in that feed bill, grow some healthy feed alternatives right there in your backyard or homestead.


Herbs are a wonderful choice to grow for your chickens. Not only do chickens like to eat many different herbs, but most herbs have some other uses you may want to try in the chicken coop and run.


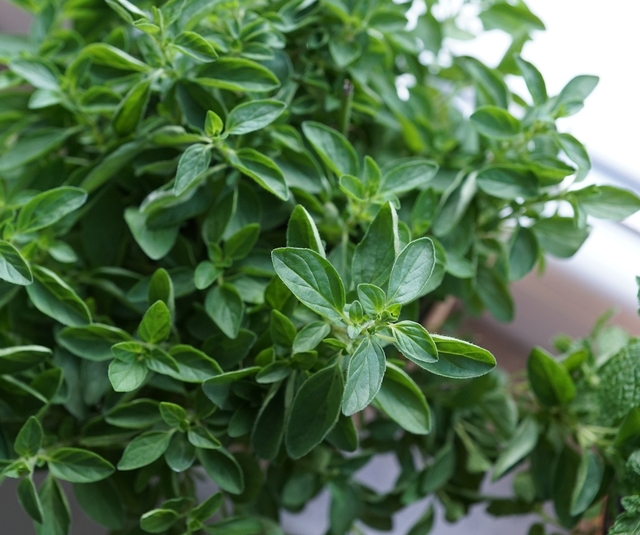
A hardy perennial in Zones 5 – 10 gardens, Oregano is a pungently aromatic plant that is one of the most important herbs in Italian, Greek and Mexican cooking.  It has a bold flavor and a hardy constitution.  It is also called Wild Marjoram.

The flavor of Oregano can vary greatly from variety to variety.  Greek Oregano is the spiciest. 


Why Feed Oregano to Chickens


Immune system: Oregano can strengthen a chicken's immune system, helping to protect against common illnesses like salmonella and avian flu.


Antibacterial and anti-inflammatory: Oregano has antibacterial and anti-inflammatory properties.


Intestinal health: Oregano can improve intestinal integrity and stimulate intestinal flora, which can help prevent diarrhea.


Egg quality: Oregano can improve egg quality.


Growth performance: Oregano can promote growth performance.


Reduced use of antibiotics: Oregano can reduce the need for conventional antibiotics in chicken feed.


Reduced infestation: Oregano can reduce infestation by pathogens like the red bird mite and histomoniasis (black head disease).


Appetizing: Oregano's essential oils can make food more appealing to chickens.


You can feed oregano to chickens fresh or mix dried oregano into their feed. Oregano essential oils don't affect the taste or appearance of eggs.


Using Oregano in the Chicken Coop

Disease prevention
Oregano can help prevent common poultry illnesses like salmonella, avian flu, and infectious bronchitis.


Anti-coccidial
Oregano has anti-coccidial properties that can help reduce oocyst excretions from infected birds.


Stress relief
Oregano essential oils can help chickens cope with stressors like parasites, temperature changes, and pathogens.


Grow in the coop
You can grow oregano in your chicken coop. To keep the plant from being damaged, you can cover the pot with chicken wire and attach it to the outside of the pot with a staple gun.


Where to Grow Oregano


You can grow some herbs like Oregano inside your chicken run by sowing seeds inside a wire fence circle like the above picture. It will keep your chickens from digging the plants right out of the ground until it's time to remove the fencing and let them feast!


Herbs are great plants to grow in pots and containers which can easily be moved right into the chicken run when ready to feed.


You can also designate a few raised garden beds for growing great food for your chickens so there's always some healthy foods available to toss in and watch the show!

            Spring Sowing                                             

Direct sow 4-6 weeks before the last frost date or as soon as the soil can be worked, or sow indoors 6-8 weeks before the last frost date. 


Winter Sowing

If you haven't tried winter sowing, you're in for a treat.  This method is especially good for sowing herbs.  Winter sowing is basically sowing seeds in the bottom of clear milk jugs in the winter, setting the milk jugs outside for the winter and leaving them there until the seeds germinate in the Spring.

For our article containing detailed information about Winter Sowing, click here


To watch our 30 minute video on how to winter sow, click here.


Soft Cuttings

Take cuttings in spring when new growth is several inches in length.  Side shoots of 4" in length are perfect. Cut the stem at an angle and remove lower leaves leaving an inch or two of the stem bare.  Plant cutting bare side down into a well-drained soil mix.  No fertilizer is needed at this stage.

Wrap the container in plastic to keep in humidity.  Avoid having the leaves touch the plastic.  Place the pot in light but out of direct light.  Keep soil moist but never soggy.  Remove the plastic when cutting grows roots.  A light tug that gives you some resistance means it has rooted.


Overwinter Plant Care

Oregano plants should be cut back to ground level and covered with a layer of mulch.  Containers can be brought inside for the winter.


Harvesting Oregano

As soon as the leaves are large enough to use and before the plant flowers.
Snip the leaves individually or shear plants to 2” above ground level just before flowering and again a month before the first frost.  You'll get two harvests that way.


Harvesting Oregano Seed

Oregano seeds are tiny and develop after the flowers fade in late summer or fall.  Collect and thoroughly dry seeds before storing them in an airtight container.


Storing Oregano


Fresh
Damp Paper Towel

This method works well for hardy herbs that have woody stems as well as a few soft-stemmed herbs.

Clean and thoroughly dry the Oregano.  Arrange lengthwise in a single layer on a slightly damp paper towel.  Loosely roll up the herb and transfer to a plastic bag or plastic wrap.  Label and store in the fridge. 

Oregano will stay fresh in the fridge using this method for up to 2 weeks.


Freezing

For best results, use frozen Oregano within 1-2 years.
By freezing herbs, you will lose some of the herb's texture but preserve the flavor.
Here are some freezing methods:

Tray Freeze

Spread herb onto a cookie sheet on a single layer. Freeze in the freezer, then transfer the Oregano into a labeled freezer bag to store.  Since the leaves are frozen separately, later you can easily remove the amount you need.

Ice Cube Trays with Oil

This method works well for hard-stemmed herbs that would probably be cooked when adding to a dish.  The oil reduces some of the browning and freezer burn.
Clean and thoroughly dry the Oregano.  Mince and firmly pack herbs into an ice cube tray 3/4 full.  Add Olive Oil to fill and freeze.  Transfer frozen cubes into labeled freezer bags to store.


Flat Freezer Bag

Trim off the stems and place in a labeled freezer bag.  Squeeze out the air, flatten the freezer bag, label and store.


Drying Oregano

Oregano is one of the best herbs to use in a dried form.  For best results, use dried Oregano within 1-2 years.


Hang to Dry

Pick your Oregano in bunches right before you intend to store them.  Tie the bottom of the bunch together with twine and hang upside down to dry in a dry, low humidity area. For added protection against dust, you can put the bundles inside paper bags with plenty of holes for ventilation.  When the herbs are dry, the leaves will crumble easily between your fingers.  Store in an air tight container.


Using Oregano

  • Oregano adds zest to pasta and pizza sauces.
  • It complements meats and vegetables.
  • Garlic, onion, thyme, basil, parsley and olive oil are complementary partners.
  • Makes a great ground cover.
~~~~~~~~~~~~~~~~~~~~~~~~~~~~~~~~~~~~~~~~~~~~~~~~~~~~~~~~~~~~~~~~~~~~~~

Growing your own herbs is fun, easy, more healthy than the herbs shipped to grocery stores, and what's best, saves you tons of money! Try it today.

~~~~~~~~~~~~~~~~~~~~~~~~~~~~~~~~~~~~~~~~~~~~~~

This post may contain some Amazon Associate links meaning that I will get a small compensation at no expense to you if you purchase something from this blog.


Growing Herbs for Chickens -- Thyme!


The perennial shrub, Thyme, certainly deserves a place in every herb garden.  Not only is it one of the most useful plants in the kitchen, but it also has attractive foliage, long-lasting flowers and it's an easy-to-care-for compact plant.  English Thyme is used most often in cooking.

Types of culinary Thyme include Thymus Vulgaris, also referred to as Common Thyme, and include summer, winter, and French Thyme. 


Why Feed Thyme to your Chickens

Thyme is one of the best herbs to add to your chicken feed for aiding in the respiratory health of your chickens. Thyme also has antibiotic and antibacterial properties, along with being a natural system to boost their immune system.

You can provide it to your flock with Thyme by giving it to them fresh so they can eat it when they choose, or you can add the dried herb to their feed.

Another great way to use Thyme is in their dust baths where they can benefit from the essential oils in the plants.


Starting Thyme From Seed

Thyme seeds are difficult and slow to germinate, but it can be done.  It will take a year to get a good-sized plant.

Seed Longevity:                                            2 years.
Seed Sowing Depth:                                     Cover thinly.
Best Soil Temp for Germination:                  70 degrees.
Days to Germination:                                    7-10+ days.


Spring Sowing


Sow indoors 6-10 weeks before the last spring frost.   Plant outside 2-3 weeks before the first last spring frost.


Winter Sowing


If you haven't tried winter sowing, you're in for a treat.  This method is especially good for sowing herbs.  Winter sowing is basically sowing seeds in the bottom of milk jugs in the winter, setting the milk jugs outside for the winter and leaving them there until the seeds germinate in the Spring.

For our article containing detailed information about Winter Sowing, click here

To watch our 30 minute video on how to winter sow, click here.


Growing Thyme

Plant Size:                                                     Height 6-12”   Width 12”.
Growing Soil Temperature:                           70 degrees.
Spacing:                                                         12”.
Container Size:                                              Height:  6-8”   Width:  4 – 12”.
Soil:                                                                Well-drained.  Rich soil produces large plants that are less fragrant.
Watering:                                                      Light.
Light/Sun:                                                     Full Sun.
Fertilizer:                                                      Very little, not necessary.
Good Companions:                                      Cabbage, Tomato, Eggplant.
Bad Companions:                                        Onion family.


                       Other Care Tips                                            

  • Trim leggy plants.
  • Lightly mulch after ground freezes.

Dividing Thyme

Divide Thyme after three or four years when the plant becomes woody.


Softwood Cuttings of Thyme

Take cuttings in spring when new growth is several inches in length.  Side shoots of 4" in length are perfect. Cut the stem at an angle and remove lower leaves leaving an inch or two of the stem bare.  Plant cutting bare side down into a well-drained soil mix.  No fertilizer is needed at this stage.

Wrap the container in plastic to keep in humidity.  Avoid having the leaves touch the plastic.  Place the pot in light but out of direct light.  Keep soil moist but never soggy.  Remove the plastic when cutting grows roots.  A light tug that gives you some resistance means it has rooted.


Harvesting Thyme

Harvest only lightly the first year.  The best flavor is mid-June and July or when the flowers are barely open.

Peel off leaves from the woody stem.  The stems from younger Thyme can be used as well as the leaves.  An established plant will keep coming back.


Harvesting Thyme Seeds

Shake the dry seed head to shake the seed free.  If they are ripe they will fall out.  If you break up the dried seed head, separating the seeds from the chaff will be time-consuming.

Storing Thyme


Fresh
Damp Paper Towel

This method works well for hardy herbs that have woody stems as well as a few soft-stemmed herbs.

  • Clean and thoroughly dry the Thyme.  
  • Arrange lengthwise in a single layer on a slightly damp paper towel.  
  • Loosely roll up the herb and transfer to a plastic bag or plastic wrap.  
  • Label and store in the fridge. 
Thyme will stay fresh in the fridge using this method for 2 weeks.


Freezing Thyme

For best results, use frozen Thyme within 1-2 years.
By freezing herbs, you will lose some of the herb's texture but preserve the flavor.  

Here are a few freezing options to consider:


Tray Freeze

Strip leaves off the stems and spread onto a cookie sheet on a single layer. Freeze in the freezer, then place in a labeled freezer bag to store.  Since the leaves are frozen separately, you can easily remove the amount you need.

Ice Cube Trays with Oil

This method works well for hard stemmed herbs that would probably be cooked when adding to a dish.  The oil reduces some of the browning and freezer burn.
Clean and thoroughly dry herbs.  Mince and pack herbs into an ice cube tray 3/4 full.  Add Olive Oil to fill and freeze. Transfer frozen cubes into labeled freezer bags to store.


Flat Freezer Bag

Trim off the stems and place them in a labeled freezer bag.  Squeeze out the air, flatten the freezer bag, label and store.

Drying Thyme

For best results, use dried Thyme within 1-2 years.
Thyme is one of the best herbs to dry.  For drying, harvest Thyme when plants begin to flower.


Hang to Dry

Pick the Thyme in bunches right before you intend to store them.  Tie the bottom of the bunch together with twine and hang upside down to dry in a dry, low humidity area. For added protection against dust, you can put the bundles inside paper bags with plenty of holes for ventilation.  When the herbs are dry, the leaves will crumble easily between your fingers.  Store in an airtight container.

Using Thyme

  • Thyme is an essential element in Creole, Cajun, Greek, and French Cuisine.
  •  Thyme can be paired with just about any kind of meat, poultry, fish or vegetable.
  • Thyme is usually incorporated during the cooking process as opposed to the last minute.

~~~~~~~~~~~~~~~~~~~~~~~~~~~~~~~~~~~~~~~~~~~~~~~~~~~~~~~~~~~~~~~~~~~~~

There's nothing like the aroma of fresh-picked herbs!  Try growing some today and save money!  Your chickens will love you for it!

~~~~~~~~~~~~~~~~~~~~~~~~~~~~~~~~~~~~~~~~~~~~~~~~


Back to Our Blog Homepage!


This post may contain some Amazon Associate links meaning that I will get a small compensation at no expense to you if you purchase something from this blog.

Azomite for the Home Garden


Azomite for the Home Garden


One of the most important things a gardener can do to have a successful harvest season is to make sure your soil is full of every nutrient your plants will need.


Gardeners seem to be much more familiar with N-P-K (nitrogen, phosphorus, potassium) than they are micro nutrients and trace minerals. Micro nutrients and trace minerals are very important to build soil to attain healthier crops.

15 Garden Chores for Early Spring


Early Spring Garden Chores


Although the term “early spring” for me in Zone 6 Ohio may not be the same time as the “early spring” for your garden zone, for this article, early spring means that time of year when winter seems to be coming to an end and intermittent freezes and thaws are happening in the garden. The first signs of Spring!

Winter Sowing 101


WINTER SOWING 101

What is it and Why is it So Popular?


See the Detailed Video here


In a nutshell, winter sowing, or winter seed sowing, is sowing seeds indoors in the winter in mini greenhouse-like containers, like milk jugs or other recycled containers, and setting the containers outside in the winter elements until Mother Nature germinates the seeds in the spring.  That basically is the winter sowing method.

Featured Post

Welcome!

Thanks to you, we've hit over 1.7 MILLION pageviews!   Homesteading is a journey, an adventure, and an ever-evolving quest to make our h...