Fruit Prep for Making Jellies
Fruit Preparation for Making Jellies
The water bath is the simplest method for canning and is suitable for most high acid harvests, including fruit and pickled vegetables.
Free Printable Pressure Canning Steps in PDF
The following instructions are for water bath canning the follow fruits, then how to process them in five easy steps!
How to Prepare Each Fruit
Apple
Wash, stem and cut into chunks. (Do not core.) Combine apples and three cups of water in a stainless steel or enameled Dutch oven. Cover and simmer for ten minutes. Crush and simmer five more minutes.
Berries
Wash. Crush one layer at a time with a potato masher in a stainless steel or enameled Dutch oven. Cover and bring to a simmer. Simmer five minutes.
Free PrintOut of
Cherries
Dark Sweet Cherries
Remove stems. Pit and chop. Cover and bring to a simmer in a stainless steel or enameled Dutch oven with six tablespoons of water and two tablespoons of lemon juice. Simmer ten minutes.
Tart Red Cherries
Remove stems. Pit and chop. Cover and bring to a simmer in a stainless steel or enameled Dutch oven with six tablespoons of water. Simmer ten minutes.
Currants
Wash. Crush one layer at a time with a potato masher in a stainless steel or enameled Dutch oven. Cover and bring to a simmer with ten tablespoons of water. Simmer for ten minutes.
Grapes
Wash. Crush one layer at a time with a potato masher in a stainless steel or enameled Dutch oven. Cover and bring to a simmer with ten tablespoons water. Simmer ten minutes.
Plums
Halve, pit and finely hop. Cover and bring to a simmer with ten tablespoons water in a stainless steel or enameled Dutch oven. Simmer ten minutes.
Strawberries
Wash. Crush one layer at a time with a potato masher in a stainless steel or enameled Dutch oven. Cover and bring to a simmer. Simmer five minutes.
Step 1
Prepare chosen fruit according to the chart above. Pour prepared fruit mixture through a wire mesh sieve lined with three layers of damp cheesecloth into a bowl.
Let drain two to four hours or until juice measures three cups. To avoid cloud jelly, do not press of squeeze fruit mixture.
Step 2
Combine fruit juice and four tablespoons of Ball Classic Pectin in a large stainless steel or enameled saucepan. Bring the mixture to a rolling boil that cannot be stirred down over high heat, stirring constantly.
Combine fruit juice and four tablespoons of Ball Classic Pectin in a large stainless steel or enameled saucepan. Bring the mixture to a rolling boil that cannot be stirred down over high heat, stirring constantly.
Step 3
Add three and one third cups of sugar, stirring to dissolve. Return to a full rolling boil. Boil hard one minute, stirring constantly. Remove from the heat and skim the foam.
Add three and one third cups of sugar, stirring to dissolve. Return to a full rolling boil. Boil hard one minute, stirring constantly. Remove from the heat and skim the foam.
Step 4
Ladle hot jelly into a hot jar, leaving one quarter inch headspace. Place jar in boiling water canner. Repeat until are jars are filled.
Ladle hot jelly into a hot jar, leaving one quarter inch headspace. Place jar in boiling water canner. Repeat until are jars are filled.
Step 5
Process jars for ten minutes, adjusting for altitude.
Process jars for ten minutes, adjusting for altitude.
~~~~~~~~~~~~~~~~~~~~~~~~~~~~~~~~~~~
Water-bath canning, also called boiling water bath, is the easier method of canning that lets you store homemade jars of jam, pickles, and tomato sauce.
So if you're canning your own home grown fruit or taking advantage of those sales, by processing your fruits, you can lock in the fresh flavor for a full year and longer!
~~~~~~~~~~~~~~~~~~~~~~~~~~~~~~~~~
Other Canning Articles:
15 Common Questions Answered About Canning
Pressure Canning Check List of Items Needed Printable
The Role of Vinegar in Canning
The Importance of Headspace in Canning
Signs of Spoilage in Home Canned Foods
Prep for Making Fruit Jellies and Five Steps to Waterbathing
Why Canning Jars Break
Reasons for Loss of Liquid in Canning - Siphoning
Canning Jar Sizes and Their Uses
Reasons Canning Jars and Contents Darken
Reasons for Loss of Liquid in Canning - Siphoning
Canning Jar Sizes and Their Uses
Reasons Canning Jars and Contents Darken
This post may contain some Amazon Associate links meaning that I will get a small compensation at no expense to you if you purchase something from this blog.
Grow Milkweed for the Monarchs
Growing Milkweed for the Monarch Butterflies
The first time I saw a Monarch butterfly up close in my garden, I was completely awestruck by its grace and beauty. Their bright orange wings and solid black borders make the Monarch butterfly one of the most recognizable butterflies. And they are, without a doubt, little migrating miracles.
Are Hostas Drought Tolerant?
Are Hostas Drought Tolerant?
Reducing our dependence on water is one way gardeners love to be eco-friendly, so it comes as no surprise that drought-tolerant plants continue to be in high demand.
But are all hostas really drought tolerant? The answer is yes, and no.
The Role of Vinegar in Canning
Which Vinegar to use in Canning
The Role of Vinegar
If you have been looking into the process of canning your own food, you've undoubtedly noticed a lot of talk about safe canning. Some of the most-asked canning questions relate to the correct use of vinegar.
Winter Care for your Potted Hostas
Winter Care for your Potted Hostas!
A frequent question we get is, will hostas survive over the winter in pots, or, how can I winterize my potted hostas? Although hostas are very forgiving plants, hostas in pots do need some care over the winter.
Hostas need a six-week period of temperatures below 40 degrees for their winter sleep. But since during this time the potted hostas can be exposed to several freezes and thaws, they need extra care to prevent damage to their roots.
Growing Swiss Chard - Homesteading 101

Swiss Chard
aka Spinach Beet, Leaf Beet
Annual, Perennial in warmer climates.
Height: 1-3' Width: Up to 2'
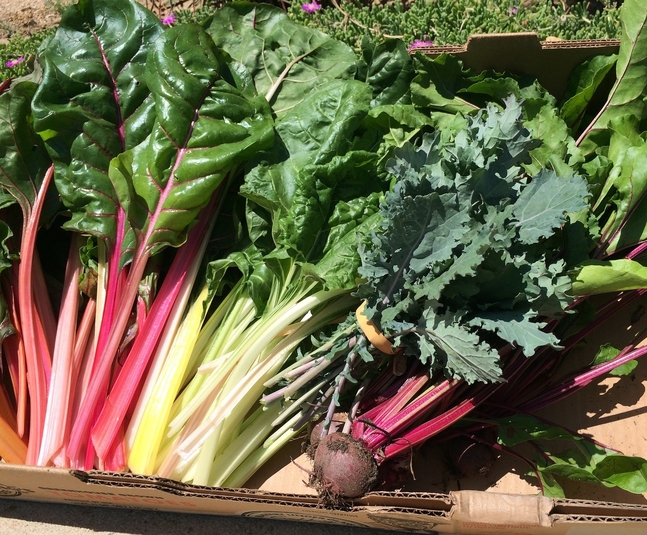
Swiss Chard is both edible and beautiful as an ornamental plant. It has colorful stems and bright green leaves making it as glamorous as it is nutritious. It is high in vitamins A and C and a good source of calcium. Swiss Chard will keep growing long after other greens have bolted.
Types:
Reddish, creamy white or colorful stalks, all of which taste mostly the same.
Starting Seeds of Swiss Chard
Seed Depth: 1/2" to 3/4" deep.Seed Spacing: 4", or thin seedlings later to 4" apart.
Germination Temp: 50+ degrees. Optimum 85 degrees.
Days to Germinate: 5-7 days.
Days to Harvest: 40 - 60 days, depending on the variety.
Seed Longevity: 4 years.
Sowing Indoors:
Spring: Sow 2 weeks before your average last frost date. Plant outside after threat of frost has passed.
Sowing Outdoors:
Spring: Direct Sow outdoors after the last frost date.
Fall: Direct Sow 10 weeks before the average first frost date.

Winter Sowing
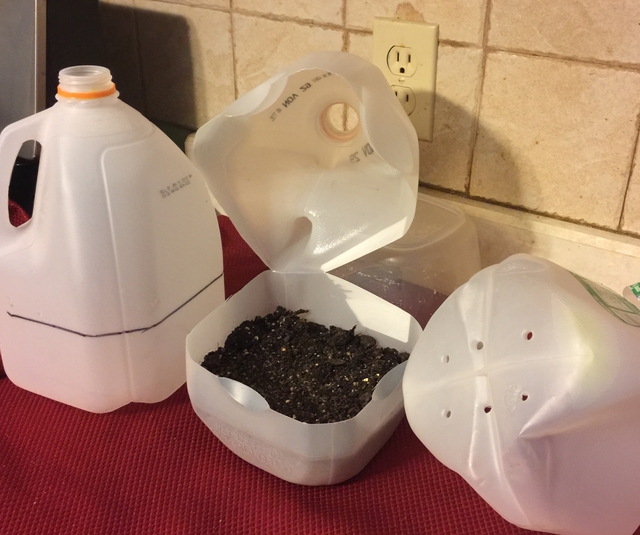
If you haven't tried winter sowing, you're in for a treat. This method is especially good for sowing herbs and greens. Winter sowing is basically sowing seeds in the bottom of a milk jug during the winter, setting the milk jugs outside for the winter and leaving them there until the seeds germinate in Spring.See our Winter Sowing article on our website for detailed information.
Growing Swiss Chard Plants
Growing Temperature: Tolerates both cool weather and heat.
Tolerates light frosts in the spring and fall.
Plant Spacing: 5" to harvest often. Mature plants 12".
Container Size: 12" deep, 12" wide. 3 in a 14" wide pot.
Sun/Shade: Prefers sun, but will tolerate shade.
Soil: Rich, fertile. Amend with some compost.
Watering: Consistent moisture for best flavor.
Fertilizing
Since greens are such a fast-growing crop, as long as they are grown in rich soil there may be little need for further fertilization. That said, a liquid balanced fertilizer when the seedlings are 4" tall will give your greens a boost and carry them through their short season. After the temperatures warm, though, the leaves of Swiss Chard will turn bitter and no amount of fertilizer will help at that point.Harvesting Swiss Chard
Harvest anytime leaves are big enough to eat, usually at 6".
Cut stalks from the outside of the plant, leaving the heart which will continue to grow. Overgrown chard will lose flavor.

Using Swiss Chard
- Use young raw leaves in salads.
- Large leaves can be cooked down like Spinach to use in casseroles, soups, and pasta.
Storing Swiss Chard For Later Use
Although tender green-leafed plants, like lettuce, cannot be preserved well, the thicker green-leafed plants can be.Fresh
- Clean and pat dry. Bundle stems lightly, place on a paper towel (to absorb moisture) and wrap in a plastic bag. Keeps in refrigerator for 10 days.
Freezing for Later Use in Chilis, Soups, Sauces, and Casseroles.
- Steam or saute' leaves, chop them and store in freezer bags.
- Puree with water and freeze into ice cube trays.
- Clean and dry the leaves and store in quart size freezer bags.
- Frozen leaves will keep for 6 months.
- Blanching the leaves first will extend freezer storage to 14 months.
This post may contain Amazon affiliate links and as an Amazon Associate I earn from qualifying purchases without costing you anything extra.
Subscribe to:
Posts (Atom)
Featured Post
Welcome!
Thanks to you, we've hit over 1.7 MILLION pageviews! Homesteading is a journey, an adventure, and an ever-evolving quest to make our h...


