Refreshing Potting Soil
Leftover potting soil can look a bit spent after a year or two, but experts agree that it still has life-giving potential, especially if you take the time to condition it properly.
Once you learn the basics of healthy soil, you'll be able to recharge last year's potting soil and save a lot of money by doing so.
What happens to potting soil over time?
Potting soil is technically not soil at all. It is a sterile mix of filler ingredients and organic matter. Some manufacturers may add some starter fertilizer.
Most bagged potting soil mixes contain a lot of cheap pine bark. You may notice that the soil level in the pots has dropped over the season due to the pine bark breaking down.
If you noticed the water was pouring straight through the old soil in the pots, the soil has become water repellent. It has lost the ability to absorb and hold the water that the plants will need for good, healthy growth.
Old potting soil can become compacted over time.
It may harbor weed seeds and insects from its past residents if leftover from past occupants.
The salts may have accumulated in the soil and on the pots forming a white ring.
The nutrients have probably been flushed out over repeated waterings.
The Goal: Rich soil that smells earthy
The goal is to create a potting soil that is:
- Free of weeds and disease.
- Aerated so the plants can get oxygen from the soil.
- Light enough to allow water (and the air) to flow through the soil easily, yet be firm enough to support the plant.
- Be able to retain the water without draining through too fast.
- Be able to retain the nutrients that you add
Types of soil amendments
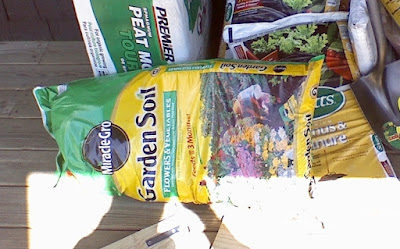
Garden Soil (Not Top Soil)
Garden soil refers to the loamy soils sold in most garden centers. It is mixed to incorporate a variety of soils and textures and usually targets right on the label a certain type of garden or plant.
Advantages:
- It's sterile, so you can avoid disease, insects and weed problems.
- It's a far better choice for potting soil recipes over Top Soil because Garden Soil is made to mix with fertilizer and organic matter where Top Soil is not.
Side Note
Never add soil from your garden. It is un-sterilized and may harbor disease, insects, and weed seeds which can cause future problems such as dead, deformed, or stunted seedlings or plants.
Compost
A mixture that consists of various decayed plants and vegetative waste is added to the soil to help plants grow.
 |
| Click to View |
Advantages:
- It will suppress disease.
- It provides moisture and plant food.
- It improves the structure of the soil.
- It adds several macro and micronutrients to the soil along with several trace elements.
- The compost will be more alkaline and is the better choice instead of Peat Moss for Boxwoods, Hydrangeas, Lavender, and Thyme.
 |
| Click to View |

The “Peats”
Coconut Peat, Peat Moss, and Sphagnum Peat Moss.
These are types of Peat generally added to potting soils.
Here are some of the advantages:
- Peats are highly absorbent material.
- Peats retain water well.
- Peats are a sterile medium.
- Each type of Peat is listed below with the advantages and disadvantages of each.
Coconut Peat
This is a by-product of the coconut processing industry. It's the finer product that's left behind in processing.
Advantages:
- Coconut Peat doesn't break down as quickly as Peat Moss does.
- It's a renewable resource, unlike Peat Moss.
- It lasts much longer in your soil than Peat Moss.
- It has a more neutral pH than Peat Moss and is good for flowering and fruiting plants that prefer a neutral pH.
Peat Moss/Sphagnum Peat Moss
These are the dead fibrous materials that form when mosses and other living materials decompose in peat bogs. Both come in convenient dry, light-weight compact blocks and can be found at garden centers.
Advantages:
- It has an acid pH and is ideal for acid-loving plants such as blueberries, camellias, hostas, etc.
Disadvantages:
- It is composed mostly of moss, and since the process of decomposition is so slow, it is not considered a renewable resource.
- It tends to become water repellent as its moisture content drops to below 30%.
 |
| Click to View |

Vermiculite and Perlite
These filler materials are frequently added to potting soils for their ability to lighten and aerate the soil.
Perlite
Perlite is the round white styrofoam-looking specks you see in potting soil.
Advantages:
- It helps to aerate the soil.
- It aids in water retention.
Disadvantages:
- It has a tendency to float to the top of the medium when watered.
- Perlite dust is harmful if inhaled and should be moistened before you mix it in. A mask is also recommended when using it.
 |
| Click to View |

Vermiculite is the sparking particles that you often see in potting mixes. It is a natural volcanic mineral that has been expanded with heat to increase its water-holding capacity.
Advantages:
- It is more superior to Perlite for water retention. The particles soak up the moisture and nutrients and keep them in the mix so the plants can access them.
- It's a permanent ingredient that won't deteriorate or lose volume in the mix.
- It is also sterile and will not become moldy or rot.
 |
| Click to View |

Sand Coarse or Builder's Sand
A primary ingredient in potting mixes.
Advantages:
Disadvantages:
- It does not improve water-holding capacity.
- Too much sand will make the mix too heavy.
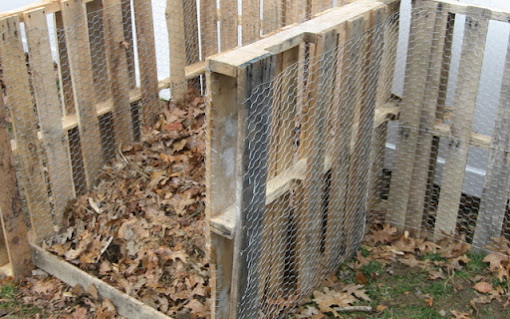
Leaf Mold
Simply, leaf mold is decomposed leaves used to condition the soil. The end result will be dark brown and crumbly.
Advantages:
- It's easier to make than compost. Just pile it up and let it decompose. No mixing browns and greens.
- It increases water retention. It has been known to hold up to 400% of its own weight in water.
- It keeps down the weeds when used as a mulch.
- It provides a great habitat for soil life including earthworms and beneficial bacteria.
- It will lighten up clay soil.
- It will help prevent sandy soils from drying out too fast.
- It's a free, renewable resource!
Ready to refresh the soil?
Rule of Thumb: Considering your old container soil to be “one part” you can mix in up to three parts of soil amendments. Frugal gardeners have reported good results with a 50/50 split.
Pour out the soil from each pot onto a tarp placed in the sun. Spread out the soil as thinly as you have room for and let it dry out. Working with dry ingredients will ensure a better mix.
Choose from the above list of soil additives and mix the dry ingredients thoroughly, then fill a few pots. Run water through to check and see if more amendments are needed for adequate drainage. The amounts you need will depend on how compacted your soil has become, and the nature of the soil you used previously.
When you have soil that is well-draining and ready to hold onto water and nutrients, you will need to refresh the nutrients that have been flushed out the previous year.
Your choice of fertilizers will depend on the plants you are going to put in the pots. If you had success the previous year with the fertilizer you were using, by all means, duplicate that.
Dry out the old soil.
 |
| Click to View |

Other Tips
- Don't reuse any soil that has been used with a diseased plant.
- Don't grow new or young plants in refreshed soil. Mature plants will fare much better.
- Don't use refreshed soil to start seeds. The seed starting mix needs to be sterile for the best results.
- Wash your hands thoroughly after mixing the ingredients.
Disinfecting your Pots before Reusing
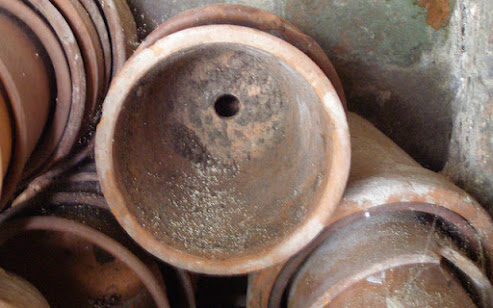
Check the inside rims of the pot for white salty deposits. Excessive levels of salts can be detrimental to plant development.
Check the pot for white fuzzy growth. This is caused by the soil remaining wet and soggy and not draining well.
To Clean the Pots
- Remove any debris stuck to the sides with mild soapy water.
- Use a brush or steel wool for the stubborn parts.
- Use a solution of 10% bleach to 90% water to submerge the pot for 10 to 15 minutes. I use my big coolers for this because it also gets my coolers clean for summer use.
- Give the pots a good final rinse and set them out to thoroughly dry.
- If you added gravel to the bottom of the pot, rinse the gravel with the above bleach solution and rinse thoroughly.
~~~~~~~~~~
The cost of purchasing expensive bagged potting soil is a good enough reason to learn to amend the potting soil from the previous year. So revive last year's container soil and save that money for extra plants!
~~~~~~~~~~~~~~~~~~~~~~~~~~~~~~~~~~~~~~~~~~~~~~~~
Where to go next!
This post may contain some Amazon Associate links meaning that I will get a small compensation at no expense to you if you purchase something from this blog.


Thank you for such a well-written post. I love dogs and gardens too!
ReplyDeleteThank you for all the information that was much needed. Well said, and I also am a dog lover and kitty cats too.
ReplyDeleteThis comment has been removed by a blog administrator.
ReplyDeleteI wish for the great of success in all of our destiny endeavors
ReplyDelete