Welcome!


Thanks to you, we've hit over 1.7 MILLION pageviews!  

Homesteading is a journey, an adventure, and an ever-evolving quest to make our homesteads more beautiful, run more efficiently, and be the haven that we've dreamed of creating for ourselves and our families.                   

Whether your homestead is deep in the country or in an urban setting, you'll find helpful articles here!


Grow these Herbs for a healthier flock!


Grow These Herbs for a Healthier Chicken Flock!


Did you know that adding herbs to your chickens' diet can improve their overall health and well-being? 


According to recent studies, incorporating herbs into a chicken's diet can increase egg production, boost immune function, and even prevent common health issues. 

Grow Mustard Greens for your Chickens!


Grow Mustard Greens for your Chickens!


Feeding greens of all kinds to chickens provides several benefits that can help improve their overall health and productivity. 


Greens are rich in nutrients, which are essential for the growth and development of the birds. They contain vitamins, minerals, and other elements that can help boost the immune system of the chickens, making them less susceptible to disease and infections. 

Growing Greens for your Chickens!


 Growing Greens for your Chickens!


According to recent studies, chickens who are fed a diet rich in greens lay eggs that are significantly higher in nutrients, including omega-3 fatty acids and vitamin E. This has led to a growing trend among backyard chicken owners to incorporate greenery into their poultry's diet. 


When it comes to greens, variety is key.  You should offer a mix of different greens to ensure your chickens get a wide range of nutrients.  Stick to greens specifically identified as safe for chickens, avoiding toxic plants like nightshade or hemlock.


If possible, allow chickens to freely graze on a dedicated patch of greens.


Greens to grow for your chickens:  Click on the links below for specifics.


Grow These Greens for Your Chickens:

Swiss Chard


In conclusion, growing greens for chickens is not only a sustainable and cost-effective way to supplement their diets, but also a rewarding and enjoyable experience for chicken owners. 


From the benefits of fresh nutrients for your flock to reducing overall feed costs, incorporating greens into your chickens' diet can have a positive impact on both their health and your wallet.

Did you know you can winter sow your greens? Read below!


Winter Sowing:


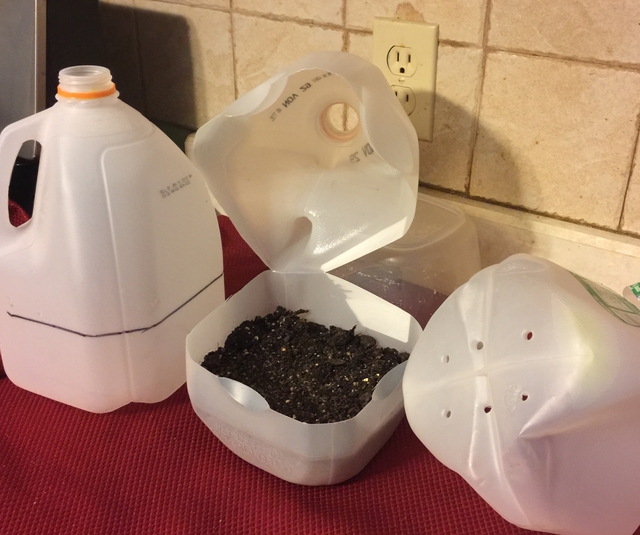
If you haven't tried winter sowing, you're in for a treat. This method is especially good for sowing herbs and greens. Winter sowing is basically sowing seeds in the bottom of a milk jug during the winter, setting the milk jugs outside for the winter and leaving them there until the seeds germinate in Spring.


For more detailed information about Winter Sowing, click here.

To watch our 30 minute video on how to winter sow, click here.

~~~~~~~~~~~~~~~~~~~~~~~~~~~~~~~~~~~~~~~~~~~~~~~~~~~~~~~~~~~~~~~~~~~~~~

This post may contain Amazon affiliate links and as an Amazon Associate I earn from qualifying purchases without costing you anything extra.


Comfrey - Good for You and Your Chickens!!


Grow Comfrey for your Chickens!!


Comfrey is known to be a very beneficial plant to feed chickens.  Generally, Comfrey will contribute to the overall healthy of your flock.  


Two specific benefits to Comfrey for Chickens:


        Better Nutrition 
 
 
Comfrey is high in protein, minerals and vitamins, especially vitamin A, which can improve egg quality and also helps to promote the growth of healthy feathers.  


Comfrey Contains Allantoin


Comfrey contains allantoin which has anti-inflammatory and antibacterial properties that can help heal any skin irritations you face with your chickens.


How to Feed Comfrey to your Chickens


The preferred method of feeding Comfrey to chickens is to chop up some leaves and mix them in with other feed. This is a great way to control how much they can eat. As with all new dietary items in your chicken's diet, moderation is important. Feeding too much Comfrey can cause digestive issues, so ensure it's only a part of their diet.


I've occasionally let my chickens have access to foraging them, as I have an abundance of Comfrey around the farm.


What kind of Comfrey is Best for Chickens?


"Russian Comfrey", a perennial in Zones 4 through 9, is often considered the best variety for feeding chickens due to its high nutritional content and adaptability.

This type of comfrey is smaller than Common Comfrey, about two feet by two feet, and has sterile seeds so it's not invasive. Bocking 14 must be produced by root cuttings or crown divisions.


The flowers can appear in May and June attracting pollinators and beneficial insects. It's easy to grow, and can thrive in almost any soil.


Russian Comfrey flowers are typically bell shaped and are blue or violet, but can also be purple or white.


It is a member of the Borage family of plants. Comfrey will shoot up quickly in early spring. Comfrey is often grown for its sheer beauty, but there are several beneficial reasons for growing this great plant in your garden.


The Many Uses of Comfrey


As a Fertilizer


Comfrey leaves contain high levels of potash and reasonable levels of nitrogen and phosphorus as well as smaller amounts of iron, calcium, and magnesium. Its concentration of nutrients actually outperforms manure, compost, and many liquid feeds.  


To use Comfrey as a fertilizer, you can place chopped Comfrey right on the soil or till them in.


As a Liquid Fertilizer


Comfrey can be used to create a liquid fertilizer to use on your plants. Just steep some chopped Comfrey leaves in water and weigh them down. Five pounds of Comfrey per seven gallons of water will do the trick. 


Let the solution sit for four to six weeks. The solution will end up being dark and thick and it can be diluted into a 12 to 1 ratio of water to the Comfrey solution for a great liquid plant feed. 


As a Soil Conditioner


The roots of Comfrey will penetrate deep into the subsoil to access nutrients that are beyond the reach of most shallow-rooted plants. Comfrey roots will also break up compacted soil.


For Vegetables


For an increased yield in your potato harvest, place the first flush of Comfrey leaves in the trenches where the potatoes are growing to provide the tubers with nutrients.


The high potassium content of Comfrey makes it especially beneficial for vegetables such as tomatoes, cucumbers or peppers as well as fruit trees. Potassium is great for increasing flower and fruit production.


As a Mulch


When Comfrey is used as a mulch, it has a great advantage over using leaves or straw which can actually pull nitrogen from the soil. 

While Comfrey used as mulch is beneficial to tomatoes, peppers, and cucumbers, using it to mulch root crops of leafy greens is not recommended as it may encourage them to go to seed prematurely.


For Attracting Pollinators


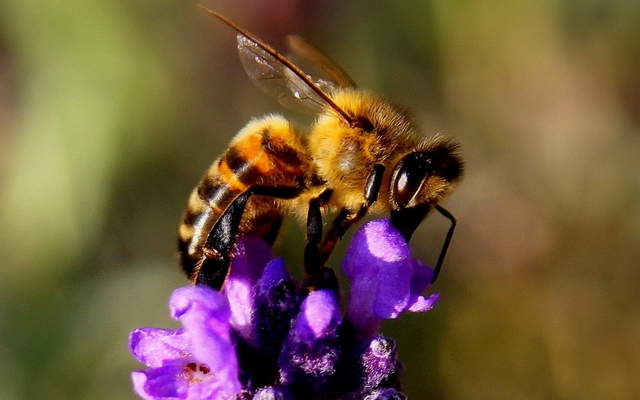
Those beautiful flowers of Comfrey will attract pollinators to your garden in early summer. Bees especially love the Comfrey flowers.


For Seedlings


When planting seedlings in the garden, add fresh cut-up Comfrey leaves to the planting hole. The leaves will break down and quickly add nutrients right at the root level.


In the Compost Pile


Comfrey leaves are known to be a compost activator. The addition of Comfrey in the compost pile will speed up the decomposition of other compost materials. The added nitrogen from the leaves will result in increased microbial decomposition. 


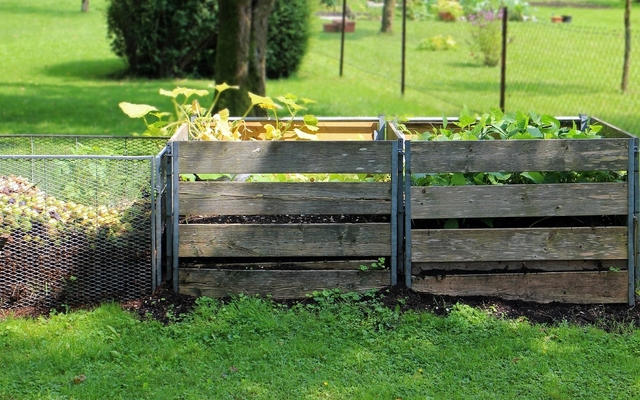
Plant some Comfrey near the compost area and add a leaf whenever adding to the pile.


Planting Comfrey


Plant Comfrey in cool areas in the spring; in warmer areas plant in the wet season. Comfrey grows well in nearly every soil, but it performs best when given extra moisture. Part sun to full sun will allow it to bloom well.


Using Comfrey Leaves


You can cut Comfrey leaves all throughout the growing season and the existing branches will quickly replace them with a fresh flush of foliage to use gain. Because Comfrey grows so fast, it is a great source of greens for your compost all season long and into the fall.


Harvesting Comfrey Leaves


Comfrey leaves are best harvested when they are cut before the plant blooms. It is advisable to wear gloves when harvesting the leaves as the hairs on the stems can irritate the skin. If your plant is new, don't harvest for the first year to let the roots get established.


For the first cutting of the leaves, do this when the plant is about two feet tall and cut the plant back to within a few inches of the crown. Just know that if you begin harvesting that early, you will not get flowers later that season.


Make More of a Good Thing!


Root Cuttings

Root cuttings of Comfrey are very easy to do. The best time for dividing Comfrey is in the spring, but it's a tough plant and you could divide it any time of the year. Cut pieces of the root 3-5” long and just lay it across a prepared garden site. Bury it 2-3” deep. Keep moist until the first leaves appear.


Crown Division

The crown of Comfrey can be divided into as many pieces as you care to make. Plant the separate clumps just below the soil surface and keep it most until the leaves appear.


~~~~~~~~~~

There are so many good reasons to grow Comfrey, and that is why it is becoming a staple in organic vegetable gardens.  Feed it to your chickens -- They will LOVE you for it!

~~~~~~~~~~

This post may contain some Amazon Associate links meaning that I will get a small compensation at no expense to you if you purchase an item.


Grow Collard Greens for your Chickens!


Grow Collard Greens for your Chickens!


Are you looking for a nutritious and cost-effective way to keep your chickens healthy and happy? Look no further than collard greens!


Feeding collard greens to chickens comes with a host of benefits that can significantly improve their health and product quality.

Growing Collard Greens


Growing Collard Greens


Do you want to improve your overall health and well-being? Are you looking for a simple and delicious way to boost your immune system and increase your energy levels? 


Look no further than the humble collard greens! These leafy greens are not only a staple in southern cooking, but they also pack a powerful nutritional punch. 

15 Common Reasons for Veggie Garden Failures


15 Reasons for Veggie Garden Failures


I personally don't believe there are people with “green thumbs.” Successful gardening of any type takes good planning and dedication to follow through. Your plants are like children; they need what they need when they need it and not when you have time to do it.  

Growing Herbs for Chickens -- Rosemary


Growing Rosemary for your Chickens!


Did you know that just a sprinkle of rosemary in your chickens' feed can make a significant impact on their health and productivity? Yes, you read that right. 


This fragrant herb isn't just for cooking anymore, it can also play a vital role in the well-being of your flock. In this article, we'll explore the benefits of feeding rosemary to chickens and discover why it's becoming a popular practice among chicken owners. From boosting immunity to improving egg quality, get ready to learn how this simple addition to their diet can make a big difference in your feathered friends' lives.

Growing Herbs for Chickens -- Dill


Do you know that by simply adding one herb to your backyard garden, you can vastly improve the health and productivity of your chickens? Yes, that's right - the small but mighty herb known as dill has been proven to have numerous benefits for our feathered friends.


In this article, we will dive into the world of dill and its powerful effects on chickens. From its nutritional value to its role in preventing common illnesses, we will explore all the reasons why growing dill for your chickens is a must. So grab your gardening gloves and get ready to learn how this simple herb can make a big impact on your flock's well-being.


Why Feed Dill to your Chickens?


Dill is a popular herb that is easy to grow and offers numerous health benefits to your chickens. It is rich in nutrients and has antimicrobial properties that can help prevent infections and promote digestive health. Plus, its unique flavor and aroma can add some variety to your chickens' diet and make their food more appealing.


Vitamins: Dill is rich in vitamins A, C, and K, all of which are important for maintaining healthy immune systems and promoting overall health in chickens.


Minerals: Dill is also a good source of several minerals, including calcium, iron, and manganese. These minerals are important for bone health, blood circulation, and the production of eggs.


Antioxidants: Dill contains several antioxidants, including polyphenols and flavonoids. These antioxidants can help protect chickens' cells from damage and promote overall health.


Essential Oils: Dill also contains essential oils, such as carvone and limonene, which can have antimicrobial properties that can help prevent infections in chickens.

Fiber: Dill is also a good source of dietary fiber, which can help promote digestive health in chickens and prevent digestive issues like constipation.

Overall, dill is a highly nutritious herb that can provide several health benefits to chickens. Incorporating dill into their diet can help promote overall health and well-being, and can be a great way to supplement their regular feed.


Growing Dill


Dill is a warm-season annual herb that has feathery leaves on fronds that add a pleasant anise-like flavor to kinds of seafood, soups, salads, and sauces. Its subtle taste complements fish and shellfish. In addition to providing aromatic seeds and foliage, Dill will brighten your garden with its yellow-green flowers in the spring and fall.


Types of Dill

Bouquet is the most popular Dill grown for its fragrance of leaves and seeds. Used for both pickling and cooking.


Taller Varieties include Mammoth and Long Island and may need to be staked.
Fernleaf Dill Weed (aka the Fish Dill) is popular for its use in fish.


Starting Dill from Seed

Seed Longevity:                                     3 years.
Seed Dowing Depth:                              ¼”.
Best Soil Temp for Germination:            60-70 degrees.
Days to Germination:                             7-10 days.
Spring Sowing:                                       Direct sow after last frost.

Sow Indoors - Not recommended; does not transplant easily.


Winter Sowing

If you haven't tried winter sowing, you're in for a treat.  This method is especially good for sowing herbs.  Winter sowing is basically sowing seeds in the bottom of clear milk jugs in the winter, setting the milk jugs outside for the winter and leaving them there until they germinate in the Spring.

For our article containing detailed information about Winter Sowing, click here.

To watch our 30 minute video on how to winter sow, click here.


Growing Dill

Plant size:                                          Generally grows 2-3’.
Growing Soil Temperature:                60– 70 degrees.
Spacing:                                             12-15”.
Container Size:                                  20 seeds per 18” pot.
Soil:                                                    Well-drained, moderately rich and loose.
Watering:                                            Loves moist soil.
Light/Sun:                                           Full sun  6-8 hours.
Fertilizer:                                            Light to none.
Good Companions:                            Cabbage, onions.
Bad Companions:                              Carrots.


Other Care Tips
                   

  • Shelter from strong winds.
  • It doesn’t transplant well.
  • Successive planting every 2-3 weeks for a continuous supply.
  • Attracts beneficial insects such as wasps and other predatory insects.
  • Attracts bees and butterflies.
  • Tall Dill plants may need staking.
  • Create a permanent Dill weed patch by allowing seeds to fall and self sow the next season.

Dill Cuttings

By placing Dill cuttings of 4-5” in length into water, the cuttings will grow roots in 3-4 weeks.

Harvesting Dill Leaves


As soon as the plant has 4-5 leaves, you can start to harvest.  Pick off remaining leaves just before the flowers open or let seeds develop for harvesting.   You can always pinch off leaves as needed.


Harvesting Dill Seeds

After the Dill plant flowers, allow the seed heads to dry on the plant.  Cut the entire seed head when seeds are a pale brown.  Thoroughly dry seeds and store in an airtight container.


Storing Dill

Fresh
Bouquet Storage

This method works well for tender herbs with soft stems and leaves.
Clean and thoroughly dry the Dill.  Trim the end of the stems and remove any wilted or browned leaves.  Place the Dill into a Mason jar or clear glass with 1" of water like a bouquet of flowers.  Loosely cover with a plastic bag or cling wrap.  Label and store in the fridge.

Dill will stay fresh in the fridge with this method for up to 3 weeks.

Freezing

For best results, use frozen Dill within 1-2 years.
By freezing herbs, you will lose some of the herb's texture but preserve the flavor.
Here are some suggestions for freezing Dill.

Tray Freeze

Spread the Dill onto a cookie sheet on a single layer. Freeze in the freezer, then transfer the herbs into a labeled freezer bag to store.  Since the leaves are frozen separately, you can easily remove the amount you need.


Ice Cube Trays

Clean and thoroughly dry the Dill.  Mince and firmly pack herbs into ice cube trays 3/4 full.  Add water to fill and freeze.  Transfer frozen cubes into a labeled freezer bag to store.


Flat Freezer Bag

Clean and thoroughly dry the Dill.  Chop herb into 1/2" pieces, place in a labeled freezer bag. Squeeze out the air, lay flat and freeze.


Drying

Dill does not dry well.


Using Dill

  • Brings a great tang to potato recipes.
  • A small amount can go a long way, so use sparingly at first.
  • Use in salads and salad dressings and of course to pickle cucumbers.
  • Delicious accent to eggs, cheese, vegetables, and fish.

~~~~~~~~~~~~~~~~~~~~~~~~~~~~~~~~~~~~~~~~~~~

In conclusion, growing dill for chickens is not just a simple task, but a beneficial one for both the chickens and the farmer. 

As we've learned, dill provides numerous health benefits for our feathered friends, and its pungent aroma can also repel pests and attract pollinators. But beyond that, it's a reminder that what we choose to grow and feed our animals can have a significant impact on their overall wellbeing. 

So, let's strive to be mindful and intentional in our farming practices, and remember that even a small herb like dill has the power to make a big difference. 


Growing your own herbs is fun, easy, more healthy than the herbs shipped to grocery stores, and what's best, saves you tons of money! Try it today.

~~~~~~~~~~~~~~~~~~~~~~~~~~~~~~~~~~~~~~~~~~~~


Back to Our
 Blog Homepage!

This post may contain some Amazon Associate links meaning that I will get a small compensation at no expense to you if you purchase something from this blog.


Growing Herbs for Chickens -- Cilantro!


Growing Herbs for Chickens -- Cilantro!


Chicken feed isn't cheep! Luckily, there are some ways that you can reduce your bagged chicken feed bill.


Do you want to provide your chickens with the freshest, most nutritious food possible? Look no further than your own backyard! 


Cilantro, a delicious and versatile herb, can be easily grown to feed your feathered friends. Not only will your chickens love the taste, but you'll also save money and have the satisfaction of knowing exactly what they're eating. 


In this article, we'll dive into the ins and outs of growing cilantro for your flock, from the benefits of this herb to useful tips and tricks. So grab your gardening gloves and get ready to learn put a dent in your chicken feed bill by growing herbs for them! 


Why Feed Cilantro to Chickens


Chickens LOVE eating cilantro. It's a great source of vitamins A, C, and K. This herb can strengthen a chicken's immune system and can help aid bone support. Cilantro is a great source of antioxidants, and the seeds have anti-parasitic properties.


The seeds also have anti-parasitic properties. Due to its remarkable ability to remove these pathogens from the digestive tract, cilantro is one of the best herbs to feed laying hens and baby chicks.


The best reason to feed Cilantro to your chickens? They love it. Chickens enjoy eating both the leaves and stems of cilantro.

Cilantro Basics


One of the world's most popular spices with a zesty, citrus flavor. It’s a fast-growing and easy-to-grow tender herb from the carrot family. Cilantro is the actual leaves of the plant, while Coriander refers to the two Cilantro seeds that are actually encased in the husk. Cilantro has a short life cycle and bolts quickly to produce its seeds in hot weather, so succession sowing of 2-3 weeks is recommended for a continued supply.


Starting Cilantro from Seed


Seed Longevity:                               Five years.

Seed Sowing Depth:                        1/4” to 1/2” deep.

Best Soil Temp for Germination:      55 – 65 degrees.

Days to Germination                        7-10.

Seed Spacing:                                 At 2-3” tall thin to 5” apart.


Spring Sowing

Start seeds indoors 2 weeks before the last frost date to plant out after the danger of frost has passed.


Direct Sowing

After the threat of frost has passed and every three weeks until Fall.


Fall Sowing

In warmer areas, direct sow in summer for a fall harvest.


milk jug as winter sown container with seeds

Winter Sowing

If you haven't tried winter sowing, you're in for a treat. This method is especially good for sowing herbs. Winter sowing is basically sowing seeds in the bottom of a milk jug in the winter, setting the milk jugs outside for the winter and leaving them there until the seeds germinate in the Spring.

For a detailed blog about Winter Sowing, click here.

To watch our 30 minute video on how to winter sow, click here.


Other Sowing Tips

  • Cilantro reseeds easily, so give it a place in your garden to do so. 
  • Cilantro will bolt quickly in hot weather.


Try Audible and Get Two Free Audiobooks


Growing Cilantro


Plant Size:                            Height 18-24"     Width to 18"

Soil Temperature:                 50 - 75 degrees.

Spacing in Beds:                  6-8"

Container Size:                    8-10" deep and 18" wide

Soil:                                     Well draining.

Watering:                            Dry soil causes the plant to bolt.

Light/Sun:                           For seeds, full sun. For leaves, light shade.

Fertilizer:                             Avoid fertilizer if growing for seed since that may actually delay 
                                           flowering.


Other Care Tips

  • For a continuous supply, make succession sowings every three weeks.
  • Snip off the top part of the main stem as soon as it develops flower buds or seed pods.


Harvesting Cilantro Leaves


Leaves can be cut at any time. Use the upper newly-cut leaves for cooking.


Harvesting Coriander Seeds


Harvest large seeds on a dry day. Cut off the top of stems when the seed pods begin to turn brown and crack if pressed. Place seed pods in a paper bag and let dry. Pods can be rolled around in between your fingers to release the seeds.


Storing Cilantro

Fresh
Bouquet Storage


This method works well for tender herbs with soft stems and leaves.

Clean and thoroughly dry the Cilantro. Trim the ends of the stems and remove any wilted or browned leaves. Place Cilantro in a Mason jar or clear glass with 1" of water like a bouquet of flowers. Loosely cover with a plastic bag or cling wrap. Label and store in the fridge.

Cilantro will stay fresh in the fridge with this method for up to 3 weeks.


Freezing


For best results, use frozen Cilantro within 1 to 2 years.  By freezing herbs, you will lose some of the herb's texture but preserve the flavor.

Here are some methods for freezing:


Tray Freeze

Spread the Cilantro onto a cookie sheet on a single layer. Freeze in the freezer, then transfer the herbs into a labeled freezer bag to store. Since the leaves are frozen separately, you can easily remove the amount you need.


Ice Cube Trays

Clean and thoroughly dry the Cilantro. Mince and firmly pack herbs into ice cube trays 3/4 full. Add water to fill and freeze. Transfer frozen cubes into a labeled freezer bag to store.


Flat Freezer Bag


Clean and thoroughly dry the Cilantro. Chop herbs into 1/2" pieces, place in a labeled freezer bag. Squeeze out the air, lay flat and freeze.


Drying

Cilantro does not dry well.


Using Cilantro

  • In omelets.
  • A staple in Latin and Asian cooking. The sweet stems are usually eaten raw.
  • Use fresh whenever possible.
  • Sprinkle raw Cilantro on salads or salsas.
  • The seeds are mildly spicy. Good for casseroles and baked goods.
  • Also adds a nice aroma to the kitchen!
~~~~~~~~~~~~~~~~~~~~~~~~~~~~~~~~~~~~~~~~~~~~~~~~~~~~~~~~~~~~~~~~

Growing your own herbs is fun, easy, more healthy than the herbs shipped to grocery stores, and what's best, saves you tons of money!  Try it today.

~~~~~~~~~~~~~~~~~~~~~~~~~~~~~~~~~~~~~~~~~~~~~~~~~~~~~~~~~~~~~~~~~~


Back to Our Blog Homepage!

This post may contain some Amazon Associate links meaning that I will get a small compensation at no expense to you if you purchase something from this blog.


Featured Post

Welcome!

Thanks to you, we've hit over 1.7 MILLION pageviews!   Homesteading is a journey, an adventure, and an ever-evolving quest to make our h...