How to Harden Off Seedlings
Getting your seedlings to a healthy state and ready for the great outdoors can be a challenge in itself.
They've been loved and pampered indoors, probably under fluorescent grow lights with pretty consistent temperatures. So there's no doubt that it can be a big shock for them when they are moved to the variable and sometimes harsh elements outside.
In order not to lose those precious seedlings to the weather, you need to harden the seedlings off.
“Hardening off “ is the process of SLOWLY changing the seedlings' environment so as not to send the seedlings into shock which can cause them to become weaker and susceptible to problems later, and may even kill them.
When to harden off seedlings?
Start the process of hardening off your seedlings a couple weeks before you anticipate planting the seedlings out into your garden. The timing of that depends on your location and the type of plant.
Generally, vegetables are categorized as hardy, half-hardy and tender. Here is a guideline to help you figure out your timing based on the zone you're in.
Hardy Vegetables
Recommended Minimum Growing Temperature is 40 degrees.
This category includes Broccoli, Brussel Sprouts, Kohlrabi, Cabbage, Onions, Leeks and Parsley.
Half-Hardy Vegetables
Recommended Minimum Growing Temperature is 45 to 50 degrees.
This category includes Celery, Chinese Cabbage, Lettuce, and Endive.
Tender Vegetables
Recommended Growing Minimum Temperatures as follows:
Squash, Pumpkins and Sweet Corn – 50 degrees.
Cucumbers and Muskmelons – 60 degrees.
Basil, Tomatoes, Peppers – 65 degrees
How to harden off seedlings
There are three important things to consider.
The sun
The most treacherous element for young seedlings is too much sun. The sun is much more powerful than any fluorescent light that the seedlings have been growing under, so limiting the seedlings' exposure to the sun's rays is of paramount importance.
The wind
As the stems of your homegrown seedlings may not yet be very sturdy, protection from strong winds is also important. Any sheltered area that will receive dappled sunlight is perfect to start with.
The temperature
A sudden shift in temperature, especially night-time temperatures, can be deadly to the seedlings at this stage.
Now for the Specifics
After 15 years of growing seedlings indoors successfully, here is my yearly process for hardening them off.
Two weeks before I want the seedlings to go into the ground, I will start to harden off my seedlings.
Note: Once the hardening off process begins, those seedlings need not go back under any fluorescent lights.
Week One
Days one, two and three.
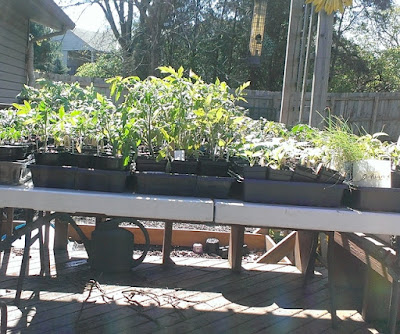
The seedlings go outside two to three hours each day in the dappled late morning sunlight. I use an inside corner of my deck and let the sunshine through the wooden slats.
The deck corner also shields the seedlings from any strong winds. After sunning, the seedlings go back in the house right inside the door for the rest of the day.
Days four, five, six and seven.
I expand the hours of dappled sun to four to five hours per day. After that, back into the house, they go. Their sunning time now reaches a bit into the afternoon.
Week Two
The seedlings are stronger now, so I move them onto a table on the deck for some full sun, starting with two to three hours a day and adding an hour a day through the week.
Instead of taking them into the house now after their trip in the direct sun, they go back to the corner with the dappled sun for the rest of the day. I keep an eye on them for any leaf wilting or sun-scald. The seedlings will tell you if they're not happy.
Weather permitting, they stay outside at night now but err on the side of safety. If in doubt, bring them back in for the night. I've been known to forget once or twice during the two-week period, and find that the seedlings are always stronger than I think they are. But why take the chance?
By the end of week two, they're pretty much outdoors day and night, and should be looking happy and healthy!
A few side notes
- Begin to cut down on the water now while the seedlings are hardening off, but don't let them wilt. You don't want to baby them too much.
- No fertilizer during the hardening off process.
Time to plant out
At this point, a light fertilizer is recommended to give the seedlings-turned-plants an extra boost. Water as needed, especially if they look a bit wilted. Do Not Overwater. This has killed more seedlings and plants than lack of water.
It is still important to keep an eye on the weather forecast, especially the night temps. If a late frost or cold threatens, a nighttime covering may still be necessary. A milk jug with the bottom cut off, staked into the ground with a thick stick can do the trick to warm the plant on a colder night. Keep an eye on the plants for any sun scald, and give them a bit of a shady respite if necessary.
A piece of cardboard folded in half and tented over the plant can shield the plant from too much sun. In the event something heavier is needed, sturdy sticks around the plant can hold up a thicker blanket for the night.
That's it!
~~~~~~~~~~
Hardening off seedlings can be rather labor intensive, but it's only for a few weeks, and I find it's a small price to pay for healthy, productive veggies through the season!
~~~~~~~~~~

Have You Tried Winter Sowing??
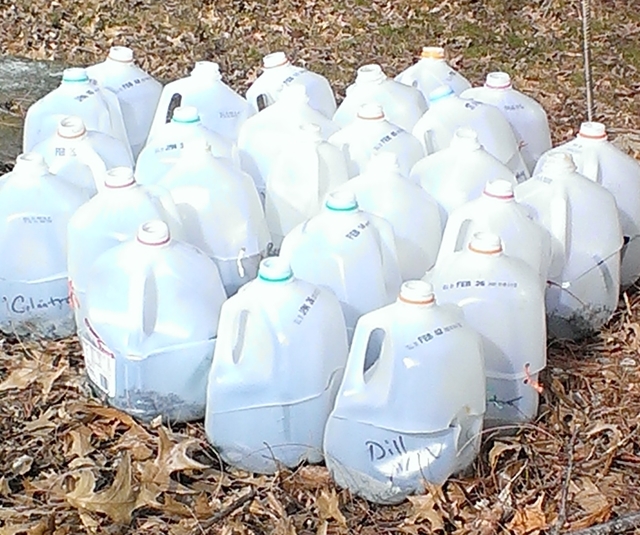
If you haven't tried winter sowing, you're in for a treat. This method is especially good for sowing herbs. Winter sowing is basically sowing seeds in the bottom of milk jugs in the winter, setting the milk jugs outside for the winter and leaving them there until the seeds germinate in the Spring.
For our article containing detailed information about Winter Sowing, click here.
To watch our 30 minute video on how to winter sow, click here.
This post may contain Amazon affiliate links and as an Amazon Associate I earn from qualifying purchases without costing you anything extra.


No comments:
Post a Comment
Note: Only a member of this blog may post a comment.